Wednesday, May 29, 2013

Cranberry Oatmeal Muffins

     No matter how fun it can be to bake delicate fruit tarts and sky-high layer cakes, sometimes I just need some classic, less indulgent breakfast. A few weeks ago, when I was studying all weekend, everything became magically, a million times more interesting than history. Suddenly, when faced with a stack of notes and review books, oatmeal muffins seemed like the perfect study break.
      I decided to throw in a little twist with some dried cranberries, but other than that these muffins are super simple. You could throw in any add-ins you want, but don't get crazy - these are meant to be simple. They are full of oatmeal and have less sugar and fat than most muffins, making them okay for an everyday breakfast.
     Maybe I shouldn't have started with the healthy description, because that tends to make bakers disappear - but bear with me. These are hearty, yes, but in the best way possible. They are moist, sprinkled with dried cranberries throughout, and they are absolutely delicious! Especially with a bit of jelly (or nutella, but let's keep it healthier here). This recipe is definitely a keeper in my kitchen.
     Enjoy!
Cranberry Oatmeal Muffins

2 cups rolled oats (not quick-cooking oats)
1 1/2 cups milk
1 1/2 cups all-purpose flour
1 tablespoon baking powder
1/2 teaspoon salt
1/2 teaspoon cinnamon
2 eggs, lightly beaten
1/2 cup firmly packed light brown sugar
1/2 cup (1 stick) unsalted butter, melted and cooled slightly
1 teaspoon vanilla extract
2/3 cup dried cranberries

Preheat oven to 400 degrees F.
Grease well a 12-cup muffin tin, or line with paper liners.
In a medium-size bowl, mix the oats and the milk and set aside for 10 minutes.
Meanwhile, in a large bowl, mix together the dry ingredients, making a well in the center. Stir in the liquid ingredients and the oatmeal mixture until just combined, being careful not to overmix. Batter may be lumpy.
Fill the muffin cups about 3/4 full. Bake for 16-18 minutes until lightly golden or a cake tester inserted into center of muffin comes out with moist crumbs attached. Don't overbake.
    -makes 12 muffins

Thursday, May 23, 2013

A Millenium Falcon Birthday

     I don't talk about it too much, but I do get orders for various baked goods every now and then. Lately it's been happening more often, which is exciting, both for me and for my obsession with clothing and high heels! And my ever-growing collection of cook books ;)
     A few weeks ago, my mom's friend emailed me about a cake for her son's party. He was turning four and had decided that he really wanted a cake shaped like the millenium falcon from star wars. I said of course I would make it, and although it was supposed to be ready two days after my AP exam, I figured those two days would give me plenty of time.
    And then I looked up a picture of the millenium falcon.
     When I heard the name, it rang a bell - this was that rocket thing from Star... something... right? I had no idea this was what it looked like, and when I realized I had just agreed to make a cake that looked like it, I may or may not have squealed and looked at my friend in shock in the middle of a history study session.
      I knew I couldn't make anything like what some of these crazy cake bakeries make - besides not having the skill, even with all the practice in the world I wouldn't have the equipment necessary at my house. I decided to go with a simple, slightly cartoon-ized version of the ship, and (after checking that this was OK with the boy's mom!) got started as soon as my AP was over!
     It ended up going pretty smoothly - the round part was made of two 9" cake layers, and I baked up two 9x13" layers and carved them to make the wing things and little bumps on top (what are these? somebody who knows Star Wars, help me?). It was a chocolate cake filled with a layer of delicious dulce de leche buttercream filling.
     Start to finish, this took about four hours (and probably would have taken less time had I been more awake, seeing as how I started at 11 pm). If you want proof, just check out my 3 a.m. Instagram cake shots ;)
     I was so happy to have had my first ever sculpted (if you can call this sculpted) cake come out as planned. I hear the birthday boy loved it! Although, let's be real, when I was four, I would have much rather have had a princess barbie cake... as much as they scare me now.
all packed up, along with a hundred brigadeiros
Happy birthday Liam!!

Monday, May 20, 2013

Lemon-Scented Cinnamon Buns

     I'm back!! My AP test is over, and I'm beyond excited to have my lazy weekend mornings and fun weekday afternoons back, with lots of room for baking!
     This recipe was actually made a couple of weeks ago, during one of my study breaks. Somehow studying seemed that much more pleasant when I could smell baking cinnamon buns in my oven...
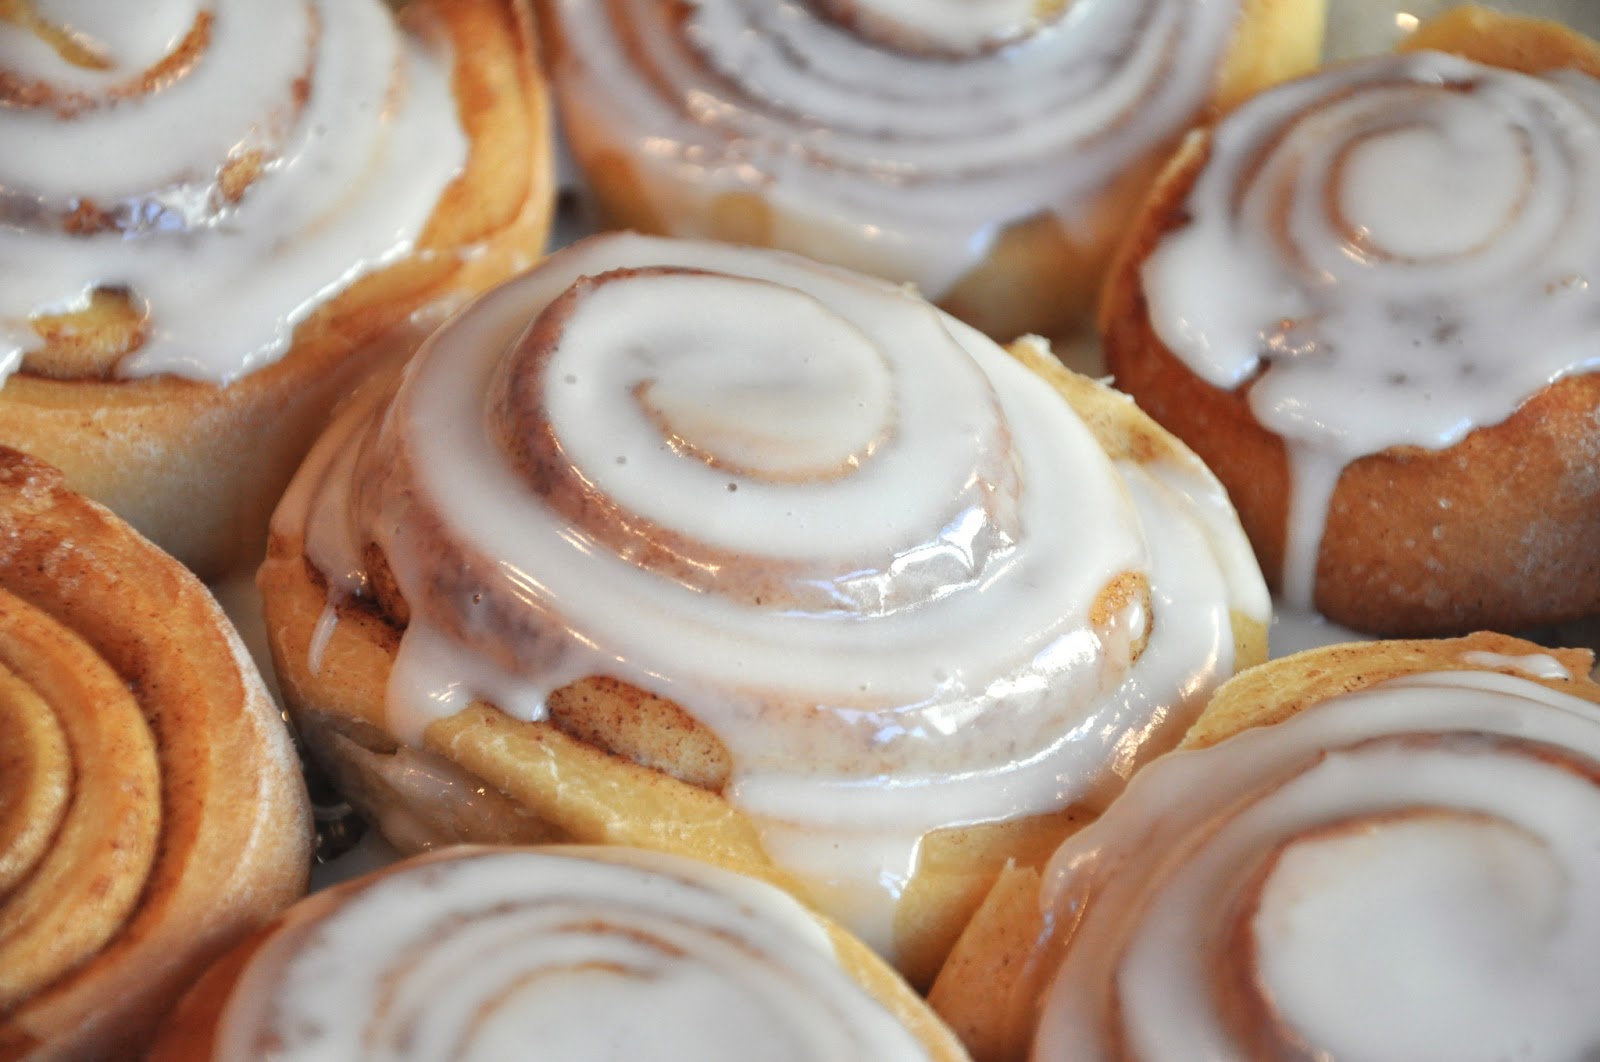
It's so fluffy I'm gonna die! ("Up" reference? Anyone? No?...)
     These aren't quite the typical extra-large, sugar-coma-inducing cinnamon buns you might get at the mall food court (or at Ikea, as I learned yesterday...). These are fluffy, but they aren't super tall or extra sweet, largely due to the lemon zest and extract, which cut through the sweetness a little bit.
     In my opinion, cinnamon buns are the classic American weekend breakfast (with the possible exception of pancakes). I bought the book the recipe is from on a whim, when I suddenly became interested in baking bread. While lots of the recipes look pretty intimidating, I decided to start with something I had attempted before, and it ended up working out really well. I made the mistake of using active dry instead of instant yeast, so perhaps they didn't rise as much as they were supposed to, but I thought they were just the right size (and they didn't lose any fluffiness).
look at those sugar crystals...
    These are the perfect treat for a lazy weekend morning. Be warned, this recipe makes quite a large number of cinnamon rolls when you and your dad are the only ones eating them - I ended up sharing most of them with a friend at school, who wasn't too upset over having plastic containers full of pastries handed to her during English class. Two days in a row. ;)
    Enjoy!
Lemon-Scented Cinnamon Buns
(slightly adapted from The Bread Baker's Apprentice)

-6 1/2 tablespoons (3.25 oz) granulated sugar
-1 teaspoon (.25 oz) salt
-5 1/2 tablespoons (2.75 oz) shortening or unsalted butter or margarine, at room temperature
-1 large (1.65 oz) egg, slightly beaten
-1 teaspoon (.17 oz) lemon extract, or 1 teaspoon (.1 oz) grated lemon zest
-3 1/2 cups (16 oz) unbleached bread or all-purpose flour
-2 teaspoons (.22 oz) instant yeast
-1 1/8 to 1 1/4 cups (9-10 oz) whole milk or buttermilk, at room temperature, or 3 tablespoons (1 oz) powdered milk (DMS) and 1 cup (8 oz) water
-1/2 cup (4 oz) cinnamon sugar (6 1/2 tablespoons granulated sugar plus 1 1/2 tablespoons ground cinnamon)
-White Fondant Glaze (see recipe below)

1. Cream together the sugar, salt, and shortening on medium-high speed in an electric mixer with a paddle attachment (or use a large metal spoon and mixing bowl and do it by hand); if you are using powdered milk, cream the milk with the sugar, but add the water with the flour and yeast.
Whip in the egg and lemon extract until smooth. then add the flour, yeast, and milk. Mix on low speed (or stir by hand) until the dough forms a ball. Switch to the dough hook and increase the speed to medium, mixing for approximately 10 minutes (or knead by hand for 12-15 minutes), or until the dough is silky and supple, tacky but not sticky. You may have to add a little flour or water while mixing to achieve this texture. The dough should pass the windowpane test and register 77-81 degrees F.
Lightly oil a large bowl and transfer the dough to the bowl, rolling it around to coat it with oil. Cover the bowl with plastic wrap.
2. Ferment at room temperature for approximately 2 hours, or until the dough doubles in size.
3. Mist the counter with spray oil and transfer the dough to the counter. Shape the buns:
     -Roll out the dough with a rolling pin, lightly dusting the top of the dough with flour to keep it from sticking to the pin. Roll it into a rectangle about 2/3" inch thick and 14" wide by 12" long for larger buns, or 18" wide by 9" long for smaller buns. Don't roll out the dough too thin, or the finished buns will be tough and chewy rather than soft and plump.
      -Sprinkle the cinnamon sugar over the surface of the dough.
      -Roll the dough up into a cigar-shaped log, creating a cinnamon-sugar spiral as you roll. With the seam side down, cut the dough into 8-12 even pieces about 1 3/4" thick for larger buns; or 12-16 pieces each 1 1/4" thick for smaller buns.
4. Line 1 or more sheet pans with baking parchment. Place the buns approximately 1/2" apart so that they aren't touching but are close to one another.
5. Proof at room temperature for 75-90 minutes, or until the pieces have grown into one another and have nearly doubled in size. You may also retard the shaped buns in the refrigerator for up to 2 days, pulling the pans out of the refrigerator 3-4 hours before baking to allow the dough to proof.
6. Preheat the oven to 350 degrees F with the oven rack on the middle shelf.
7. Bake the cinnamon buns for 20-30 minutes, or until golden brown.
8. Cool the buns in the pan for about 10 minutes and then streak white fondant glaze across the tops while the buns are warm but not too hot. Remove the buns from the pans and place them on a cooling rack. Wait at least 20 minutes before serving.

White Fondant Glaze
Sift 4 cups of powdered sugar into a bowl. Add 1 teaspoon of lemon extract and 6 tablespoons-1/2 cup warm milk, briskly whisking until all the sugar is dissolved. Add the milk slowly and only as much as is needed to make a thick, smooth paste.
When the buns have cooled but are still warm, streak the glaze over them by dipping the tines of a fork or a whisk into the glaze and waving the fork or whisk over the tops. Or, form the streaks by dipping your fingers in the glaze and letting it drip off as you wave them over the tops of the buns. (Remember to wear latex gloves.)

Tuesday, May 7, 2013

Banana Nutella Bars (Teenage Cakeland Guest Post!)

     AP Global has taken over my life for a bit - for the next 9 days, actually, because I cannot WAIT for this to be over - until the AP test, after which I'll have plenty of time for baking lots of sweet treats to entertain you with! Actually, I have big baking plans for next Friday - and I say big both in size and degree of awesome (Star Wars fans, get super excited!).
    In the meanwhile, thanks SO much to Dru of Teenage Cakeland for offering to guest post while I'm studying (she was lucky enough to finish her AP last week!). I was sold the minute I saw the word Nutella.
    Enjoy!
 Hello, readers of Sophia's Sweets! I'm Dru from Teenage Cakeland. Recently, Sophia did a guest post for me (these delicious S'more Brownies!) while I was in a studying craze , so when she said she needed some help while preparing for her own APs, I was more than happy to return the favor!
I'm sure Sophia will agree that we teenagers are under a lot of stress, a lot of the time. We all need an escape from the intensity of real life. When I bake, it's all I need to think about. I can enjoy myself and the things that I can create. There's no pressure, because it's what I love.
Want to know what else I love? Nutella. And I don't think I'm alone here. Banana Nutella Bars are the only recipe all my friends request for their birthdays, for holidays, and every time I ask them for ideas on what to bake. The moistness of the bananas and the creamy marbled Nutella create a gooey, melt-in-your-mouth bar with a heavenly flavor. They're everyone's favorite- and soon, yours, too!
 Banana Nutella Bars 
                                                     (adapted from Healthfull Ever After)

                                                                 2 bananas, mashed
                                        1/3 cup blended cottage cheese (or an extra banana)
                                                                3/4 cup white sugar
                                                                      1 tsp vanilla
                                            1/3 cup Greek yogurt (I use vanilla Chobani)
                                                                  1/4 cup applesauce
                                                                             2 eggs
                                                                         1 pinch salt
                                                                      1/2 tsp cinnamon
                                                                     1 tsp baking soda
                                                                         1 cup flour
                                                            3/4 cup whole wheat flour
                                                                     1/2 cup Nutella

Preheat oven to 350 degrees F. Line a 9x13 inch pan with parchment paper and grease with cooking spray.
In a stand mixer, mix mashed bananas with sugar, vanilla, yogurt, applesauce, and eggs until well blended.
In a medium bowl, sift together salt, cinnamon, baking soda, and flours.
Add the flour mixture to the wet ingredients and mix on low until just combined.
Pour half the batter into the prepared pan. In a glass measuring cup, heat the Nutella about 30 seconds, or until just pourable. Pour half the Nutella over the batter in a zig zag design and swirl with a knife to marble.
Top with the rest of the batter and repeat marbling with the second half of the heated Nutella. The marbling design will look similar to this:
 Bake for 28-30 minutes, until the top is firm and golden. Cool completely before cutting.

Sunday, May 5, 2013

Meringue-Topped Chocolate Cream Torte

      This last week has been absolutely insane at school, and I'm getting ready for another crazy week and a half. Everybody is cramming for AP tests coming soon, and mine (AP global history) is on the 16th - until then, I'm pretty much confined to my couch and my books. Since I know you are most likely in a nicer situation, I wanted to take a minute to share this great recipe with you, which I made a few weeks ago for a big family gathering when I was in Brazil.
     It's always interesting for me to bake in Brazil because while many are the same, some ingredients are just slightly different in a way that will have a big impact on a recipe. This year, when trying to make a chocolate cream pie, I discovered that heavy cream (which is hard to find fresh in Brazil, so we buy it canned) there has a slightly larger ratio of water to fat, and therefore has to be strained before being made into whipped cream. Left with a bowl of un-whipped cream and some egg whites, I resorted to a thin layer of meringue with a little cream folded in to make it a little less airy (I'm all for airiness, but trust me, here, this works better). The result? Everybody LOVED it.
    This isn't a traditional chocolate cream pie, but it sure is delicious. The crispy crust, creamy filling and light topping go perfectly together. This torte disappeared, no joke, within five minutes.
    Enjoy!
Meringue-Topped Chocolate Cream Torte
(filling adapted from King Arthur Flour)

2 cups crushed butter cookies or shortbread
a pinch of salt
8 tablespoons (1/2 cup) melted butter

2 tablespoons unsalted butter
1 1/3 cups semisweet chocolate, chopped
1 teaspoon vanilla extract 
2/3 cup granulated sugar
3 tablespoons cornstarch
2 tablespoons unsweetened cocoa powder
1/8 teaspoon salt
3 large egg yolks
1 cup heavy cream, divided
2 cups milk
2 egg whites
6 teaspoons sugar
3 tablespoons heavy cream, lightly whipped

Preheat oven to 350 degrees F. Stir together the cookies, salt, and melted butter. Press into a 10" springform pan. Bake until lightly browned around the edges. Let cool.

Place the chopped chocolate, butter, and vanilla extract in a 2-quart mixing bowl; set aside.
In a medium saucepan away from heat, whisk together the sugar, cornstarch, cocoa and salt. Whisk in 1/4 cup of cold heavy cream until the mixture is smooth, with no lumps. Repeat with another 1/4 cup of the cream. Whisk in the egg yolks
Place the saucepan over medium heat, and gradually whisk in the remaining cream and milk.
Bring to a boil, whisking constantly as the mixture thickens; boil for 1 minute
Remove the pan from the heat and pour the mixture over the reserved chocolate and butter.
Whisk until the chocolate is melted and the mixture is smooth.
Pass the filling through a strainer into a bowl to remove any lumps.
Place plastic wrap or buttered parchment paper on the surface to prevent a skin from forming, and chill thoroughly.

Heat your broiler to high.
Once the cream and crust are cooled, spread the cream in the crust. 
In a cool metal bowl, beat together the egg whites and the sugar until they form stiff peaks. Fold in the lightly whipped heavy cream. Spread the mixture over the chocolate cream.
Broil the torte just until the meringue is lightly browned. Careful - it will burn quickly (and melt your filling).
Refrigerate until serving.