Tuesday, December 10, 2013

Norwegian Cinnamon Buns


 As you've probably noticed, I have a bit of a thing for cinnamon rolls. They can be everything from soft and fluffy to ooey-gooey with melted butter and sugar, and are easily adaptable to endless variations, from flavors to textures to frostings and more. And now I feel like I'm writing an infomercial, so let's move on...
These cinnamon buns in particular are totally different from any others I've made. The dough is rolled really thin, making for many, many flaky layers. The filling, instead of being just melted butter and a little cinnamon sugar, is creamed together, which lets the buttery flavor sink in to the dough while also keeping the rolls moist and gooey. 
 They are almost more of a "morning bun," Starbucks-style. They don't have any frosting, but they really don't ask for it at all - the sugar and egg wash caramelize and create a crisp, flavorful topping.
These won't be winning any beauty pageants, but I think the layers all swirling together makes for a charming little pastry that's perfect for Christmas breakfast.
Enjoy!
Norwegian Cinnamon Buns

for the dough:
600 g flour
100 g sugar
1/2 teaspoon salt
21 g (yep, 3 packets) of active dry yeast, or 45 g fresh yeast
100 g unsalted butter
400 ml milk
2 eggs

for the filling:
150 g unsalted butter, at room temperature
150 g sugar
2 teaspoons cinnamon
1 egg, lightly beaten, to glaze

Line a 9" square baking pan with parchment paper.
Combine the flour, sugar, salt and yeast in a large bowl. Melt the butter and whisk it into the milk and eggs, then stir into the flour mixture. Mix to combine and then knead the dough either by hand or using the dough hook of a stand mixer until it's smooth and springy. The dough will start out very soft; add extra flour, a little at a time, just until it's workable. Form into a ball, place in an oiled bowl, cover with plastic wrap and leave to rise for about 25 minutes.
Take 1/3 of the dough and roll or stretch it to fit pan; this will form the bottom of each bun after baking. Roll out the rest of the dough on a lightly floured surface, aiming for a rectangle of roughly 50 x 25 cm.
Mix the filling ingredients in a small bowl and then spread the rectangle with the buttery cinnamon mixture. Try to get even coverage on the whole of the dough. Roll it up from the longest side until you have large log; as you roll, stretch the dough out a bit, in order to get thin layers. Cut the roll into about 20 rounds. Sit the rounds in rows on top of the dough in the tin, swirly side up. Don't worry if they don't fit together snugly, as they will rise. Brush them with egg and then let rise again for about 15 minutes, or until puffy. Meanwhile, preheat oven to 230 C / 425 F.
Bake for 20-25 minutes, or until buns are risen and golden-brown in color. Don't worry if they aren't perfectly swirled or round - this will only add to the rustic charm! ;)
Use parchment to lift buns from pan, and leave to cool slightly on a cooling rack. Tear them apart and enjoy, preferably while still warm.

Saturday, November 23, 2013

Toffee-Topped Pumpkin Blondies

 I'm sorry if you're getting sick of all the pumpkin recipes on here. I promise it'll only last until next week (Thanksgiving, which in my opinion marks the official start of Christmas cookie season!). The last couple of months of the year are always insane, with tests, concerts, holiday parties, and of course, lots of delicious food. On Thursday, I took an hour out to just bake whatever I wanted to, and this was what I came up with.
These blondies are a combination of everything good. Pumpkin puree and pumpkin pie spice make them reminiscent of my favorite Starbucks drink, and the addition of chocolate makes anything better. The toffee bits sprinkled over the top give them a delicious crunchy layer that makes them irresistible. I snuck some into school for friends, and they were far gone by the end of the day.
Enjoy!
Toffee-Topped Pumpkin Blondies
(heavily adapted from The Domestic Rebel)

2/3 cup butter
2 cups brown sugar
2 tsp vanilla extract
1/2 cup unsweetened pumpkin puree
2 1/2 cups all-purpose flour
1 tsp baking powder
1/4 tsp baking soda
1/4 tsp salt
1 tsp pumpkin pie spice
1 cup semisweet chocolate chips
1 cup toffee baking bits

Preheat oven to 350 degrees F. Grease an 8×8″ baking pan; set aside.
In a medium saucepan, melt the butter and brown sugar together. Allow to cool for about 5 minutes. Stir in the vanilla and pumpkin puree. Add the flour, baking powder, baking soda, pumpkin pie spice and salt and stir until a dough has formed (it may seem thick for blondie dough; no worries). Stir in the chocolate chips. If the dough is still warm, they may start to melt - that's perfectly okay, a little chocolate swirl never hurt anybody!
Spread the mixture into your prepared pan. Sprinkle the top evenly with the toffee bits. Bake for about 30 minutes, or until a toothpick inserted near the center comes out mostly clean. Cool completely before cutting into squares. (Although they will smell incredible warm out of the oven, don't try to cut them until they're cooled - trust me!)

Thursday, November 14, 2013

Traditional Financiers


 Financiers are my new favorite thing. Ever. I bet you're dying to know why, so here's a list (partly because I like lists, but also partly because my SAT-practice-test-brain can't handle much more than that right now).
1. They are chewy with crisp edges, which is always lovely.
2. They have a wonderfully nutty flavor from the almonds and browned butter in them.
3. They are just about the most perfect snack to have with a cup of tea or coffee.
4. They are the namesake of one of my favorite bakeries
5. They gave me an excuse to use one of my new baking molds I bought in France this summer (because let's be honest here, what isn't better when it comes from France?).
6. They are insanely easy to make.
I baked the extra batter in tiny tart pans for an even more bite-sized treat
 I totally wasn't kidding about #6. The batter for these comes together in the time it takes to preheat the oven, and you can have a perfect snack, dessert, or breakfast (because I won't judge you) in under half an hour. When isn't that a good thing?
 These are also perfect for tons of different variations. Sick of making almond-flour-everything? Substitute ground pistachios (plus you'll get a lovely light green color). Want something fruity? Thrown in some berries. Something richer? Chocolate chips would be delicious. Anyway you make them, they're quick, easy, and will be gone in less time than it took to throw them together.
  Enjoy!
 Traditional Financiers 

1/2 cup + 1-1/2 T. (120 g) sugar
1/4 cup + 1 T. (40 g) unbleached all purpose flour
1/2 cup + 2 t. (60 g) almond meal
100 g egg whites (from about 3 large eggs)
1/2 cup (100 g) unsalted butter, browned (still hot)

Preheat oven to 425F degrees, and butter 12 financier molds, roughly 1-1/4" x 2-1/4". (My tin only makes 7 financiers - if yours is like this, either set aside batter and wait to use the tin again or bake in a mini muffin tin or mini tart pans.) Refrigerate buttered tin.
Sift together sugar, flour and almond meal into a medium bowl.
Create a well in the center of the dry ingredients and add in egg whites; whisk together by hand until ingredients have been combined.
While still hot, slowly pour browned butter into batter, simultaneously whisking the batter until combined.
Evenly distribute batter among molds or mini-muffin tin wells, leaving about 1/8" of space from the rim.
Lower oven temperature to 350F degrees, and bake on the center rake for about 20 minutes or until golden brown and a tester inserted in the center comes out clean. Cool unmolded financiers on a wire rack.

Monday, November 4, 2013

Nutella-Swirled Pumpkin Bread

When it comes to fall, pumpkin bread is one of those things that never gets old. As food bloggers, it's our job to come up with a million and one variations on classics, and in my opinion, Nutella makes just about everything exponentially better. When I saw a Nutella-infused pumpkin bread, I figured, why not?
This cake is tender and moist, and the pumpkin flavor isn't too strong. There's a huge amount of Nutella in here, but that's what makes it so delicious and gooey. It's a new fall classic, if that's possible. 
Whenever I bake anything that isn't super messy, I bring some of it into school to share with a friend or two. Last week, I had a few friends complain that they never got sugary goodie bags - needy people! ;) - so this was their reward for waiting so long. I think it was worth it.
Enjoy!

Nutella-Swirled Pumpkin Bread

1 3/4 cups all purpose flour
1 teaspoon baking soda
1/2 teaspoon salt
1/2 tablespoon cinnamon
1 1/2 teaspoons nutmeg
1 1/2 cups sugar
1/2 cup canola oil
1/3 cup water
1 cup unsweetened canned pumpkin
2 eggs
1 teaspoon vanilla extract
roughly 1/2 cup Nutella (or other chocolate hazelnut spread)

Preheat the oven to 350 degrees F. Spray 4 mini loaf pans with cooking spray. Set aside.
In a medium bowl, whisk together flour, baking soda, salt, cinnamon, and nutmeg. Set aside.
In a large bowl, whisk together sugar, oil, water, pumpkin, eggs, and extracts. Whisk until smooth and combined.
Slowly stir in the flour mixture. Mix until ingredients are combined.
Pour the batter into the mini loaf pans, making sure batter is evenly divided. Drop 2 heaping tablespoons of Nutella onto each loaf pan. Swirl the Nutella into the pumpkin batter with a knife. Place the loaf pans onto a baking sheet and place in the oven. Bake for 40-45 minutes or until a toothpick comes out clean.
Place the loaf pans on a wire rack. Cool for 15 minutes in the pan and then carefully remove the loaves. Cool completely before slicing.

*Note-You can make regular size loaves. This recipe should make 2 8×4 loaves. Adjust baking time to about 60 minutes. 

Wednesday, October 23, 2013

Classic Red Velvet Cupcakes with Cream Cheese Frosting

 Being interested in a career in the culinary world, it's often easy to get caught up in all of the new, inventive flavor combinations and techniques. My favorite thing to do is add my own twists to classics, but this week I was reminded that sometimes it's important to go back to basics!
 I got an "emergency" phone call one night last week, from a friend of my cousin's, who needed a last-minute box of goodies for her boyfriend (a certain unnamed cookie company messed up her bouquet order delivery date). With the liberty to fill a box with whatever I thought he would like, plus the excitement of an early-morning delivery of a box of sugar to the gym where he works, how could I say no?
I made my choices pretty quickly - this guy likes chocolate, so brownies (salted, of course!) were a given; and who doesn't like peanut butter? Cookies it was. I wanted something additional that screamed "birthday," so I decided to go with a classic, rainbow-sprinkled red velvet cupcake. Until I realized I didn't have a go-to recipe!
  I went back to a few different recipes I've used as a basis for variations in the past (did you know red velvet cake and orange marmalade are a match made in heaven?!), and was able to find a great one I hadn't made in years. It's my favorite, and I think it's a wonderful go-to.
 The cupcake is tender, fluffy, and not too sweet. The frosting provides a great sweet touch, and is the perfect consistency for spreading or piping simply (if you want to get crazy with the decoration, just add in a little extra sugar to get a thicker mixture). So, emergency missing recipe crisis averted - on to the next twist!
  Enjoy!
All packed and ready for delivery!
Classic Red Velvet Cupcakes with Cream Cheese Frosting
(from Food Network)

Cupcakes
2 1/2 cups all-purpose flour
1 1/2 cups sugar
1 teaspoon baking soda
1 teaspoon salt
1 teaspoon cocoa powder
1 1/2 cups vegetable oil
1 cup buttermilk, room temperature
2 large eggs, room temperature
2 tablespoons red food coloring
1 teaspoon white distilled vinegar
1 teaspoon vanilla extract

Preheat the oven to 350 degrees F. Line 2 (12-cup) muffin pans with cupcake papers.
In a medium mixing bowl, sift together the flour, sugar, baking soda, salt, and cocoa powder. In a large bowl gently beat together the oil, buttermilk, eggs, food coloring, vinegar, and vanilla with a handheld electric mixer. Add the sifted dry ingredients to the wet and mix until smooth and thoroughly combined.
Divide the batter evenly among the cupcake tins about 2/3 filled. Bake in oven for about 20 to 22 minutes, turning the pans once, half way through. Test the cupcakes with a toothpick for doneness. Remove from oven and cool completely before frosting.

Cream Cheese Frosting
                                                        1 pound cream cheese, softened
                                                              2 sticks butter, softened
                                                             1 teaspoon vanilla extract
                                                          4 cups sifted confectioners' sugar

In a large mixing bowl, beat the cream cheese, butter and vanilla together until smooth. Add the sugar and on low speed, beat until incorporated. Increase the speed to high and mix until very light and fluffy.
Spread or pipe onto cooled cupcakes. Decorate as desired.

Sunday, October 20, 2013

Pumpkin Cinnamon Rolls

If your Pinterest feed is anything like mine, you're probably being bombarded by pumpkin-scented, spice-filled, warm-out-of-the-oven everything. You might be looking forward to gingerbread or even next spring's fresh fruit by now, but if you're like me, you're excited to take any opportunity to bake up something that's even slightly reminiscent of a pumpkin spice latte (because let's be honest, those are the greatest drink in the world, and nobody should even consider having coffee in any other way, ever).

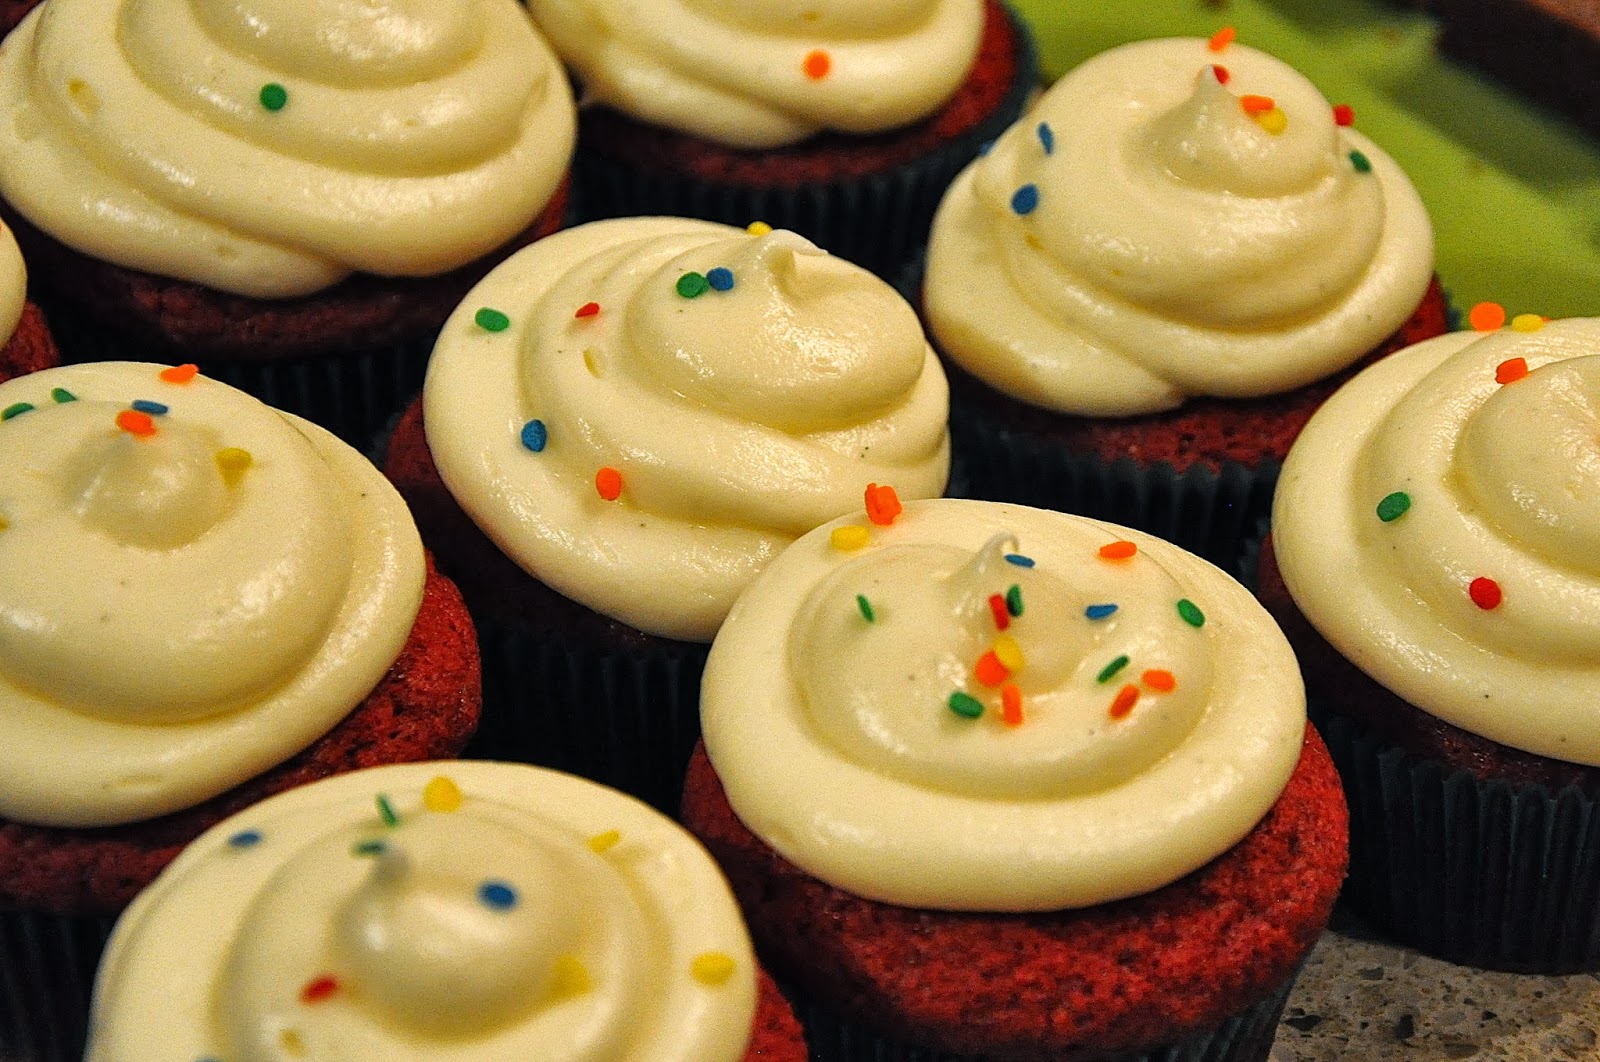
In my opinion, these rolls (or buns.. what's the difference between cinnamon rolls and cinnamon buns?) bring together the best of fall baking. They're incredibly light and fluffy, and the dough has a light pumpkin flavor. (The pumpkin in the dough does make it hard to roll out due to how soft it is, but get through it and you will be rewarded.) The generous amount of cinnamon sugar swirled in brings in the perfect amount of sweetness and spice, and the cream cheese frosting provides a nice contrast to the sweetness of the swirl.
It all comes together into one pillowy, warm, indulgent breakfast/lunch/dinner/dessert/snack/anytime food, and I promise one bite of these will make you excited to pull on a sweater and curl up by a fireplace. My friend declared them the best thing I've ever baked, and I just might have to agree with her.
Enjoy!
Pumpkin Cinnamon Rolls

Dough
6 tablespoons (85 grams) unsalted butter, to be divided
1/2 cup (120 ml) whole milk, warmed (but not over 116 degrees)
2 1/4 teaspoons active dry yeast (from 1 .25-ounce or 7 gram envelope yeast)
3 1/2 cups (440 grams) all-purpose flour, plus extra for rolling out
1/4 cup (packed) (50 grams) light or dark brown sugar
1/4 cup (50 grams) granulated sugar
1 teaspoon (6 grams) table salt
1/2 teaspoon ground cinnamon
1/4 teaspoon freshly grated nutmeg
1/8 teaspoon ground cardamom (optional)
1/4 teaspoon ground ginger
2/3 cups (160 grams) pumpkin puree, canned or homemade
1 large egg
Oil for coating rising bowl
Filling
3/4 cup (packed, 145 grams) light or dark brown sugar
1/4 cup (50 grams) granulated sugar
1/8 teaspoon table salt
2 teaspoons (5 grams) ground cinnamon
Glaze
4 ounces (115 grams) cream cheese, softened
2 tablespoons (30 ml) milk or buttermilk
2 cups (240 grams) powdered sugar, sifted
1 teaspoon vanilla extract

Make your dough: Melt your butter and set aside to cool slightly.
Combine your warmed milk and yeast in a small bowl and set aside. After five to seven minutes, it should be a bit foamy. If it’s not, you might have some bad yeast and should start again with a newer packet.
In the bottom of the bowl of an electric mixer combine flour, sugars, salt and spices. Add just 1/4 cup (or two-thirds of; leave the rest for assembly) of your melted/browned butter and stir to combine. Add yeast-milk mixture, pumpkin and egg and mix combined. Switch mixer to a dough hook and run it for 5 minutes on low.
Scrape mixture into a large oiled bowl and cover with plastic wrap. Set aside for 1 hour in a draft-free place; it should just about double.
While it is rising, line the bottom of two 9-inch round cake pans (8-inch round should work too, as does an 8-inch square) with parchment paper and butter the sides of the pan and the paper.
Assemble buns: Scoop dough onto a very well floured surface and flour the top of it well. With a rolling pin, roll the dough to an approximately 16×11-inch rectangle. Brush reserved melted/browned butter over dough. Stir together remaining filling ingredients and sprinkle mixture evenly over dough. Starting on a longer side, roll the dough into a tight spiral. It’s going to make a mess because the dough is crazy soft and some stuff spills off the ends; don’t sweat it. It will all be delicious in the end.
To cut cinnamon rolls without squishing their pretty spirals: With a sharp serrated knife, using absolutely no pressure whatsoever (only the weight of the blade should land on the dough) gently saw your log with a back-forth motion into approximately 1-inch sections. When a soft dough like this is rolled, it tends to grow longer, which means that you’ll have the option to either make more buns (say, 18 instead of 16) or just cut them a little larger (in generous inches).
Divide buns between two prepared pans. You can sprinkle any sugar that fell off onto the counter over them. Cover each pan with plastic wrap and let rise for another 45 minutes.
If you’re doing this ahead of time, you can now put them in the fridge overnight. In the morning, leave them out for an hour to warm up and finish rising.
15 minutes before you’re ready to bake them, heat the oven to 350°F. Meanwhile, you can make the glaze. Beat your cream cheese until it is light and fluffy. Add powdered sugar and vanilla. Drizzle in milk until you get the consistency you’re looking for, either thick enough to ice or thin enough to drizzle.
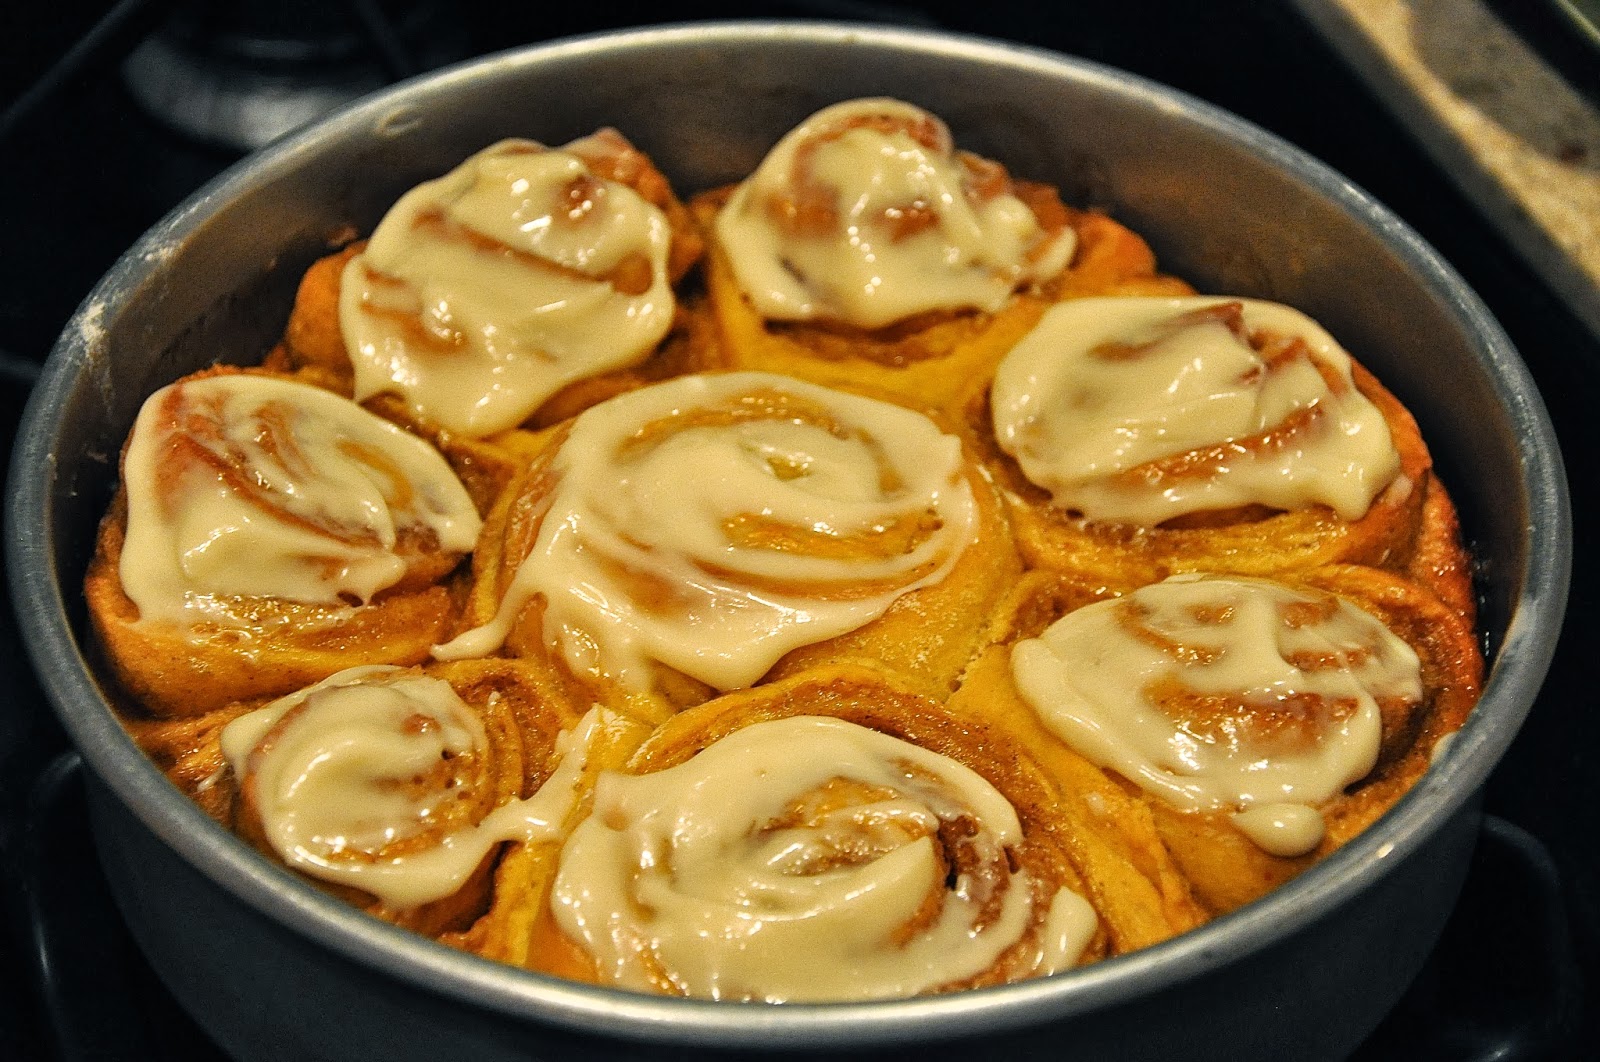
Finish your buns: Remove the plastic and bake buns for 25 minutes, until puffed and golden and the aroma is perfection. Transfer pans to wire cooling racks and drizzle/spread with cream cheese glaze before enjoying, preferably while still warm.

Tuesday, October 15, 2013

Classic Peanut Butter Chocolate Chip Cookies

     Strangely enough, peanut butter chocolate chip cookies are one of my most often-requested treats. They aren't super complicated - essentially just a chocolate chip cookie with some of the butter subbed out for peanut butter - but they tend to strike a nostalgic chord in adults and teenagers alike. Somehow, the sweet & salty flavor combination and crisp texture remind me of my days in kindergarten, and in a week that includes standardized tests, late-night choir rehearsals, and college tours, sometimes that's all I really need.
   This is my favorite recipe, and while they aren't gooey, I think that's okay - but if you don't, just bake them for a couple of minutes less. The peanut butter flavor is definitely noticeable without being overwhelming, and you don't get any chunks of peanuts (again, if you do want these, just sub in chunky peanut butter). Best of all, these are tender, buttery and crazy addictive. I promise they'll take you back to your own kindergarten classroom, complete with crayons and nap time!
    Enjoy!
Classic Peanut Butter Chocolate Chip Cookies

1 stick butter, at room temp
1/2 cup smooth peanut butter
1/2 cup dark brown sugar
1/2 cup granulated sugar
1 egg
1 tsp vanilla
1 cup flour
1/2 tsp baking soda
1/2 tsp salt
1 1/2 cups chocolate chips

Preheat oven to 375 and line a baking sheet with parchment or a baking mat.
Cream the butter and peanut butter on medium high for 1 minute.
Add sugars and beat at med-high for another minute. Add egg and vanilla and mix until smooth.
Add flour, baking soda and salt on low speed until thoroughly combined. Mix in chocolate chips (the
dough will be quite soft).
Chill dough for 15-20 minutes.
Drop the dough by the small scoopfuls onto a lined baking sheet.
Bake for 10-12 minutes until edges are golden brown. For a crispier cookie, allow the entire cookie to brown. Let cookies cool on baking sheet for 10 minutes and then transfer to a rack to cool completely.
 -makes about 24 cookies

Wednesday, October 9, 2013

Bittersweet Brownies with Pumpkin Cream Cheese Frosting

 Remember last week, when I mentioned something special I was working on? Well, this week was supposed to be pumpkin week here, but... life (and a pretty cool order that I'll tell you about soon) got in the way, and we're left with 2 pumpkiny recipes. But they're pretty great.
  I am slightly obsessed with anything "fall-flavored," from pumpkin spice lattes to cinnamon pancakes. I tried out something totally different with these brownies, and to my surprise, it totally worked.
 The brownies are dark, chewy, thin, and super chocolatey. They may be a new favorite, especially to use as a base for other variations. On top comes a cream cheese frosting mixed with pumpkin puree that is insane - it's sugar and spice and everything nice. (Too much? Sorry...)
 These are unlike any other fall treat that might be sitting in one of your Pinterest boards, and totally worth a shot - who knows, they might become a new Fall go-to for you, too!
  Enjoy!
Bittersweet Brownies with Pumpkin Cream Cheese Frosting

Bittersweet Brownies
3 ounces (85 grams) unsweetened chocolate, roughly chopped
1 stick (4 ounces or 115 grams) unsalted butter, plus extra for pan
1 1/3 cups (265 grams) granulated sugar
2 large eggs
1 teaspoon (5 ml) vanilla extract
1/2 teaspoon flaky sea salt or 1/4 teaspoon table salt (about 2 grams)
2/3 cup (85 grams) all-purpose flour

Heat oven to 350°F. Line an 8×8-inch square baking pan with parchment, extending it up two sides, or foil. Butter the parchment or foil or spray it with a nonstick cooking spray.
In a medium heatproof bowl over gently simmering water, melt chocolate and butter together until only a couple unmelted bits remain. Off the heat, stir until smooth and fully melted. You can also do this in the microwave in 30-second bursts, stirring between each. Whisk in sugar, then eggs, one at a time, then vanilla and salt. Stir in flour with a spoon or flexible spatula and scrape batter into prepared pan, spread until even. Bake for 25 to 30 minutes, or until a toothpick inserted into the center comes out batter-free.
Let cool before frosting.


Pumpkin Cream Cheese Frosting
(adapted from Chow)
3 cups powdered sugar, sifted
1/2 teaspoon ground cinnamon
1/8 teaspoon freshly ground nutmeg
6 ounces cream cheese, at room temperature
4 tablespoons unsalted butter (1/2 stick), at room temperature
1/4 cup pumpkin purée (not pie filling)

Place the sugar, cinnamon, and nutmeg in a medium bowl and whisk to combine; set aside.
Place the cream cheese and butter in the bowl of a stand mixer fitted with a paddle attachment and beat on medium speed until fully combined and smooth, about 1 minute.
Reduce the speed to low, slowly add the powdered sugar mixture, and beat until fully incorporated and smooth, about 3 minutes.
Turn the mixer to medium speed, add the pumpkin, and mix until fully incorporated and smooth, about 1 minute. You may need to add more powdered sugar to reach desired consistency.


Frost pan of cooled brownies. (You may have frosting left over. Just eat it with a spoon use it on cupcakes!) Refrigerate frosted brownies for about 15 minutes before cutting.
   -Makes about 20 brownies, depending on how large you cut them.

Wednesday, October 2, 2013

Plum Almond Tart

 You might have noticed I went missing for almost 2 weeks, which is unusual even for me. But I have a reason. See, I've been planning something supercalifragilisticexpialidociously fun for next week. Stay tuned....
 But meanwhile, this was made a couple of weeks back, when I could still go outside without having to worry about zipping up my boots and digging that old scarf out of the back of the closet. It used up some of our last perfectly sweet plums and was a great goodbye to summery flavors.
 It's very similar to this French Pear Tart, starting with a buttery crust, which is topped with a  creamy almond layer and crowned with the "star of the show," fresh fruit. The layer of almond cream puffs up in the oven and becomes a beautiful golden-brown that kind of makes you want to stick your face in the whole thing.
 I glazed it with a little bit of fig jam and water I boiled together, but this is really just for that bakery-style, shiny finish; a dusting of powdered sugar is just as delicious!
 This was the perfect dessert to finish off a summery meal, especially when paired with Olive Oil Ice Cream. I mean, come on - plums, frangipane, and creamy olive oil - how much classier can you get?! ;)
Enjoy!
Plum Almond Tart
(adapted from Around My French Table; wording adapted from Writes 4 Food and Dorie Greenspan)

1 recipe sweet tart dough (recipe below)
About 5 sweet, ripe plums
6 Tbsp. unsalted butter, at room temperature
2/3 cup sugar
3/4 cup almond flour (or almond meal)
2 tsp. all-purpose flour
1 tsp. cornstarch
1 large egg
2 tsp. dark rum or 1 tsp. good vanilla extract
2 tablespoons fig jam (or other light-colored jelly), mixed with 1/2 teaspoon water

In a food processor, whirl together the butter and sugar until they’re well-combined and smooth. Add the almond flour; process to blend. Add the flour and cornstarch, process, then add the egg. Process briefly until the mixture is smooth and well-combined. Add the rum or vanilla and pulse just to combine. Scrape the almond cream into a container and refrigerate until you’re ready to use it.
Cut the plums into thick slices and set on paper towels to dry for a couple of minutes.
To assemble the tart, preheat the oven to 350 degrees and line a baking sheet with a silicone mat or piece of parchment. Spoon the almond cream into the prepared tart shell and smooth the surface. Arrange the plum slices in a circular pattern on top of the cream, leaving a tiny bit of space between them to allow the cream to rise up and turn golden brown.
Bake the tart for 50 to 60 minutes, until the crust is a rich brown color, the almond cream is shiny and golden, and a cake tester inserted in the cream comes out clean. Remove the tart to a cooling rack and let it cool before lifting it out of the pan.
 Microwave the jam and water together just until bubbling. Brush onto cooled tart (or dust tart with pastry cream).
This tart is best eaten the day it is made.

Sweet Tart Dough
1 1/2 cups all-purpose flour
1/2 cup confectioners' sugar
1/4 teaspoon salt
1 stick plus 1 tablespoon (4 1/2 ounces) very cold (or frozen) unsalted butter, cut into small pieces
1 large egg yolk

Put the flour, confectioners' sugar and salt in the workbowl of a food processor and pulse a couple of times to combine.  Scatter the pieces of butter over the dry ingredients and pulse until the butter is cut in coarsely - you'll have pieces the size of oatmeal flakes and pea-size pieces and that's just fine.  Stir the egg, just to break it up, and add it a little at a time, pulsing after each addition.  When the egg is in, process in long pulses - about 10 seconds each - until the dough, which will look granular soon after the egg is added, forms clumps and curds.  Just before your reaches this clumpy stage, the sound of the machine working the dough will change - heads up.  Turn the dough out onto a work surface.
Very lightly and sparingly - make that very, very lightly and sparingly - knead the dough just to incorporate any dry ingredients that might have escaped mixing.
Butter a 9" tart pan and press the dough evenly along the bottom and up the sides of the pan.  Don't be stingy - you want a crust with a little heft because you want to be able to both taste and feel it.  Also, don't be too heavy-handed - you want to press the crust in so that the pieces cling to one another and knit together when baked, but you don't want to press so hard that the crust loses its crumbly shortbreadish texture.  Freeze the crust for at least 30 minutes, preferably longer, before baking.  Freeze the crust for at least 30 minutes, preferably longer, before baking.

To partially bake the crust: Center a rack in the oven and preheat the oven to 375 degrees F.  Butter the shiny side of a piece of aluminum foil and fit the foil tightly against the crust.  Bake the crust for 25 minutes, then carefully remove the foil.  If the crust has puffed, press it down gently with the back of a spoon.  Bake for another 3 to 5 minutes, then transfer the crust to a cooling rack; keep it in its pan. 

Sunday, September 22, 2013

Earl Grey Eclairs

 Junior year, or at least the first 2 weeks of it, has been great and bad and wonderful and terrible and confusing and musical and most of all, busy. I've been baking, occasionally, but it's usually to de-stress, and by the time I'm done I have an entirely new to-do list and I can't even think about sitting down to blog.
 So now, in the 23 minutes I have left before the Emmys start, I give you these eclairs. They were an idea that came to me out of the blue, and somehow, perhaps magically, the baking gods were on my side and they worked out just as I had wanted them to. I only had to make them twice. ;)
 These are a simple choux pastry, hollow inside and perfect for filling with the creamy custard flavored with earl grey tea. The tea is one of my favorite drinks in the world - I have it almost every morning before school, even though it may make me seem like I'm 90 years old - and I even brought home a giant tin of it from England. On top, instead of a traditional fondant glaze, there's a thin layer of sweet cookie dough.
 This layer of cookie dough does several things. First, it makes the whole dessert something totally different, which is always nice. Second, it makes the eclairs beautiful - the cracked, sugar-dusted top is enough to make anyone's mouth water. Third, it adds texture to an otherwise fairly soft dessert: the topping is crispy and crumbly at the same time, and goes perfectly with the smoothness of the cream. Lastly (and maybe most importantly), it kind of melts into the choux and makes the whole thing insanely buttery, and wonderfully reminiscent of tea and cookies. And perfect.
  Enjoy!
 Earl Grey Eclairs

Biscuit Topping
100g unsalted butter, very cold
125g cake flour
125g caster sugar
1 tsp pure vanilla extract

Choux Pastry
120g cake flour
100mL whole milk
100mL water
10g caster sugar
1 pinch salt
80g unsalted butter
4 large eggs

Lightened Crème Pâtissière
1/4 cup loose earl grey tea leaves (or about 5 tea bags)
400mL whole milk
4 egg yolks
80 caster sugar
30g corn starch
25g unsalted butter
1 cup double cream

For the biscuit topping:
Cut the chilled butter into small pieces, then mix together with the flour, sugar and vanilla till well combined.
Bring the mixture together into a ball by hand and refrigerate for an hour.
For the choux:
While the topping mixture is chilling, preheat the oven to 350 degrees F and melt the butter into the milk in a saucepan and bring to a simmer.
Add the flour, sugar and salt all at once and rapidly mix with a wooden spoon till the dough comes together into a ball and there is a thin layer forming on the bottom of the pan.
Transfer the dough to a bowl and mix in the eggs with a wooden spoon, one at a time, till the dough is smooth and glossy.
Fill a large piping bag with a 1″/ 2.5cm round tip and pipe out long shapes about 10cm long onto a tray lined with baking paper. Make sure to leave about 10cm between each pastry to leave room for them to spread.
 Once this is done, take the biscuit topping out of the fridge and lightly knead to soften, then place between two sheets of non-stick baking paper or plastic wrap and roll flat to about 1-2mm thick. Cut into rectangles about 4cm x 12cm, to make sure that it completely covers the eclairs and hangs off the sides.
Place each rectangle of biscuit topping on top of each eclair, then bake for 10 minutes, then prop the oven door open about 3mm (the handle of a wooden spoon is great for this) and allow to bake for another 20 minutes or till they are golden on top and fully puffed up. Set aside to cool before filling.
For the cream:
Whisk together the egg yolks and sugar, then add the corn starch and whisk till mixture becomes pale yellow and thickened.
Set aside and scrape the vanilla into the milk and bring to a simmer.
Slowly pour the milk into the egg yolk mixture in a thin stream while constantly beating.
Pour back into the saucepan and bring to a boil while whisking, making sure to scrape down the sides.
Leave the mixture to cool for about 10 minutes so that it’s no longer boiling, then briskly whisk in the butter till the mixture is smooth and glossy.
Scrape the mixture into a non-reactive bowl and keep tightly covered with plastic wrap till ready to use. Once you’re ready to fill the eclairs, beat the cream to firm peaks then carefully mix together the cream and the pastry cream with a spatula.
Fill a piping bag with the mixture then pipe each eclair with the pastry cream in three places and dust with icing sugar before serving.
Best eaten within a day of filling (unfilled pastries can be stored in an airtight container for up to one week).
   -makes about 20 eclairs

Friday, September 13, 2013

Homemade Indulgences: Tart Pinkberry!

   Welcome to a new series here at Sophia's Sweets! I like to call it "Homemade Indulgences;" the idea is basically to re-create some of my favorite store-bought treats at home.
   Choosing a recipe to start with was easy. (By the way, sorry for the back-to-back ice cream posts - I'm trying to get them in while the weather is warm enough!) As any of my friends (or family) will tell you, I am completely obsessed with frozen yogurt. It's super yummy, and low-fat enough to pass as healthier than ice cream. For dessert, I love mixing flavors and crazy toppings, but sometimes I just want a simple snack. One of my favorites is the classic plain/tart frozen yogurt, topped with fresh fruit. It turns out, it's SUPER easy to make at home!
  No cooking of custards, or even pulling out of blenders, is required. Let it go for a spin in the ice cream machine, and you're all set! I loved this right after it was churned the best, but it was great after hardening for a few hours too. You'll just have to microwave it for a few seconds to get it back to that soft, creamy texture.
  I've been enjoying this with fresh berries and a drizzle of honey. Not only is it cheaper than one of New York's many frozen yogurt chains ($5 cups of yogurt start to add up...), but it also isn't full of various preservatives and other unpronounceable ingredients. And it tastes just like store-bought. I found myself a new favorite!
  Enjoy!
Tart Pinkberry
(slightly adapted from Food Network)

2 cups plain whole-milk yogurt
2 cups plain nonfat or reduced-fat Greek yogurt
1/2 cup superfine sugar
3 tablespoons light corn syrup
1 teaspoon vanilla extract or 1/4 teaspoon vanilla bean paste
Fresh fruit or other toppings (like honey), for garnish

Whisk both yogurts, the sugar, the corn syrup and the vanilla in a bowl until combined. Pour into an ice cream maker and freeze according to the manufacturer's instructions.
For a soft consistency, serve right out of the ice cream maker. For a firmer texture, transfer the frozen yogurt to a covered container and freeze for up to 2 hours. Serve with assorted toppings.

Wednesday, September 11, 2013

Olive Oil Ice Cream

 When you think of ice cream, olive oil probably isn't the first flavor that comes to mind. Deep dark chocolate, light and creamy vanilla bean, sweet and sour strawberry - those are more likely. But I'm here to tell you that olive oil beats them all.
 This recipe basically replaces some of the cream in a classic ice cream recipe with olive oil. The oil not only adds a great creamy texture, but a lovely flavor. When you first taste it, you might not detect the olive oil, but there's definitely something wonderfully different about the ice cream.
 The oil adds a fruitiness and depth that I've never been able to achieve at home. (Shoutout to two awesome friends of mine who gave me an ice cream machine for my birthday!)
 This was perfect served alongside an almond plum tart (recipe to come!), but I think it would be great with any fruity dessert. Get ready to turn your kitchen into a 5-star restaurant!
 Or, if you're like me, you can forget to photograph the ice cream with the tart, so just pile a bunch into a beer glass and call it a day. Whether you then eat the entire five scoops is entirely up to you.
 I promise not to judge.
Enjoy!
Olive Oil Ice Cream

2 cups whole milk
1 cup heavy cream
5  large egg yolks
1/2 cup sugar
pinch of salt
1/2 cup fruity extra-virgin olive oil
2 teaspoons pure vanilla extract


Set a heatproof bowl with a strainer set over it ready for the cooked custard.
Bring the milk and cream to a boil in a large heavy saucepan.  In a large bowl, whisk the yolks and sugar together until very well blended and just slightly thickened.  Whisking without stop, drizzle in about 1/3 of the hot liquid - adding it slowly will temper the eggs and prevent them from cooking.  Once the eggs are acclimated to the heat, you can whisk in the remaining liquid a little more quickly.  Add the salt and pour the custard back into the pan.  Cook the custard over medium heat, stirring constantly.  The custard should reach at least 170 degrees, but no more than 180 degrees.  
Immediately remove the pan from the heat and pour the custard through the strainer into the bowl.  Discard whatever remains in the strainer.  Add the olive oil and whisk.  Stir in the vanilla.  The custard needs to chill before you churn it.  Chill it and scrape the custard into your ice cream maker and make according to the appliance instructions.

Monday, August 26, 2013

Teatime Lavender Cupcakes

 Lately I've been loving using herbs and teas in sweets. From earl grey ice cream to rosemary shortbread, the idea is all over - and these cupcakes are a great example. A while back, I bought a big bag of "culinary lavender" for these shortbread cookies, and I've been trying to find other recipes to use it up. I've had my eye on this one for a while, so I decided to finally try it out.
 These are the perfect way to infuse some flowery flavor into a baked good without making it seem like a bite of perfume. A little bit of lavender is ground up into the sugar, and then sprinkled on top (use a sprig of lavender to garnish if you have it). The icing was interesting because it's kind of a take on royal icing - just egg white and confectioner's sugar. It's very sweet, but in a thin layer it's a nice contrast to the cake.
  These are perfect with a cup of tea in the afternoon. Or for breakfast, because ya know... it's tea. Kind of.
   Enjoy!
Teatime Lavender Cupcakes
(from Cupcakes)

1/2 cup granulated sugar
1/4 teaspoon dried lavender flowers (safe for culinary use)
1/2 cup (8 tablespoons) unsalted butter, at room temperature
2 eggs
1 cup self-rising flour
2 tablespoons milk

1 1/2 cups confectioners' sugar, sifted
1 egg white
lilac food coloring
dried or fresh lavender, for decorating

Preheat the oven to 350 degrees F, then line a 12-cup muffin pan with paper liners.
Put the sugar and lavender flowers in a food processor and process briefly to combine. Tip the lavender sugar into a bowl with the butter and beat together until pale and fluffy.
Beat the eggs into the butter mixture, one at a time, then sift in the flour and fold in. Stir in the milk, then spoon the mixture into the muffin cups. Bake for about 18 minutes until risen and golden and a skewer inserted in the center comes out clean, then transfer to a wire rack to cool.
To decorate, gradually beat the confectioners' sugar into the egg white in a bowl, then add a few drops of food coloring and stir to achieve a lavender-colored icing. Spoon the icing over the cupcakes, then top each one with a sprig of fresh lavender (or a few bits of dried lavender). Let icing set before serving.
   -makes 12 cupcakes

Sunday, August 25, 2013

TWD Rewind: Cheese and Tomato Galette

 For a while now, I've been trying to get back into Tuesdays with Dorie. It can be annoying at times, often having other people choose what I should bake this week, but ultimately I find that it makes me try new techniques and recipes that I wouldn't have attempted otherwise. So, while I try to catch up, here's an old recipe I missed a few months back!
 Sometimes, the group's chosen recipes can even turn out to be unexpected favorites. Like this galette.
 I made it expecting something kind of boring - like a classed-up pizza. It turned out to be absolutely delicious - I made the crust with white whole-wheat flour, which made it a little more substantial, and it has a lovely crunch from the cornmeal in it. The cheeses mix together really well, and pair perfectly with ripe summer tomatoes.
 It's perfect for a summery lunch or a light dinner alongside a salad, and it will definitely be made all the time!
As always, the recipe can be found in Baking with Julia, or here.
Enjoy!