Tuesday, June 26, 2012

TWD Rewind: Fluff-Filled Chocolate Madeleines

Sometimes you just need junk food. It's delicious, it's familiar, and sometimes you just want some. I'm past the days of wishing for a hostess cupcake in my lunch box, but I do like my own versions of things I loved as a little kid.
These madeleines are everything good about those familiar lunch treats, but with a grown-up twist of delicious homemade components. They start off with a madeleine with a deep chocolate flavor. I had a little trouble with the madeleines, because they did not form the characteristic hump on the back - they were soft and tasty nonetheless. The baked madeleines are filled with a ten-year-old's dream: a jar of marshmallow fluff. The actual filling of the cakes was a little tricky - I wasn't able to get very much filling in. According to other blogs, the best way to do this is to hollow out part of the madeleine before filling. However you do it, the filled madeleines are then dipped into a bowl of dark ganache, and topped off with a squiggle of fluff. Indulgent much?
These are a perfect for anything from a birthday party to an after-school treat. They don't take very long to make, if you don't count the chilling time, and are so rich you are happy with just one. The recipe, as always, can be found in Baking from My Home to Yours.
Enjoy! <3

Monday, June 25, 2012

Strawberry Oat Crumble Bars

I had two reasons for making these bars.
The first was that ever since I started baking, I look at lots and lots of food blogs for recipes and ideas. Every time I search through recipes, one comes up for crumble bars. These bars are a layer of buttery, crumbly dough, topped by some sort of fruit or jam, and then finished with a layer of "crumble," usually made out of the same dough as the bottom layer. They look delicious and summery, and they were always on my to-do list. Until yesterday.
The second reason for making these bars (you do realize I'm just trying to justify my adding another pan of buttery baked goods to our kitchen?) was that I was looking for something to bake, so I went to one of my favorite food blogs, 17 and Baking. This was the first recipe I saw, and it looked perfect for what I had in mind; it was quick, summery, and (most importantly) yummy!
I loved how these came out. They are crumbly and a little thinner than I thought they would be, but still delicious. When I was in the middle of baking, I realized I had bought strawberry jam instead of raspberry - oh well! I cut down the butter by one tablespoon because that was all I had (whoops!), but I think it would have been even better with the original amount. Despite these bars being very sweet, they have an addictive quality to them! They also gave me lots of new ideas for flavor combos...
Enjoy! <3
Strawberry Oat Crumble Bars
(Slightly adapted from 17 and Baking)


1 1/4 cups flour
1/3 cup packed light brown sugar
1/2 tsp salt
5 oz (10 tablespoons) cold unsalted butter, cut into pieces
1 tablespoon milk
1 1/2 cups old fashioned oats
3/4 cup strawberry jam

Preheat oven to 375 degrees F.
Mix the flour, sugar, and salt in the bowl of a food processor, then add the butter and pulse until a dough starts to form. Blend in the milk. (If you don’t have a food processor you could do this with an electric mixer, a pastry cutter, or even a couple of forks or knives.) Transfer the dough-bits to a bowl and knead in the oats until well combined.
Put 3/4 cup dough off to the side (this will be used as the crumble.) Press the rest of the dough evenly into a buttered 9×9″ metal baking pan (Or line with parchment paper). Spread the jam evenly over the top (if the jam seems tough to spread, heat it up a little to thin it.) Crumble the reserved dough evenly over the top.
Bake in the center of the oven until golden, 20-25 minutes, and cool completely in the pan on a rack. Use a knife to loosen the sides, lift it out, and cut into bars on a cutting board.

Saturday, June 23, 2012

TWD Rewind: Flip-Over Plum Cake

I'm having a dilemma. Inside my head (very intense). Help me out here.
I can't decide what season is better for baking. Oh I know, this is extremely intense. On the one hand, I love fall. Pumpkin, cranberries, and apples are amazing in cakes and pies. But on the other hand, look at all the summer treats being posted all over the internet - peach cobblers, raspberry bars, and strawberry cakes are all light and delicious. I think as long as I have this plum cake around, the dilemma will have to be solved in the fall...
This cake is great. It is buttery and crumbly, with a nice contrast between sweet cake and tart fruit. I couldn't find plums on the day I made it, so I used pluots, a cross between a plum and an apricot. It worked out well, but they are more sour than plums and I think the original recipe would be even more delicious. I guess I'll just have to try it again, no? ;)
The recipe, as always, can be found in Baking from My Home to Yours. Enjoy! <3

Thursday, June 21, 2012

Peanut Butter Chocolate Chunk Cookies

Sometimes I make recipes that are really good, and I photograph them and plan to write a post later on, and then forget about it. As I was searching through my photos for a specific picture, I came across these two. I actually made these cookies a couple of years ago, but I remember them clearly, which means they must have been pretty good! I have tried out many a peanut butter chocolate chip cookie recipe in my few years of baking, but this was by far the best, and the only really good one I've ever made. I remember making these for a recital at the time, and I know I either doubled or tripled the recipe and ended up with so many cookies that I filled a huge tin and froze tubs of raw dough. Those tubs were a lovely surprise when cleaning out the freezer!
This recipe comes from one of my many cookbooks that I don't even know how I ended up owning, but am interested to try recipes from nonetheless. The book for these recommends drizzling them with melted milk chocolate. I'm sure that would be delicious, but they really don't need it. They are great as-is, and one of those simple recipes I can always go back to.
Enjoy! <3

Peanut Butter Chocolate Chunk Cookies
(ever-so-slightly adapted from Buttercup Bakes At Home)

1 1/4 cups all-purpose flour
1/2 teaspoon baking soda
1/2 teaspoon baking powder
1/4 teaspoon salt
1/2 cup (1 stick) unsalted butter, softened
3/4 cup chunky peanut butter
1 cup firmly packed light brown sugar
1 large egg, at room temperature
1 tablespoon vanilla extract
1 cup semisweet chocolate chunks (I used chips)

Preheat oven to 350 degrees.
In a medium bowl, combine the flour, baking soda, baking powder, and salt. Set aside.
In a large bowl, cream the butter and peanut butter on the low speed of an electric mixer until smooth, about 2 to 3 minutes. Add the brown sugar and continue to beat another 1 to 2 minutes. Add the egg and vanilla and mix well. Add the dry ingredients and thoroughly mix. Stir in the chocolate chunks.
Drop by rounded teaspoonfuls onto ungreased cookie sheets, leaving 3 to 4 inches between for spreading. Bake for 10 to 12 minutes. Cool the cookies on the sheets for 1 minute, then remove to a rack to cool.

Monday, June 18, 2012

TWD: French Strawberry Cake

Hi! If this is your first time visiting my blog, welcome! I'm Sophia, a fifteen-year-old baker in New York City. I am beyond excited to be hosting Tuesdays with Dorie this week! Actually, I'm not sure what to be more excited about - that I'm hosting, or that I made a genoise. Considering that three days ago, I had no idea what a genoise even was.
When I volunteered to host, I hadn't actually seen the recipe. After I was chosen, I read it and started to get nervous - I had no idea what this cake was supposed to be. How was I supposed to post about a complete failure when it's my turn to host??
I made the recipe exactly as stated, sifting and measuring every little detail. I swear I over-folded the genoise batter, and there were still some lumps of flour after it baked because I was so scared to mix it too much. I don't know what I managed to do, but it worked! The bottom layer was a little tough, and I had some trouble with slicing into 3 layers, but it was delicious nonetheless. I was so happy with how this cake turned out, and am grateful to TWD for opportunities like this one. Without the group, I would never had made a recipe like this and discovered how much I loved it.
When I was thinking about what to write for this post, I realized that there are some things words just can't describe. The feeling of folding and pouring the batter; the curiosity over whether the first bite would be delicious; the look on my dad's face when he walked into the kitchen and saw his father's day cake. As food bloggers, all we can do is describe these as best as we can.
Go make this cake for yourself to find out what I'm talking about; the recipe is right below, or on my fellow host's beautiful blog, Sleep Love Think Dine! Be sure to stop by the TWD website and see everybody's lovely cakes.

French Strawberry Cake
from Baking with Julia by Dorie Greenspan

1 recipe Perfect Genoise Batter (recipe below)
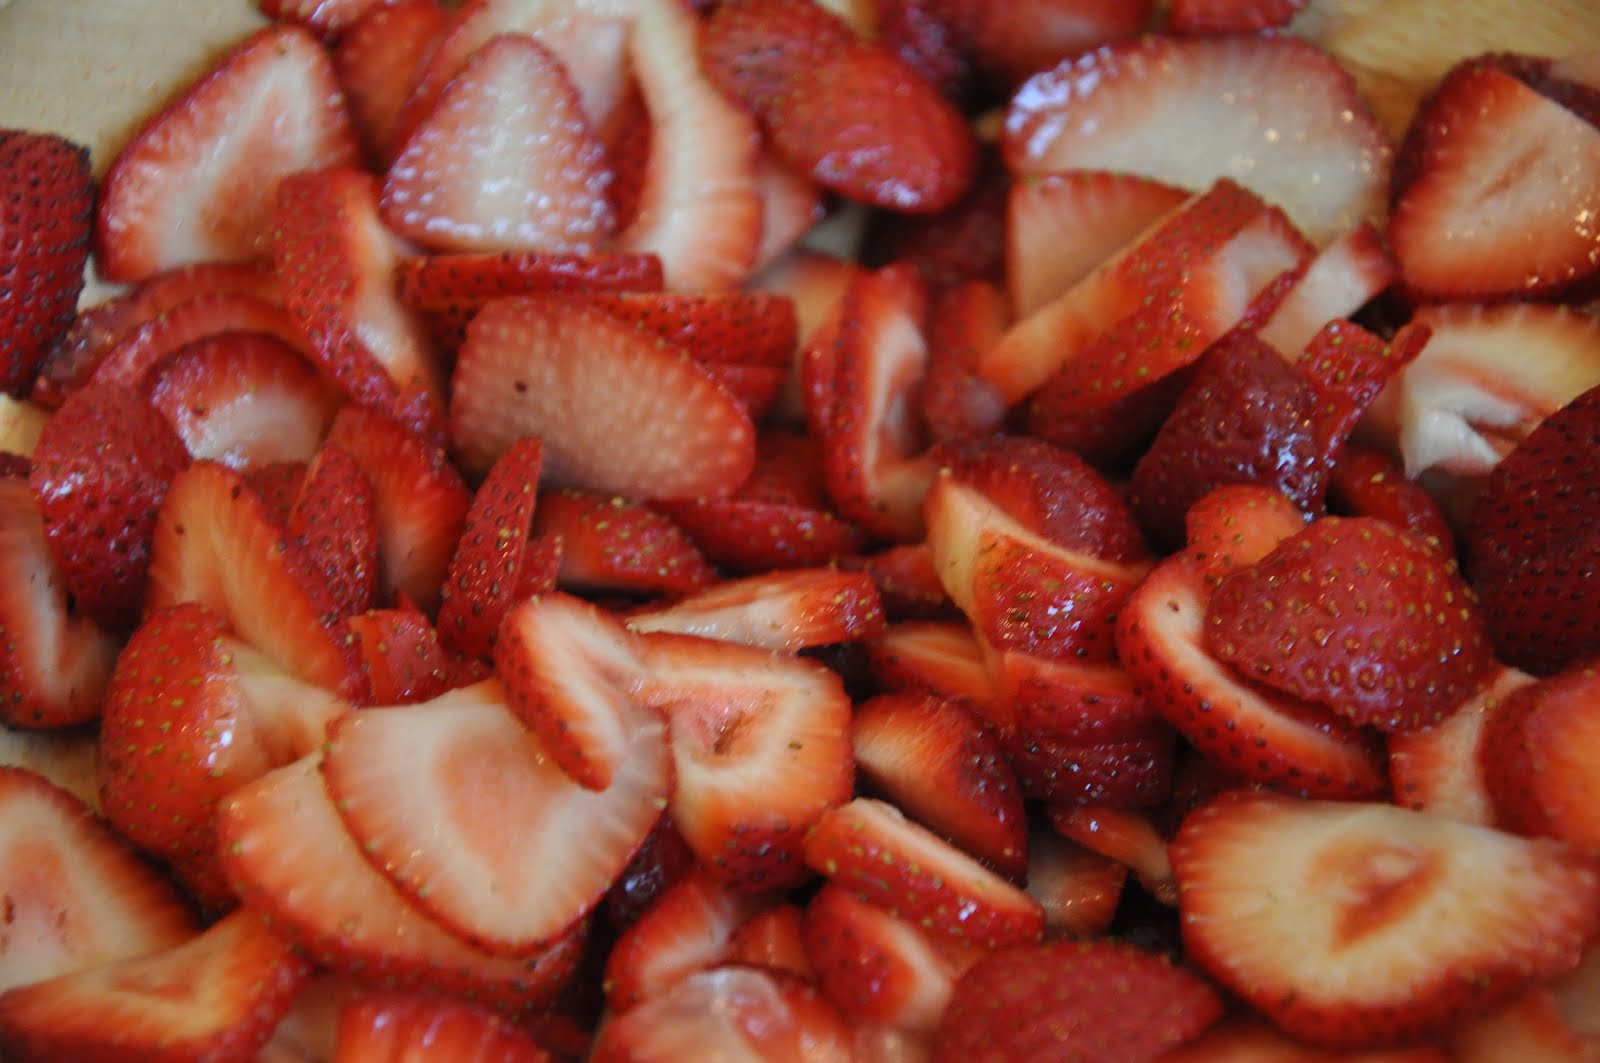
2 pints ripe fresh strawberries, hulled and sliced
1/4 to 1/3 cup sugar,(depending on the sweetness of the fruit)

Position a rack in the lower third of the oven and preheat the oven to 350F. Grease the bottom and sides of an 8-inch round cake pan with solid shortening, dust with flour, and tap out the excess. Fit the bottom with a parchment or waxed paper circle.
Baking the cake:
Carefully pour the batter into the prepared pan, smoothing the top with a rubber spatula, working from the center outward and creating a slightly raised ridge around the sides. Bake for 25 to 27 minutes, or until the top springs back when lightly prodded and the cake starts to come away from the sides of the pan. Transfer the cake to a rack and let it rest for 5 to 10 minutes.
To remove the cake from the pan, first test its readiness: Tilt and rotate the pan, then gently tap it on the counter. If it doesn't seem as if the cake is releasing from the pan, or you are the cautious type, run a thin blade between the cake and the sides of the pan, freeing the sides and letting a little air get under the cake. Invert the cake onto a rack and remove the pan. Slowly peel off the paper liner, turn it over, and put it back on the cake. Cover the cake with another rack and invert again. Remove the top rack and let the cake cool completely right side up. The cake can remain uncovered at room temperature for a day, but it should be wrapped in plastic if you won't be using it within 2 days. For longer storage, wrap it well and freeze it for up to 10 days. Thaw, still wrapped, at room temperature.
Preparing the Berries:
Toss the sliced berries with the sugar in a large bowl and leave them, uncovered, at room temperature for at least 2 hours.
Coarsely mash the berries with the tines of a fork and toss them again; let them stand for 1 hour longer. You can do this the day before, but the berries should be refrigerated after they are mashed.
The Cream
1 1/4 cups heavy cream
2 tablespoons sour cream
2 tablespoons sugar
1 teaspoon pure vanilla extract
5 large strawberries (with hulls)

Using a mixer fitted with the whisk attachment or a hand-held mixer, whip the heavy cream, sour cream, sugar, and vanilla together until the mixture forms soft peaks. The cream is the proper consistency when the tracks made by the whisk close slowly and almost disappear. Cover and refrigerate the cream until you're ready to frost the cake. Just before using the cream, give it a turn or two by hand with a whisk to bring the mixture together again.
Finishing the cake:
Using a serrated knife and a gentle sawing motion, cut the cake horizontally into 3 layers. Place the bottom layer cut side up on a cardboard cake round or the removable bottom of a tart pan. Lifting the berries from the bowl with a slotted spoon so that most of the liquid drains off, spoon half of the mashed strawberries over the cake layer, then spread a thin layer of the whipped cream over the berries. Top with the middle cake layer, spoon on the rest of the strawberries, and spread another thin layer of cream over the berries. Center the top layer over the filling.
Working with a flexible metal icing spatula, frost the top and sides of the cake with whipped cream, leaving about 1/2 cup of the cream for decoration. Spoon the remaining whipped cream into a pastry bag fitted with a 1/4-inch star tip and pipe 10 rosettes around the top of the cake, positioning the rosettes about an inch in from the edge and leaving an inch between each rosette.
Slice each berry in half from blossom to stem, leaving some of the hull on each half. Prop a berry half, cut side down, on top of each rosette and refrigerate the cake for at least an hour before serving.
Storing:
The cake can be refrigerated for several hours before serving. Keep it away from any foods in the refrigerator with strong odors, as cream picks up odors quickly. It would be ideal if you could store the cake in a box.
Contributing Baker Flo Braker

Perfect Genoise
2 tablespoons unsalted butter, melted
1 cup sifted cake flour
1/2 cup sugar
1/8 teaspoon salt
4 large eggs, at room temperature
1 teaspoon pure vanilla extract

Pour the melted butter into a 1-quart bowl; reserve.
Return the sifted flour to the sifter or sieve and add 1 tablespoon of the sugar and the salt; sift onto a piece of waxed paper and set aside.
Put the eggs and the remaining sugar into the bowl of a heavy-duty mixer (or work with a hand-held mixer). Holding the whisk attachment from the mixer in your hand, beat the mixture to blend the ingredients. With the bowl and whisk attachment in place, whip the mixture on medium speed until it is airy, pale, and tripled in volume, like softly whipped cream, 4 to 5 minutes. You'll know that the eggs are properly whipped when you lift the whisk and the mixture falls back into the bowl in a ribbon that rests on the surface for about 10 seconds. If the ribbon immediately sinks into the mixture, continue whipping for a few more minutes. Pour in the vanilla extract during the last moments of whipping.
Detach the bowl from the mixer. Sprinkle about one third of the sifted flour mixture over the batter. Fold in the flour with a rubber spatula, stopping as soon as the flour is incorporated. Fold in the rest of the flour in 2 more additions.
Gently spoon about 1 cup of the batter into the bowl with the bmelted butter and fold the butter in with the rubber spatula. Fold this mixture into the batter in the mixer bowl. (This is the point at which the batter is at its most fragile, so fold gingerly.) The batter should be poured into a prepared pan and baked immediately.
<3

Saturday, June 16, 2012

TWD Rewind: Corniest Corn Muffins

You might have noticed that I've been baking a lot of TWD rewinds recently. I've sort of gotten back into it, and have set a kind of insane goal to finish my rewind list by September. I can't realistically see that happening, because my list of "to-bake" recipes is longer than my list of already-made recipes, but I've been having fun baking the recipes I've seen people write about but missed out on making myself.
Last week, I decided to make the Corniest Corn Muffins. I've made the other corn muffin recipe in the book before, but this one seemed more my style: it's sweeter and something I would like to have for breakfast. The batter for these is easy to whip up and takes fresh corn, something I had never put in cornbread before! I discovered it's actually a nice addition.
When I took these out of the oven, they looked really yummy. Still warm, they were corn-y and delicious. After a couple of hours (when I took the picture), they became kind of sad-looking, in addition to losing the crispiness to their tops. After that, they just weren't very good - even warmed up for breakfast, they were fine, but nothing special. We ended up throwing away most of the batch, which doesn't happen very often around here!
Overall, probably not one I'll make again. I'm still looking for a great corn muffin recipe - do you have any favorites? If you want to try this one out, the recipe can be found in Baking From My Home To Yours.
<3

Friday, June 15, 2012

TWD Rewind: Snickery Squares

Whenever I pick up a cookbook for the first time, I flip through it and look for the most attractive pictures. I'm pretty sure everybody does this - when you aren't familiar with a book, the first thing you do is try to find the tastiest thing in there! When I picked up BFMHTY, the picture of the Snickery Squares caught my eye right away. I mean, what was essentially homemade snickers?? I've had this book for years, so I have no idea why it took me so long to get around to making this recipe. I think I had always thought the middle layer was going to be some complicated homemade caramel recipe, but as I was reading the recipe last week when I decided I was finally going to make it, I realized it is really just a layer of store-bought dulce de leche. You can easily use homemade dulce de leche, but I have a brand I love that I buy at a Brazilian supermarket, and it's always in my kitchen.
This recipe is surprisingly simple to make, but seems like it took hours when you bite into one of the little squares. It starts with a simple shortbread on the bottom, which I made gluten-free by subbing in gluten-free all-purpose flour and a little xanthan gum for the wheat flour. Then comes a layer of dulce de leche sprinkled with caramelized peanuts. The peanuts were really quick to candy - the caramel cooked extremely fast and they were ready to break apart in just a few minutes. I would maybe have liked a thicker layer of "candy" on them, because it wasn't all that noticeable when eating the bars. After the peanuts comes a layer of bittersweet chocolate, followed by some more crushed peanuts. Yum!
I was so happy with how this recipe turned out, and can't believe it took me about four years to get around to making it! The recipe can be found in Baking From My Home To Yours, as always!
<3

Thursday, June 14, 2012

TWD: Oasis Naan

I totally meant to post this Tuesdays with Dorie last week, I really did. But last week was finals week, and I had to bake some cookies for a trip over the weekend. Naan wasn't happening! I finally made this a few days ago, and was shocked at how easy it was. The dough is quick to throw together - the only thing that took up some time was the kneading, which unlike lots of other recipes in Baking with Julia, has to be done by hand. It then rises for a couple of hours and is baked in a 500 degree oven.
I thought the method of baking was really interesting. Baking sheets are heated in the oven as it preheats, and then the dough is put onto them and baked for just 6-8 minutes. This results in quick, bake-right-before-eating naan that is perfect steaming hot and served with anything soupy and delicious!
This was so delicious, and I loved the topping of scallions, salt, and cumin seeds. I learned to watch out with the cumin seeds, because just two or three on a piece of bread gives a pretty strong flavor. I wished I could have gotten the full eight naans out of this recipe, but my dog had other plans...
She actually climbed up onto the table to grab a piece of raw dough.I was not happy...
Oh well, just an excuse to make this again! The recipe can be found on last week's hosts' blogs, Maggie of Always Add More Butter and Phyl of Of Cabbages & King's Cakes.

Wednesday, June 13, 2012

TWD Rewind: Linzer Sables

Happy summer! Although I still have two state tests next week, yesterday was my last day of freshman year. I'm currently drinking a smoothie and wearing a t-shirt that says "I survived (insert hardest teacher in the school's class)," so I think that's a pretty good start to the summer!
Finals are over at last, which means I have more time to bake and post here. These cookies, a very old TWD from the old book, were made this weekend, and they are the perfect way to celebrate the start of summer. They are crunchy and light, with a thin layer of jam that makes them twice as delicious. They are also so pretty; when my mom saw them, she said the sugar looked like a layer of lace.
I agree. These are adorable, and so easy to decorate - just cut out half of the cookies with a hole in the middle, and dust those with confectioner's sugar before sandwiching. These have some room for variation. You can change the type of nut used in the dough (I used almonds), the type of filling (I used raspberry jam), and the shape of the cookie (flowers!). I love the idea of rolling out the dough before freezing it, too - it made transferring the cut cookies so much easier.
I loved the taste and look of these, and they are so easy to make. The recipe can be found here, or in Baking from My Home to Yours.
<3

Tuesday, June 5, 2012

One Lovely Blog and BFMHTY's Lemon Poppyseed Muffins

When I was checking my comments the other day, I saw one in particular that made me smile (although any nice comment makes me smile). Paula from Vintage Kitchen Notes gave me a One Lovely Blog Award! Thanks Paula! Apparently how this works is that you receive the award and tell your readers 7 things about yourself. Here we go...
1. I am finishing my freshman year of high school.
2. I started baking for real when I was 9 and have been in love with it ever since.
3. I also cook. A little bit. Not really all that much. But I like to help other people cook.
4. My favorite thing to bake is probably muffins. Like these that I made last week...
A very old TWD from Baking From My Home To Yours, these were delicious! Light, fluffy and the perfect breakfast during finals week! Check out the recipe from the original host. And back to the list...
5. I don't actually post everything I bake on here. There are plenty of things that I spare you. For example, a while back I made a gluten-free "pineapple upside down cake" that really was like a big pile of batter with a few chunks of half-baked cake. Hey, it was yummy, but I like to keep certain standards when posting on here...
6. I am fluent in Portuguese. My mom is from Brazil, thus the Brazilian recipes on here.
7. My dream trip is to go to New Zealand. Mainly so I can jump off of the skytower. Hey, I'm a teenager, I'm allowed :)

Now here comes the fun part! I get to nominate five blogs I like! I'm all about the teen baking thing, so here are some of my favorites:
1. Lauren from Celiac Teen (yep, she's pretty famous already, but I like her blog)
2. Elissa from 17 and Baking (okay, she's famous too...)
3. Erica from Cannella Vita
4. Mia from The Little Blue Bicycle
5. Lucy from Teen Baker
This is a group of five other teenage girls baking their way through high school/college, and each has a great, unique blog. Girls, here are the rules...

The Rules of Acceptance:
-Thank the person who gave you this award
-Include a link to their blog
-Next, select 5 blogs/bloggers that you’ve recently discovered or follow regularly.
-Nominate those bloggers for the Awards
-Finally, tell the person who nominated you 7 things about yourself.
-In the same post, include this set of rules.
-Inform each nominated blogger of their nomination by posting a comment on each of their blogs.

<3