Showing posts with label yeast bread. Show all posts

Sunday, November 30, 2014

Swirly Cheese Buns

Growing up, Christmases spent with my dad's side of the family were events I looked forward to all year. The week would be spent sitting around the tree, rarely doing anything other than reading, watching movies, and sneaking off into other rooms to discretely wrap presents. We also spent a lot of time every single day in the kitchen; by the time the 25th came around, my grandmother, my aunts and I had churned out enough varieties of cookies to satisfy all my older cousins (who, strangely enough, would still rather eat raw dough than wait for the cookies to come out of the oven).
Waking up Christmas morning, the house was always filled with the smell of my great-grandmother's coffee cake (which is the most prized recipe I have and will most likely never be making its way online), along with the sweet scent of 
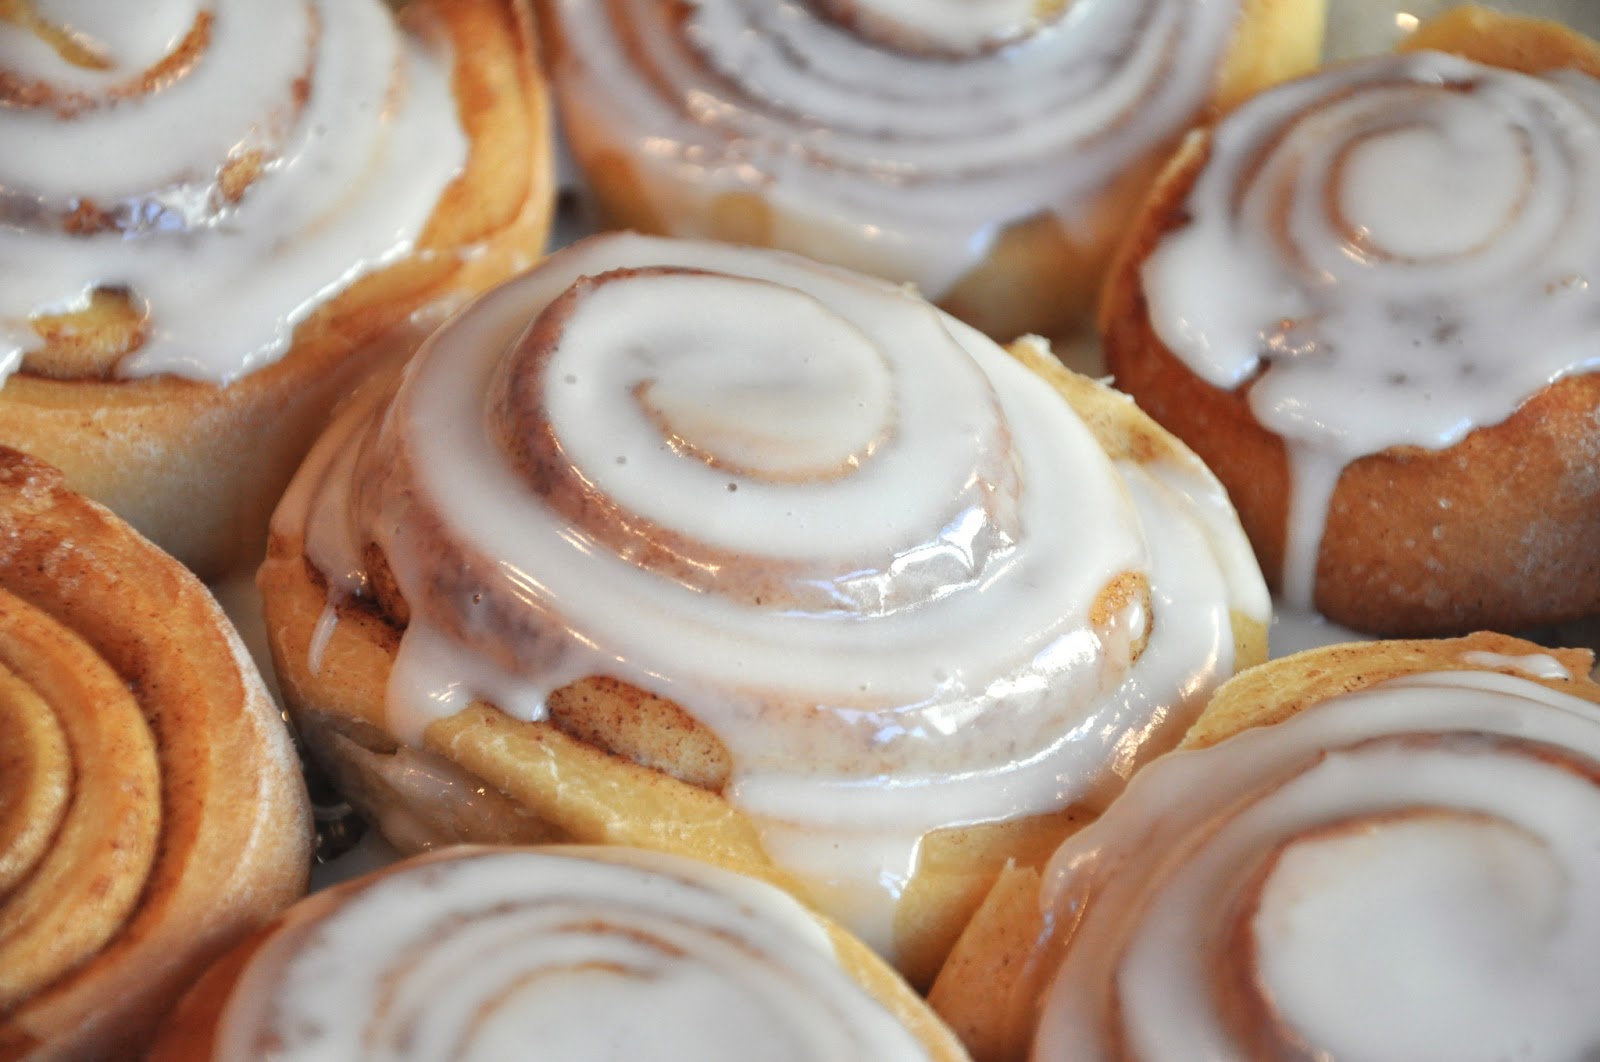
cinnamon buns. Hers were small and not at all like what you can buy at a mall food court, but they gave me a fondness for small, swirly rolls.
Around this time of year, I always start thinking of those cinnamon buns. They are a sacred tradition to me and I don't ever make them before December, but until then, I have to find substitutes. Last weekend, I threw together this savory variation. The dough recipe is similar to that of a traditional cinnamon bun, but they are filled with lots of gooey cheese, along with some shallots and herbs for extra flavor. They might just have to join in for this year's Christmas breakfast.
Enjoy!
 Swirly Cheese Buns

for the dough:
3 cups all-purpose flour
1 teaspoon salt
pinch of black pepper
1 tablespoon sugar
2 1/4 teaspoons instant yeast
1 cup milk
1/4 cup (1/2 stick) unsalted butter, melted and cooled to lukewarm, plus 1 tablespoon for brushing the rolls

for the filling:
1 small shallot, minced
1 1/2 cups grated fresh Mozzarella cheese
1/4 cup grated Parmesan cheese
1 teaspoon dried oregano (or finely chopped fresh herbs of your choice)
1/4 teaspoon salt
pinch of black pepper

To make the dough: In the bowl of a stand mixer fitted with the paddle attachment, combine the flour, salt, pepper, and sugar. Mix briefly to combine. In a medium measuring cup, whisk the yeast into the milk to dissolve. Add the yeast mixture and the melted butter to the mixer and beat on low speed just until a rough dough comes together. Switch to the dough hook and knead the dough on low speed for about 5 minutes, or until it is smooth and elastic.
Spray a large bowl with nonstick cooking spray. Shape the dough into a ball and place in the prepared bowl. Cover with plastic wrap and let rise for about 2 hours, or until doubled in size.
Meanwhile, in a small bowl, stir together all of the ingredients for the filling. Line two 9-inch round cake pans with parchment paper and set aside.
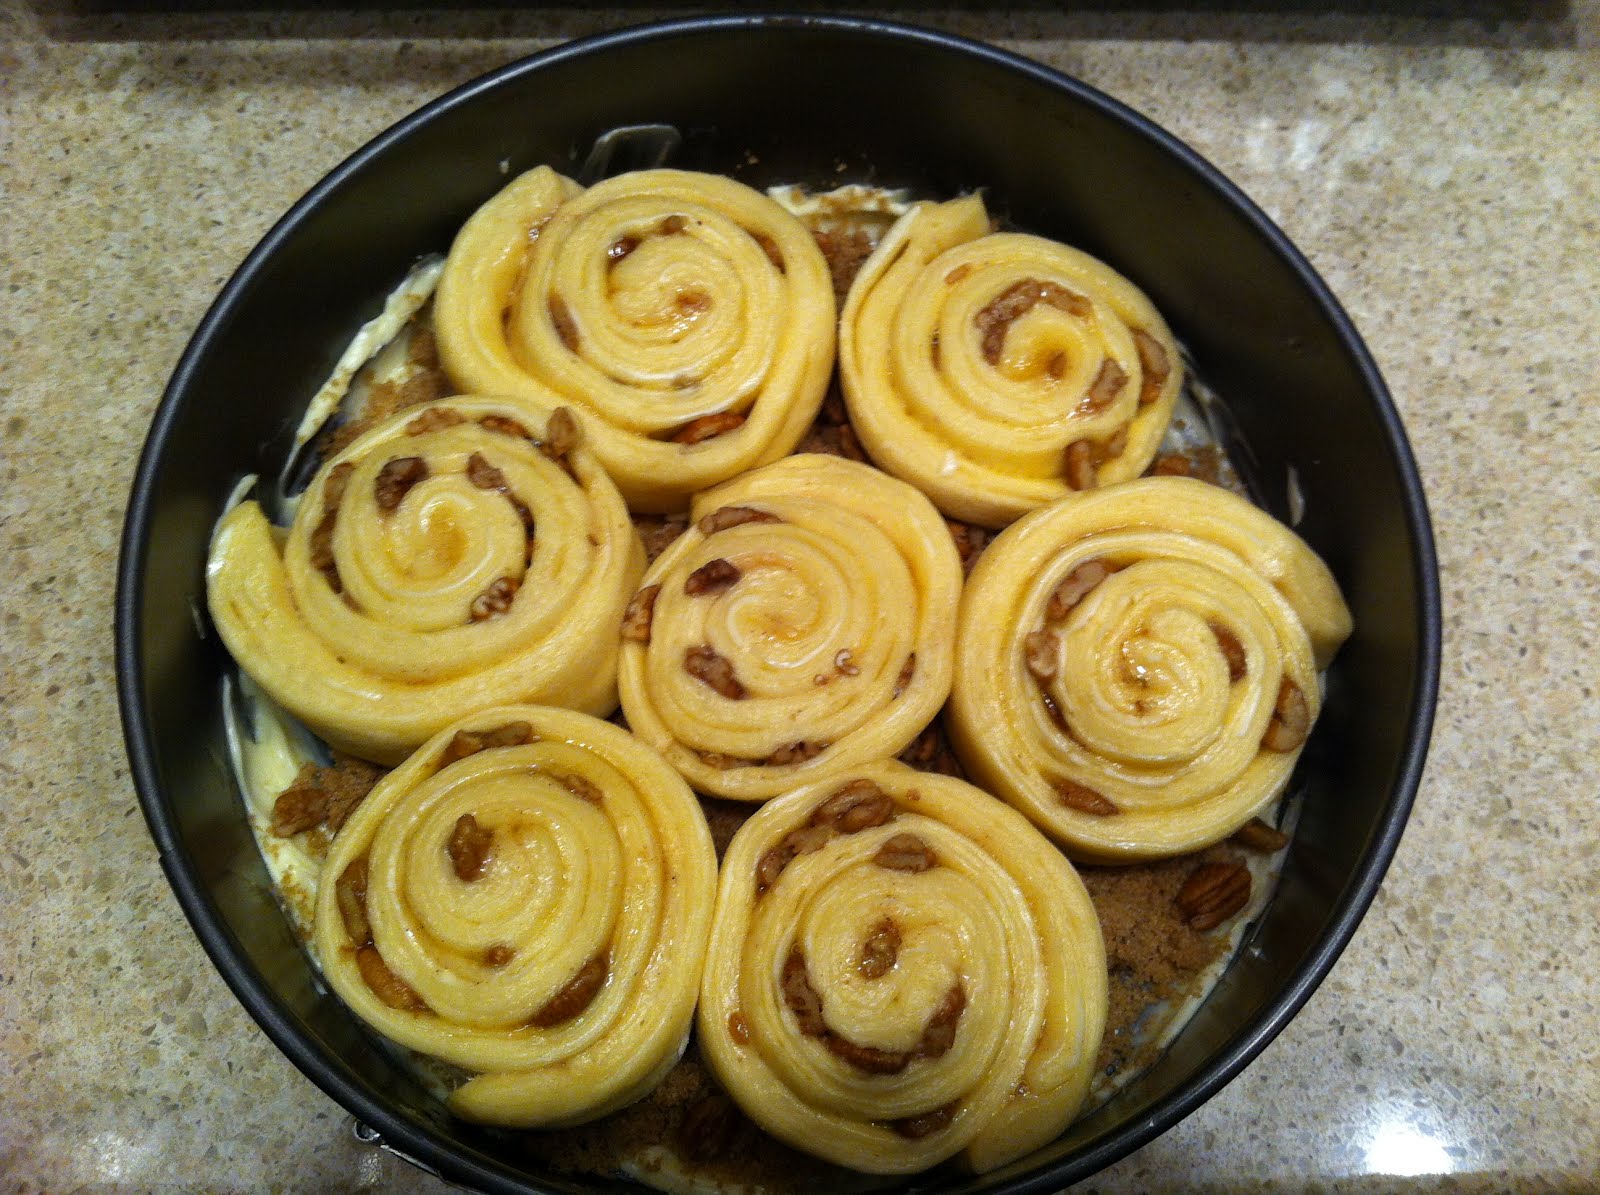
Turn the dough out onto a lightly floured work surface. Roll into a rectangle measuring about 12×16-inches. Spread the filling evenly over the dough, leaving about 1/2-inch border at the edge. Starting with a short side, roll the dough into a tight log. Cut the dough into 12 rolls, each about 1-inch wide. Place 6 of the rolls into each of the prepared pans, spacing them out evenly. Melt the remaining 1 tablespoon of butter and gently brush it over the rolls. Cover the pans with plastic wrap and let rise for about 2 hours, or until doubled in size.
Preheat oven to 350 F when the rolls are nearly done rising.
Remove the plastic wrap from the pans, and bake the rolls for 20-25 minutes, or until they’re golden brown and the cheese bubbles. Serve warm.

Monday, April 14, 2014

Cream Cheese Kolache

 Cream cheese what? No worries, about a week ago, I had no idea what a kolache (or "kolacky") was either. My music history class is doing presentations on composers from the Romantic Era, and my group was assigned Dvořák. When we determined what each group member was going to do, one of my designated tasks was bringing in a Czech dessert to symbolize Dvořák's homeland. (This really didn't do us any good grade-wise, but totally earned us endless love and admiration from the rest of the class.) 

When I researched Czech sweets, "kolache" came up over and over again. They are essentially small rolls with centers that have been hollowed out and stuffed with some kind of sweet filling (although they can also be made larger and cut into slices). I went with a cream cheese filling that's almost like cheesecake, and its richness complemented the fairly simple roll well. 
 These are pretty dense, and from what I read, they should be this way; you're not going for a brioche texture. That said, they're crazy addictive, especially warm out of the oven, and they are just sweet enough to feel indulgent yet totally appropriate for breakfast. We served them during first period, and they were much appreciated by our classroom full of sleep-deprived teenagers.
  Enjoy!

Cream Cheese Kolache
(adapted from The History Kitchen)

Dough
1 package active dry yeast (¼-ounce/2¼ teaspoons)
1 cup warm milk (105 to 115°F)
½ cup unsalted butter, softened
2 large eggs
6 tbsp granulated sugar 
1 tsp salt
½ teaspoon ground nutmeg
About 4 cups unbleached all-purpose flour 
Egg Wash
1 large egg, beaten
1 tsp cream, milk, or water
Cream Cheese Filling
16 oz. cream cheese, softened
1/2 cup granulated sugar or more to taste
2 large egg yolks
2 tablespoons all-purpose flour 
1 teaspoon vanilla extract or 1/2 teaspoon vanilla bean paste

In a small bowl or measuring cup, dissolve the yeast in ¼ cup milk.
In a large bowl, combine the yeast mixture with the remaining milk, butter, eggs, sugar, salt, and nutmeg. Blend in 1½ cups flour. 
Gradually add enough of the remaining flour to make a workable dough (it will still be fairly sticky).
On a lightly floured surface or in a mixer with a dough hook, knead the dough until smooth and springy, about 5 minutes.
Place in an oiled bowl and turn to coat.
Cover with a kitchen towel or loosely with plastic wrap and let rise in warm, draft-free place until nearly doubled in bulk, 2 to 3 hours, or in the refrigerator overnight.
Punch down the dough, knead briefly, cover, and let rise in a warm, draft-free place until nearly doubled in bulk, about 1¼ hours.
Line a large baking sheet with parchment paper or lightly grease the sheet. Punch down the dough, knead briefly, divide in half, form into balls, and let stand for 10 minutes.
On a lightly floured surface, roll out the dough ½ inch thick. Cut into 2½-inch rounds (or the size of your choice). Reroll and cut out the scraps.
Place on parchment paper-lined or greased baking sheets about 1 inch apart, cover with a towel or plastic wrap greased with cooking spray, and let rise at room temperature until nearly doubled in bulk, about 1 hour.

Meanwhile, make the cream cheese topping: in a medium bowl, beat the cream cheese and sugar until smooth. Blend in the yolks, flour, and vanilla.
Position a rack in the center of the oven. Preheat the oven to 375°F (350°F for a convection oven). Using your thumb or the back of a spoon, press 1 large, deep indentation into the center of each round, leaving a ½-inch wide-rim (I used a shot glass to do this). Brush the edges with the egg wash.
Spoon about 1 tablespoon topping into each indentation.
Bake until golden brown or the center of the dough registers about 180°F on an instant-read thermometer, about 12 minutes. Transfer to a wire rack and let cool.
Kolache are best eaten on the same day they are made, but can be covered with plastic wrap and stored at room temperature for up to 2 days or in freezer for up to 3 months.


  • -makes about 36 - 2.5" kolache
  • *Note: The history of this pastry is actually interesting and fairly complicated; check out the recipe's source for a detailed account.    :)

Monday, May 20, 2013

Lemon-Scented Cinnamon Buns

     I'm back!! My AP test is over, and I'm beyond excited to have my lazy weekend mornings and fun weekday afternoons back, with lots of room for baking!
     This recipe was actually made a couple of weeks ago, during one of my study breaks. Somehow studying seemed that much more pleasant when I could smell baking cinnamon buns in my oven...
It's so fluffy I'm gonna die! ("Up" reference? Anyone? No?...)
     These aren't quite the typical extra-large, sugar-coma-inducing cinnamon buns you might get at the mall food court (or at Ikea, as I learned yesterday...). These are fluffy, but they aren't super tall or extra sweet, largely due to the lemon zest and extract, which cut through the sweetness a little bit.
     In my opinion, cinnamon buns are the classic American weekend breakfast (with the possible exception of pancakes). I bought the book the recipe is from on a whim, when I suddenly became interested in baking bread. While lots of the recipes look pretty intimidating, I decided to start with something I had attempted before, and it ended up working out really well. I made the mistake of using active dry instead of instant yeast, so perhaps they didn't rise as much as they were supposed to, but I thought they were just the right size (and they didn't lose any fluffiness).
look at those sugar crystals...
    These are the perfect treat for a lazy weekend morning. Be warned, this recipe makes quite a large number of cinnamon rolls when you and your dad are the only ones eating them - I ended up sharing most of them with a friend at school, who wasn't too upset over having plastic containers full of pastries handed to her during English class. Two days in a row. ;)
    Enjoy!
Lemon-Scented Cinnamon Buns
(slightly adapted from The Bread Baker's Apprentice)

-6 1/2 tablespoons (3.25 oz) granulated sugar
-1 teaspoon (.25 oz) salt
-5 1/2 tablespoons (2.75 oz) shortening or unsalted butter or margarine, at room temperature
-1 large (1.65 oz) egg, slightly beaten
-1 teaspoon (.17 oz) lemon extract, or 1 teaspoon (.1 oz) grated lemon zest
-3 1/2 cups (16 oz) unbleached bread or all-purpose flour
-2 teaspoons (.22 oz) instant yeast
-1 1/8 to 1 1/4 cups (9-10 oz) whole milk or buttermilk, at room temperature, or 3 tablespoons (1 oz) powdered milk (DMS) and 1 cup (8 oz) water
-1/2 cup (4 oz) cinnamon sugar (6 1/2 tablespoons granulated sugar plus 1 1/2 tablespoons ground cinnamon)
-White Fondant Glaze (see recipe below)

1. Cream together the sugar, salt, and shortening on medium-high speed in an electric mixer with a paddle attachment (or use a large metal spoon and mixing bowl and do it by hand); if you are using powdered milk, cream the milk with the sugar, but add the water with the flour and yeast.
Whip in the egg and lemon extract until smooth. then add the flour, yeast, and milk. Mix on low speed (or stir by hand) until the dough forms a ball. Switch to the dough hook and increase the speed to medium, mixing for approximately 10 minutes (or knead by hand for 12-15 minutes), or until the dough is silky and supple, tacky but not sticky. You may have to add a little flour or water while mixing to achieve this texture. The dough should pass the windowpane test and register 77-81 degrees F.
Lightly oil a large bowl and transfer the dough to the bowl, rolling it around to coat it with oil. Cover the bowl with plastic wrap.
2. Ferment at room temperature for approximately 2 hours, or until the dough doubles in size.
3. Mist the counter with spray oil and transfer the dough to the counter. Shape the buns:
     -Roll out the dough with a rolling pin, lightly dusting the top of the dough with flour to keep it from sticking to the pin. Roll it into a rectangle about 2/3" inch thick and 14" wide by 12" long for larger buns, or 18" wide by 9" long for smaller buns. Don't roll out the dough too thin, or the finished buns will be tough and chewy rather than soft and plump.
      -Sprinkle the cinnamon sugar over the surface of the dough.
      -Roll the dough up into a cigar-shaped log, creating a cinnamon-sugar spiral as you roll. With the seam side down, cut the dough into 8-12 even pieces about 1 3/4" thick for larger buns; or 12-16 pieces each 1 1/4" thick for smaller buns.
4. Line 1 or more sheet pans with baking parchment. Place the buns approximately 1/2" apart so that they aren't touching but are close to one another.
5. Proof at room temperature for 75-90 minutes, or until the pieces have grown into one another and have nearly doubled in size. You may also retard the shaped buns in the refrigerator for up to 2 days, pulling the pans out of the refrigerator 3-4 hours before baking to allow the dough to proof.
6. Preheat the oven to 350 degrees F with the oven rack on the middle shelf.
7. Bake the cinnamon buns for 20-30 minutes, or until golden brown.
8. Cool the buns in the pan for about 10 minutes and then streak white fondant glaze across the tops while the buns are warm but not too hot. Remove the buns from the pans and place them on a cooling rack. Wait at least 20 minutes before serving.

White Fondant Glaze
Sift 4 cups of powdered sugar into a bowl. Add 1 teaspoon of lemon extract and 6 tablespoons-1/2 cup warm milk, briskly whisking until all the sugar is dissolved. Add the milk slowly and only as much as is needed to make a thick, smooth paste.
When the buns have cooled but are still warm, streak the glaze over them by dipping the tines of a fork or a whisk into the glaze and waving the fork or whisk over the tops. Or, form the streaks by dipping your fingers in the glaze and letting it drip off as you wave them over the tops of the buns. (Remember to wear latex gloves.)

Saturday, January 12, 2013

TWD Rewind: Finnish Pulla


   Hello from finals week! I have seven (!!!) finals coming up this week, so I have been super busy studying and trying to distract myself from just about everything else I would rather be doing! I decided to take a few hours off today, and I wanted to leave you with this quick post.
 I made this over Christmas break, and it was the perfect holiday treat - it is like a challah, but a bit sweeter and with a distinct note of cardamom (which actually comes from whole cardamom pods!) This recipe was actually pretty easy to make - the only issue I had was when it came to the baking time. The pictures above are from the first baking time the recipe gives, but when I cut into it, I realized that it actually needed about 20 minutes more. After that extra baking time, it was perfect!
  The recipe can be found on Erin's blog, The Daily Morsel.
  Enjoy!

Saturday, October 27, 2012

TWD: Bagels! (and Veggie Cream Cheese)

 I'm sorry. I'm sorry I've been gone for a week and a half. I'm sorry I haven't posted a new recipe in nearly three weeks. The kitchen being painted, our house's lack of heat due to a boiler switch, schoolwork, pottery classes, and various other shenanigans got in the way of baking these past couple of weeks. I actually made an okay gluten-free carrot cake last week, but it was kind of crumbly, and let's just say that the chocolate "glaze" resulted in a cracked, hard-as-rock layer of yuck. Overall, not a great culinary period of time...
 ...but. Last weekend, these bagels. Bagels have been on my to-bake list for years, and I never got around to making them. I was so excited when I saw that they had been chosen as last week's Tuesdays with Dorie! This week was actually a fifth Tuesday of the month, so we had a make-up week in case we wanted to go back and make something we missed. Perfect!
um, YUM!
 The dough was kneaded, left to rise, deflated, left to rise, shaped into doughnut shapes, boiled, baked, and left to cool. I made the quick Vegetable Cream Cheese from the book, using red bell peppers instead of radishes. The cream cheese was light and refreshing, as opposed to the heavy, buttery spreads that can sometimes be piled onto deli bagels.
Listen, dears. (I feel that as I'm writing about a recipe made on Julia Child's show, calling you dears is appropriate. 'Kay?) The thing is, I live in New York City. My hometown basically is the bagel capital of the world (Montreal, I don't even want to talk about this with you). I was skeptical that these could live up to the chewy perfection two dollars can get you on my corner.
I was wrong to doubt this recipe. These bagels are tender, golden-brown bites of delicious. They are like a very, very good New York deli bagel (although not quite so huge, which is a good thing). I am so glad I got to try out making this usually-store-bought staple at home, and I know I will be making bagels again in the future; that said, I'm not promising to never buy one again.
If you live near a great bagel place, give this recipe a try and compare the two results. Let me know what you find? If you don't live near a great bagel place, you must give this recipe a try, if only to understand what all the fuss is about. ;) The recipe, as always, can be found in Baking with Julia or on the host's blog, Heather's Bytes. Thanks for hosting, Heather!
    Enjoy!

Tuesday, October 2, 2012

TWD: Pumpkin Raisin Loaves

 You might be thinking that the slabs of bread above don't look like the picture-perfect loaves so many bakers are turning out this week. What can I say- some recipes just get mixed up. This week's Tuesdays with Dorie was one time-consuming recipe, and it left me thoroughly confused by the time I finished my first slice, over 24 hours after starting the dough. This was due to two things:
1. I made a couple of changes. I'm not a huge fan of fresh cranberries, plus I couldn't find them, so I figured I would use dried instead. When I was making the bread, I wasn't feeling the whole walnuts thing (ugh, chopping was involved, plus I'd rather not have crunchy bits in my bread), but I wanted to keep it very fall-spirited, so I decided to leave out the walnuts and raisins and go with just the cranberries. Oh, and then I dumped in a bag of what I thought was dried cranberries but turned out to be raisins. And they were hard to mix in. Whoops... and with that, Pumpkin Raisin Bread was born.
 2. I kind of misread the recipe. I didn't realize just how small the three loaves were supposed to be- I thought they were just slightly smaller than the 9x5" loaf pans I have- so I decided to bake the dough in two big loaf pans. I thought they would come out big and perfect for sandwiches, like last month's whole wheat bread, so imagine my surprise when my bread didn't rise to fill the large pans. The loaves baked up nicely, though, despite the shape.
This bread isn't light and fluffy, nor is it savory enough to be paired with meat and cheeses. It is sweet and ever-so-slightly dense, which makes it perfect for a cool fall morning. My dad ate lots of it plain, but I enjoyed it slightly toasted with jam or butter and cinnamon sugar. So maybe it's not exactly the way it was meant to be, but hey, it's a winner in my book.
The recipe can be found in Baking with Julia or on the host's blog, Rebecca of This Bountiful Backyard.
   Enjoy!

Wednesday, September 19, 2012

TWD: Whole Wheat Loaves

So sorry for the absence- I've been busy with other life-related things, like the start of school and Sweet 16 planning.  All good things, but they take up time! I've also been stuck in a bit of a baking rut... I'm sick of making breads and savory things, and I don't know what else to do. This week I had a free afternoon and promised myself that I would make something sweet, and I did, but it was an old favorite- this cherry pie- which, don't get me wrong, is wonderful, but I need something new.
cheesy rolls
Anyone want to send me your favorite sweet fall recipes? I'm looking for a great pumpkin bread...
 But back to today. This week's Tuesdays with Dorie recipe is hosted by Michele of Veggie Num Nums and Teresa of The Family That Bakes Together. Thanks for hosting! I decided to fancy it up a bit by baking half of the dough into little rolls, which I tucked some shredded mozzarella and a little butter into when I folded them into thirds. I baked them in my muffin top pan, and got 8 large rolls from half the dough. This was a fairly quick recipe (I did use maple syrup instead of malt extract, which can be hard to find) - I had a little trouble with the initial kneading of the dough, but it eventually all came together. This bread is tender and has a great flavor- not overwhelmingly "healthy-tasting," as some whole wheat breads can be.
I have been enjoying this bread as toast with nutella in the mornings and peanut butter and jelly. Yum! The recipe can be found on the hosts' blogs or in Baking with Julia, as always. Enjoy!
PB&J with homemade bread!

Tuesday, July 17, 2012

TWD: Semolina Bread

I am so excited about this recipe. The warm, crusty bread served hot at nearly every Italian restaurant in NYC? The one I've been wishing I knew how to make? I found it.
This bread is not exactly like the ones I get served at restaurants. It's not as flimsy, not as full of holes. It's so much better. It has a soft center but very crisp edges, and a great, slightly salty taste that makes it perfect for spreading with butter (but not so much so with fruit spreads).
This recipe is so easy to make. If you've never touched a packet of yeast before in your life, you can still make this bread. The dough is super quick to put together (especially if you use a stand mixer, like I did). I completely messed up the two rises - for the first, the loaf rose for about four hours instead of two, and for the second, the loaf was out in the open for about 8 hours before staying in the fridge overnight. Neither of these extremely long rises was intentional (I just wasn't home at the right times), but they ended up working out well, especially since my house was air-conditioned, which makes for longer rises. Some bakers in the group complained about an overly salty loaf; I put in the two teaspoons of salt the recipe calls for and thought that it was salty, but not more than it should be.
Thanks to Anna of Keep it Luce and Renee of The Way to My Family's Heart for being wonderful hosts for this week's Tuesdays with Dorie recipe!
<3

Thursday, June 14, 2012

TWD: Oasis Naan

I totally meant to post this Tuesdays with Dorie last week, I really did. But last week was finals week, and I had to bake some cookies for a trip over the weekend. Naan wasn't happening! I finally made this a few days ago, and was shocked at how easy it was. The dough is quick to throw together - the only thing that took up some time was the kneading, which unlike lots of other recipes in Baking with Julia, has to be done by hand. It then rises for a couple of hours and is baked in a 500 degree oven.
I thought the method of baking was really interesting. Baking sheets are heated in the oven as it preheats, and then the dough is put onto them and baked for just 6-8 minutes. This results in quick, bake-right-before-eating naan that is perfect steaming hot and served with anything soupy and delicious!
This was so delicious, and I loved the topping of scallions, salt, and cumin seeds. I learned to watch out with the cumin seeds, because just two or three on a piece of bread gives a pretty strong flavor. I wished I could have gotten the full eight naans out of this recipe, but my dog had other plans...
She actually climbed up onto the table to grab a piece of raw dough.I was not happy...
Oh well, just an excuse to make this again! The recipe can be found on last week's hosts' blogs, Maggie of Always Add More Butter and Phyl of Of Cabbages & King's Cakes.

Tuesday, May 29, 2012

TWD: Pecan Sticky Buns

Welcome to Tuesdays with Dorie's first Third Tuesday! Usually we do two recipes per month, but since May has three Tuesdays, we decided to make this a "rewind" week, where we can make whatever we want! I made these a couple of weeks ago, and ate them throughout the week (hey, celebrating my birthday, right?).
These are a buttery, sugary blob. But they're so delicious, they're worth it.
The flour on top of the yeast mixture cracked... yay!
This dough ROSE. The second rise was done in the fridge.
Lining the pan with butter, sugar, and pecans. I only made half the recipe, and froze the other half of the dough. We couldn't have two whole pans of these lying around!
The logs cut into pieces.
Risen and into the oven!
Oh my goodness, so delicious.
Make these! Please! The recipe can be found on the blogs of the two hosts from when the group made the recipe, Lynn of Eat Drink Man Woman Dogs Cat and Nicole of Cookies on Friday. Enjoy! <3

Sunday, May 27, 2012

Daring Bakers: Challah!

Sophia's Sweets is back to Daring Bakers!! I've been meaning to go back for a while, and every month I check the forums to see what everyone is making. Lately the recipes have just looked a bit too time-consuming, especially since the Tuesdays with Dorie recipes have been kind of intense! When I saw that this month's was challah, I knew I couldn't miss out.
"May’s Daring Bakers’ Challenge was pretty twisted – Ruth from The Crafts of Mommyhood challenged us to make challah! Using recipes from all over, and tips from “A Taste of Challah,” by Tamar Ansh, she encouraged us to bake beautifully braided breads."
I've made challah twice before, with some success. Both times it was very yummy right out of the oven and was okay the next day, but it was never anything that I thought would be worth the extra time to make, especially since the market on our corner sells great challah!
Their challah is very sweet, and I knew if I was going to make it myself, I wanted the sort of bread I could eat for breakfast every day without feeling like I just had dessert about twelve hours too early. I was looking for a recipe and couldn't find one I liked, when Erica from Cannella Vita emailed me wanting to share baking tips and recipes. She is another 15-year-old food blogger - go check out her blog, it's awesome! She is a member of Daring Bakers as well and hasn't done it in a while either, so we decided to do it together. She suggested this Apple Honey Challah, and it looked delicious!
It was the perfect recipe to ease myself back in to the group. It was a pretty simple dough, not a lot of fuss. I changed the recipe slightly by making half of the flour whole wheat, and I only had two eggs, so I used a little extra oil in the place of the third yolk and brushed the top with milk instead of eggwash.
It was the perfect recipe for a chilly Tuesday night. I did have some trouble with the braiding - I used this tutorial from The Challah Blog, but was not able to roll the strips out long enough to braid them that much. Oh well, I think it's pretty, and it sure is delicious! Enjoy! <3

Apple and Honey Challah
(slightly adapted from Smitten Kitchen)

Bread
2 1/4 teaspoons (1 standard 1/4-ounce packet) active dry yeast
1/3 cup (79 ml) plus 1 teaspoon honey
1/3 cup (79 ml) neutral oil, plus more for the bowl
2 large eggs plus 1 large yolk
1 1/2 teaspoons (8 grams) table salt
2 1/4 cups all-purpose (530 grams) or bread flour (578 grams), plus more for your work surface
2 cups whole wheat flour

Apple filling
2 medium baking apples, peeled, cored and in 1/2- to 3/4-inch chunks
Squeeze of lemon juice, to keep them from browning

Egg wash
1 large egg
Coarse or pearl sugar for sprinkling (optional)

Make your dough: Whisk yeast and 1 teaspoon honey into 2/3 cup warm water and let stand until foamy, a few minutes.
With a stand mixer: In the bowl of a stand mixture, whisk together yeast mixture, oil, remaining honey (1/3 cup), eggs and yolk. Switch to dough hook and add 4 1/4 cups flour and salt. Use dough hook on a moderate speed until it pulls all of the flour and wet ingredients together into a craggy mass. Lower the speed and let the dough hook knead the dough for 5 minutes, until smooth, elastic and a little sticky.
By hand: In a large bowl, whisk together yeast mixture, oil, remaining honey (1/3 cup), eggs and yolk. Add flour all at once and stir with a wooden spoon until you get a craggy mass of uneven dough. Turn dough out onto a floured counter and knead it into a smooth, elastic dough, about 5 to 8 minutes. Try to use as little flour as necessary when kneading the dough; you don’t want to toughen the bread. A bench scraper can make it really easy to remove it from the counter if it gets stuck in a spot.
Both methods: Transfer dough to large oil-coated bowl, cover with plastic wrap and set aside for 1 hour, or until almost doubled in size.
Add apples to dough: Turn dough out onto a floured counter and gently press it down into a flat, oblong shape. The shape does not matter so however it goes, it goes. Spread 2/3 of apple chunks over 1/2 of the flattened dough. Fold the other half over the apple chunks and press the dough down around them, flattening the now lumpy dough. Spread the remaining 1/3 apple chunks over half the folded dough. Fold the other half over the apples, pressing the dough down again. Your dough packet will likely be square-ish. Fold the corners under with the sides of your hands and form the dough into a round. Upend your empty bowl over and set it aside for another 30 minutes.
Weave your bread: Divide dough into 4 pieces. Roll and stretch each one as carefully as you can into a rope — don’t worry about getting it too long or thin, just 12 inches or so should do. If any apple chunks fall out as you form the ropes or at any other time in the forming of the loaf or risings, just poke them back in with your finger.
Arrange two strands in each direction, perpendicular to each other, like a plus sign. Weave them so that one side is over, and the other is under, where they meet. So, now you’ve got an 8-legged woven-headed octopus. Take the four legs that come from underneath the center and move them over the leg to their right, i.e. jumping it. Take those legs that were on the right and again, jump each over the leg before, this time to the left. If you had extra length to your ropes, you can repeat these left-right jumps until you run out of rope. For me, this was enough. Just as you had with the folded packet of apple dough above, tuck the corners/odd bumps under the dough with the sides of your hands to form a round.
Transfer the dough to a parchment-covered heavy baking sheet or baker’s peel (if you’ll be using a bread stone). Beat egg until smooth and brush over challah. Let challah rise for another hour but 45 minutes into this rise, preheat your oven to 375 degrees.
Bake your loaf: Before baking, brush loaf one more time with egg wash and sprinkle with coarse sugar if you’re using it. Bake in middle of oven for 40 to 45 minutes. It should be beautifully bronzed; if yours (like mine, except I didn’t catch it in time) starts getting too dark too quickly, cover it with foil for the remainder of the baking time. The very best way to check for doneness in any bread but especially on like this where the wetness of the apples can slow down the baking time a bit, is with an instant read thermometer — the center of the loaf should be 195 degrees.
Cool loaf on a rack before serving.

Tuesday, February 7, 2012

TWD: White Loaves


This is a quick post, as I am super busy tonight. This is the first ever recipe for the new book, Baking with Julia!! I am super excited to be in this group! It was chosen by the great girls at Slush and Someone's in the Kitchen.
This was a fairly simple recipe, and probably the most successful bread I've ever made (not that I've made many). I added in a little cinnamon sugar swirl with butter when I was rolling it up. This was delicious as toast, and I will make it again in the future if I want a simple white loaf. If using the cinnamon swirl bread and wanting to eat it plain, I would recommend adding in a little more sugar to the actual dough - it was a little bland, but did have a great texture. I'm sure it would be delicious with raisins as well.
Enjoy!

Tuesday, July 6, 2010

I've Been a Bad Blogger...

I'm so, so sorry. I've been completely neglecting this blog. But now I'm back... although I'm away right now and wasn't able to make this week's TWD. And I won't be able to make next week's... whoops. But for now, I'll post the last 3 (!!!!) weeks' recipes. Here we go.


Three weeks ago, Susan of Food.Baby picked the Raisin Swirl Bread. I had been looking forward to this recipe since I got the book, and was so excited it was finally picked. It was simple to make, and I had no problems with it. Obviously my swirl is not perfect, because my bread was longer than the loaf pan and I had to tuck the ends under. The taste? It was really good. Next time I think I would add more sugar to the swirl and maybe a bit more to the dough as well, because it was a tiny bit bland. But there definitely will be a next time! You can find the recipe here.


Two weeks ago, Amy of Amy Ruth Bakes chose the Dressy Chocolate Loaf Cake. I had a few issues with this one. First, my cake sank. I don't know why, but it did. So there is a dent in my cake. Whoops. Also, the sour cream that I got had separated. It was still perfectly good, but it made the frosting a bit lumpy. All in all, the cake won't be winning any prizes for looks, but it was really yummy. I found the icing a bit too dark for my taste, but everyone else loved it. I probably won't make this one again, but you can find the recipe here if you want to try it for yourself.


Finally, last week Wendy of Pink Stripes chose the Rum-Drenched Vanilla Cakes. These were super simple to put together (No mixer needed!), but did take a long time to bake. I halved the recipe and baked it in only one loaf pan. It overflowed, but this could be because I was using a slightly smaller size than recommended (I'm really not sure, and I was too lazy to pull out the tape measure). After the cake came out of the oven, I brushed it with rum syrup (just water, sugar, and rum). I don't love the taste of rum, so I thought I wouldn't like this cake. The rum taste wasn't very strong, though - the cake tasted more like vanilla (due to the vanilla bean in the batter). Everyone loved this cake, and I'll definitely make it again. You can find the recipe here.

Since next week and this week's TWD recipes won't be made anytime really soon (or at least I don't think... maybe I can try to get the tart done here in Brazil...), they will be added to my list of rewinds and I'll post them here as soon as they are made. See you soon, and Enjoy!

P.S. About this month's Daring Bakers challenge... yeah, that wasn't gonna happen around here. No time! But no worries, this month's will be up on the 27th (I'm super excited about it!)