Showing posts with label bar cookies/brownies. Show all posts

Monday, August 11, 2014

Spicy Chocolate Brownies

 Last summer, my dad and I spent three days in Paris. He had been there several times in the past, so he told me that I could plan the trip as I wanted, and he would be happy to follow along. I made sure that we got to all of the usual tourist spots - the Eiffel Tower, the Arc de triomphe, etc. - but also planned our days around pâtisseries. I had spent years reading about food bloggers' adventures eating in Paris and had been making a mental list of places to go - so when I got three days to play with, I had to fit in as much as I could!
On our first day, we were walking down a narrow street on our way to lunch and were stopped by a man who offered us a chocolate sample from his little shop. It was a thin dark chocolate bark with chili in it - it wasn't something I would usually go for, but we were in Paris, so why not? Even though his shop wasn't one on my list, he ended up giving us one of the best chocolates we had ever eaten.
 This brownie uses that same combination of dark chocolate and spice. With cinnamon and a hint of cayenne pepper, the chocolate flavor is enhanced, and it makes for a brownie you can't eat just one of. These are more cakey than the usual brownie, but in this case it works surprisingly well; that said, if you want them fudgier, feel free to leave out about 1/4 cup of the flour.
  Enjoy!
Spicy Chocolate Brownies 
(slightly adapted from Food Network Magazine)

2 sticks unsalted butter, plus more for greasing
2 cups brown sugar
4 large eggs
2 teaspoons vanilla extract
2/3 cup good-quality unsweetened cocoa powder
1 cup all-purpose flour
1 teaspoon ground cinnamon
1/4 teaspoon chili powder or cayenne pepper
1/2 teaspoon kosher salt
1/2 teaspoon baking powder

Preheat oven to 350 degrees. Grease a 9x13 baking dish with butter.
Melt the 2 sticks of butter in a nonstick saucepan over medium-low heat; do not boil. Remove from the heat and let cool slightly. Add the brown sugar, eggs, and vanilla and stir with a wooden spoon until combined.
Add the cocoa, flour, cinnamon, chili powder, salt, and baking powder and mix until smooth. Spread the batter in the prepared pan and bake until a toothpick inserted in the middle comes out mostly clean, 20 to 25 minutes. Cool in the pan on a rack before slicing.

Saturday, November 23, 2013

Toffee-Topped Pumpkin Blondies

 I'm sorry if you're getting sick of all the pumpkin recipes on here. I promise it'll only last until next week (Thanksgiving, which in my opinion marks the official start of Christmas cookie season!). The last couple of months of the year are always insane, with tests, concerts, holiday parties, and of course, lots of delicious food. On Thursday, I took an hour out to just bake whatever I wanted to, and this was what I came up with.
These blondies are a combination of everything good. Pumpkin puree and pumpkin pie spice make them reminiscent of my favorite Starbucks drink, and the addition of chocolate makes anything better. The toffee bits sprinkled over the top give them a delicious crunchy layer that makes them irresistible. I snuck some into school for friends, and they were far gone by the end of the day.
Enjoy!
Toffee-Topped Pumpkin Blondies
(heavily adapted from The Domestic Rebel)

2/3 cup butter
2 cups brown sugar
2 tsp vanilla extract
1/2 cup unsweetened pumpkin puree
2 1/2 cups all-purpose flour
1 tsp baking powder
1/4 tsp baking soda
1/4 tsp salt
1 tsp pumpkin pie spice
1 cup semisweet chocolate chips
1 cup toffee baking bits

Preheat oven to 350 degrees F. Grease an 8×8″ baking pan; set aside.
In a medium saucepan, melt the butter and brown sugar together. Allow to cool for about 5 minutes. Stir in the vanilla and pumpkin puree. Add the flour, baking powder, baking soda, pumpkin pie spice and salt and stir until a dough has formed (it may seem thick for blondie dough; no worries). Stir in the chocolate chips. If the dough is still warm, they may start to melt - that's perfectly okay, a little chocolate swirl never hurt anybody!
Spread the mixture into your prepared pan. Sprinkle the top evenly with the toffee bits. Bake for about 30 minutes, or until a toothpick inserted near the center comes out mostly clean. Cool completely before cutting into squares. (Although they will smell incredible warm out of the oven, don't try to cut them until they're cooled - trust me!)

Wednesday, October 9, 2013

Bittersweet Brownies with Pumpkin Cream Cheese Frosting

 Remember last week, when I mentioned something special I was working on? Well, this week was supposed to be pumpkin week here, but... life (and a pretty cool order that I'll tell you about soon) got in the way, and we're left with 2 pumpkiny recipes. But they're pretty great.
  I am slightly obsessed with anything "fall-flavored," from pumpkin spice lattes to cinnamon pancakes. I tried out something totally different with these brownies, and to my surprise, it totally worked.
 The brownies are dark, chewy, thin, and super chocolatey. They may be a new favorite, especially to use as a base for other variations. On top comes a cream cheese frosting mixed with pumpkin puree that is insane - it's sugar and spice and everything nice. (Too much? Sorry...)
 These are unlike any other fall treat that might be sitting in one of your Pinterest boards, and totally worth a shot - who knows, they might become a new Fall go-to for you, too!
  Enjoy!
Bittersweet Brownies with Pumpkin Cream Cheese Frosting

Bittersweet Brownies
3 ounces (85 grams) unsweetened chocolate, roughly chopped
1 stick (4 ounces or 115 grams) unsalted butter, plus extra for pan
1 1/3 cups (265 grams) granulated sugar
2 large eggs
1 teaspoon (5 ml) vanilla extract
1/2 teaspoon flaky sea salt or 1/4 teaspoon table salt (about 2 grams)
2/3 cup (85 grams) all-purpose flour

Heat oven to 350°F. Line an 8×8-inch square baking pan with parchment, extending it up two sides, or foil. Butter the parchment or foil or spray it with a nonstick cooking spray.
In a medium heatproof bowl over gently simmering water, melt chocolate and butter together until only a couple unmelted bits remain. Off the heat, stir until smooth and fully melted. You can also do this in the microwave in 30-second bursts, stirring between each. Whisk in sugar, then eggs, one at a time, then vanilla and salt. Stir in flour with a spoon or flexible spatula and scrape batter into prepared pan, spread until even. Bake for 25 to 30 minutes, or until a toothpick inserted into the center comes out batter-free.
Let cool before frosting.


Pumpkin Cream Cheese Frosting
(adapted from Chow)
3 cups powdered sugar, sifted
1/2 teaspoon ground cinnamon
1/8 teaspoon freshly ground nutmeg
6 ounces cream cheese, at room temperature
4 tablespoons unsalted butter (1/2 stick), at room temperature
1/4 cup pumpkin purée (not pie filling)

Place the sugar, cinnamon, and nutmeg in a medium bowl and whisk to combine; set aside.
Place the cream cheese and butter in the bowl of a stand mixer fitted with a paddle attachment and beat on medium speed until fully combined and smooth, about 1 minute.
Reduce the speed to low, slowly add the powdered sugar mixture, and beat until fully incorporated and smooth, about 3 minutes.
Turn the mixer to medium speed, add the pumpkin, and mix until fully incorporated and smooth, about 1 minute. You may need to add more powdered sugar to reach desired consistency.


Frost pan of cooled brownies. (You may have frosting left over. Just eat it with a spoon use it on cupcakes!) Refrigerate frosted brownies for about 15 minutes before cutting.
   -Makes about 20 brownies, depending on how large you cut them.

Tuesday, May 7, 2013

Banana Nutella Bars (Teenage Cakeland Guest Post!)

     AP Global has taken over my life for a bit - for the next 9 days, actually, because I cannot WAIT for this to be over - until the AP test, after which I'll have plenty of time for baking lots of sweet treats to entertain you with! Actually, I have big baking plans for next Friday - and I say big both in size and degree of awesome (Star Wars fans, get super excited!).
    In the meanwhile, thanks SO much to Dru of Teenage Cakeland for offering to guest post while I'm studying (she was lucky enough to finish her AP last week!). I was sold the minute I saw the word Nutella.
    Enjoy!
 Hello, readers of Sophia's Sweets! I'm Dru from Teenage Cakeland. Recently, Sophia did a guest post for me (these delicious S'more Brownies!) while I was in a studying craze , so when she said she needed some help while preparing for her own APs, I was more than happy to return the favor!
I'm sure Sophia will agree that we teenagers are under a lot of stress, a lot of the time. We all need an escape from the intensity of real life. When I bake, it's all I need to think about. I can enjoy myself and the things that I can create. There's no pressure, because it's what I love.
Want to know what else I love? Nutella. And I don't think I'm alone here. Banana Nutella Bars are the only recipe all my friends request for their birthdays, for holidays, and every time I ask them for ideas on what to bake. The moistness of the bananas and the creamy marbled Nutella create a gooey, melt-in-your-mouth bar with a heavenly flavor. They're everyone's favorite- and soon, yours, too!
 Banana Nutella Bars 
                                                     (adapted from Healthfull Ever After)

                                                                 2 bananas, mashed
                                        1/3 cup blended cottage cheese (or an extra banana)
                                                                3/4 cup white sugar
                                                                      1 tsp vanilla
                                            1/3 cup Greek yogurt (I use vanilla Chobani)
                                                                  1/4 cup applesauce
                                                                             2 eggs
                                                                         1 pinch salt
                                                                      1/2 tsp cinnamon
                                                                     1 tsp baking soda
                                                                         1 cup flour
                                                            3/4 cup whole wheat flour
                                                                     1/2 cup Nutella

Preheat oven to 350 degrees F. Line a 9x13 inch pan with parchment paper and grease with cooking spray.
In a stand mixer, mix mashed bananas with sugar, vanilla, yogurt, applesauce, and eggs until well blended.
In a medium bowl, sift together salt, cinnamon, baking soda, and flours.
Add the flour mixture to the wet ingredients and mix on low until just combined.
Pour half the batter into the prepared pan. In a glass measuring cup, heat the Nutella about 30 seconds, or until just pourable. Pour half the Nutella over the batter in a zig zag design and swirl with a knife to marble.
Top with the rest of the batter and repeat marbling with the second half of the heated Nutella. The marbling design will look similar to this:
 Bake for 28-30 minutes, until the top is firm and golden. Cool completely before cutting.

Saturday, April 27, 2013

S'more Brownies (guest post)

     I had the honor of posting these s'more brownies on my friend Dru's blog, Teenage Cakeland! Check out my guest post (and the great recipe) here.
    Enjoy!

Thursday, April 25, 2013

Butterscotch Chocolate Chip Blondies

     Some of the people I enjoy baking for the most are my friends. Yes, I like giving them yummy things, but it's also nice to occasionally have critics who will love just about anything I make. When I bake for a big group of fellow teenagers, I generally keep it pretty simple - not too many fancy layers or flaky pastries - that way, I know everything will disappear quickly!
     I'm in AP World History this year, which... well, it's not the easiest course (to say the least). My teacher has been having some review sessions after school in preparation for the AP exam in 3 (!!!!) weeks, and I decided that snacks were in order. As long as we were struggling over which Chinese dynasty had which rulers, we might as well have sweets.
     A couple of weeks ago I made s'more brownies, which everybody loved. This week, I decided to keep with the bar cookie theme - bar cookies are quick to bake, with no scooping of individual cookies, and not messy to serve - but something less chocolatey. Enter blondies.
     These are delicious blondies, chock full of butterscotch chips and melty pieces of chocolate. I had to add in an extra egg to the batter because it was too dry (my version of the recipe is below), and it resulted in a blondie that is the perfect combination of chewy and cakey. I love these, and so does my family - I'll find out tomorrow what my classmates think of them ;)
     Enjoy!
Butterscotch Chocolate Chip Blondies
(adapted from Hershey's Kitchens)

3/4 cup (1 1/2 sticks) butter or margarine, softened
3/4 cup light brown sugar  
1/2 cup granulated sugar 
3  eggs 
2 cups all-purpose flour 
1 teaspoon baking soda 
1/2 teaspoon salt 
1-3/4 cups (11-oz. pkg.) butterscotch chips 
1 cup semisweet chocolate chips

Heat oven to 350°F. Grease 13x9x2-inch baking pan.
Beat butter, brown sugar and granulated sugar in large bowl until creamy (I did this by hand). Add eggs; beat well. Stir together flour, baking soda and salt; gradually add to butter mixture, beating until well blended. Stir in butterscotch chips and nuts, if desired. Spread in prepared pan.
Bake 30 to 35 minutes or until top is golden brown and center is set. Cool completely in pan on wire rack. Cut into bars.
   -Makes 24 to 36 bars, depending on how big you cut them.

Thursday, April 11, 2013

TWD Rewind: {Salted} Best Ever Brownies

     I love all of the variations on brownies bakers come up with every day. They're indulgent, delicious, and totally new - I even have a batch of chunky s'more brownies cooling on my counter right now. But sometimes you just need a classic brownie.
     This might be my new go-to recipe. While they do take longer to make than my old recipe, they are so, so worth it.
     I know brownie texture is a controversial topic with many people - some like them like cake, some like them as dense as fudge. I think this is the perfect balance between the two. The mixture of chocolates gives them a great flavor, too. I sprinkled quite a bit of fleur de sel on top of the pan of batter before baking, which enhances the deep chocolatey flavor. You can expect to see my own variations on this recipe coming up!
   The recipe can be found on the host's blog from a Tuesdays with Dorie I missed back in November.
   Enjoy!!

Wednesday, July 25, 2012

Thick and Creamy Lemon Bars

Lemon bars are one of those quintessential bakesale treats. Available at just about every elementary school fundraiser, they never fail to please. While second graders will usually head straight to the colorful cupcakes and rice krispie treats, some of the older customers will be sensible and go to the lemon bars!
The problem with lemon bars is that they are often either too sour, from too much lemon juice, or much too sweet, with lots of unnecessary sugar. This recipe finds the perfect balance - the crust is crumbly and sweet, and the filling is tart but not overly so. It has lots of lemon zest, which creates a nice strong flavor.
The balance between the filling and crust in these bars is very nice. There is plenty of filling, but if you like a larger crust-to-filling ratio, feel free to reduce the lemon layer. If you ever are involved in a bake sale, be sure to take these; the people smart enough to choose them will thank you.
Enjoy! <3
Thick and Creamy Lemon Bars
(from Smitten Kitchen)

For the crust:
1 cup (2 sticks) unsalted butter, at room temperature
1/2 cup granulated sugar
2 cups flour
1/8 teaspoon kosher salt

For the lemon layer:
6 eggs, at room temperature
2 1/2 cups granulated sugar
2 tablespoons grated lemon zest (4 to 6 lemons)
1 cup freshly squeezed lemon juice
1 cup flour

Confectioners’ sugar, for dusting

Preheat the oven to 350 F and grease a 9 x 13 inch baking pan.
For the crust, cream the butter and sugar until light in the bowl of an electric mixer fitted with the paddle attachment. Combine the flour and salt and, with the mixer on low, add to the butter until just mixed. Dump the dough onto a well-floured board and gather into a ball. Flatten the dough with floured hands and press it into the greased baking sheet, building up a 1/2-inch edge on all sides. Chill.
Bake the crust for 15 to 20 minutes, until very lightly browned. Let cool on a wire rack. Leave the oven on.
For the lemon layer, whisk together the eggs, sugar, lemon zest, lemon juice, and flour. Pour over the crust and bake for 30 to 35 minutes, or about five minutes beyond the point where the filling is set. Let cool to room temperature.
Cut into rectangles or squares (I did some of both) and dust with confectioners' sugar.

Sunday, July 22, 2012

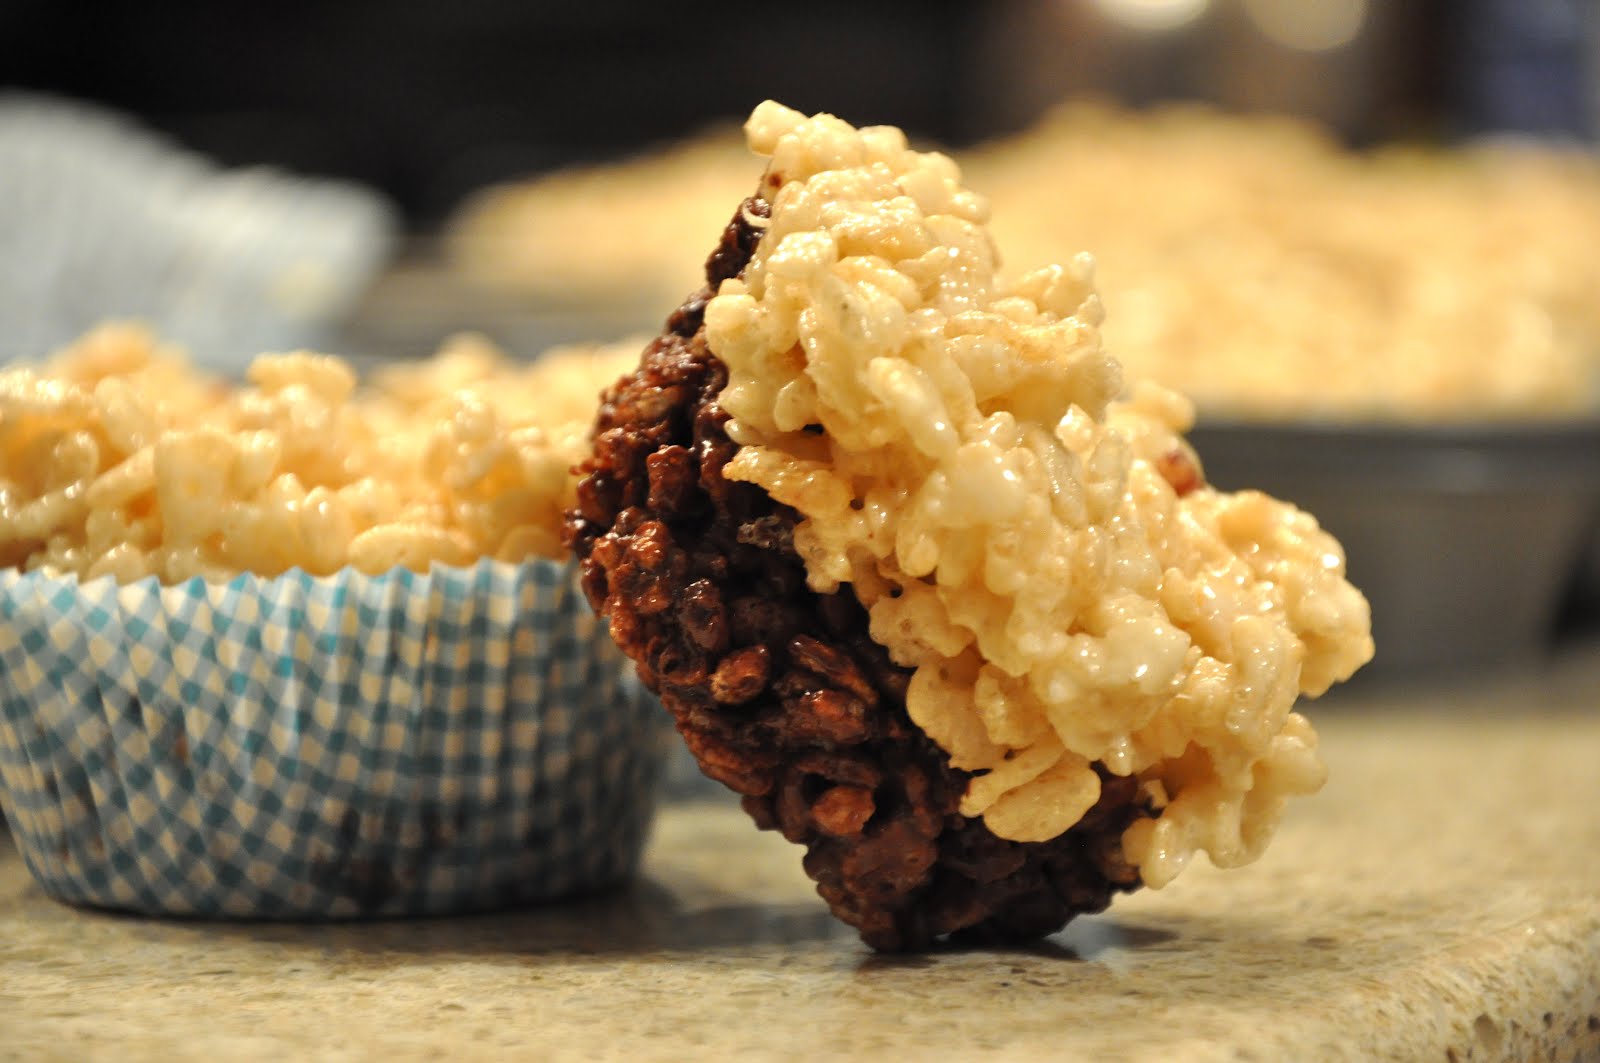
Black and White Rice Krispies

Rice Krispies were always one of my favorite treats as a kid. The crinkly blue package filled with crispy, sweet squares of marshmallow-covered cereal were the perfect after-school snack. A few years ago, when I became vegetarian, I gave up gelatin, and therefore, most marshmallows. A few weeks ago, I decided that too many things had gelatin in them and I was missing out on too much, so I went back to it. Since then, I've realized that the pre-packaged rice krispie treats are nothing compared to homemade ones. I usually use the classic recipe from the cereal company, but seeing all the variations on food blogs, I decided to try something new.
These are the greatest rice krispies I've ever had. They are made entirely of rice krispie cereal, not half of chocolate cereal, but half of the rice krispies are combined with cocoa powder and chocolate chunks. The chocolate offsets the extremely sweet marshmallows, and the bottom and top layers create the perfect balance of chocolate and vanilla. In my opinion, this is a much better treat than those little blue packages.
Enjoy! <3
Black and White Rice Krispies
(slightly adapted from Baking Bites)

4 tbsp butter, divided
1 1/2 oz bittersweet chocolate, chopped
1 tbsp cocoa powder
1 tsp vanilla extract
40 regular marshmallows or 4 cups mini marshmallows, divided 6
1/2 cups Rice Krispies/rice bubble cereal, divided
1/2 cup bittersweet chocolate, chopped, or mini chocolate chips

Line 18 muffin cups with paper liners.
In a large microwave-safe mixing bowl, melt 2 tbsp butter, 1 1/2 oz bittersweet chocolate, and cocoa powder. Stir frequently to fully incorporate cocoa and to prevent scorching. Add half of the marshmallows and microwave for 1-2 minutes, until fluffy and melted. Add in 3 1/4 cups rice krispies and stir to combine, making sure chocolate covers the whole batch. Stir in chopped bittersweet chocolate or chocolate chips and divide mixture evenly among prepared muffin tins, filling each 1/2 way up.
In a large microwave-safe mixing bowl, melt 2 tbsp butter and mini marshmallows in microwave for 2-3 minutes, until marshmallows are fluffy and butter is completely melted. Add in vanilla and remaining 3 1/4 cups rice krispies and stir to coat every rice krispie.
Divide evenly among chocolate-filled muffin tins, filling each the rest of the way up.
Chill in the refrigerator for 15 minutes or let set at room temperature before serving. Store in an airtight container at room temperature.
-makes 18 rice krispies

Monday, June 25, 2012

Strawberry Oat Crumble Bars

I had two reasons for making these bars.
The first was that ever since I started baking, I look at lots and lots of food blogs for recipes and ideas. Every time I search through recipes, one comes up for crumble bars. These bars are a layer of buttery, crumbly dough, topped by some sort of fruit or jam, and then finished with a layer of "crumble," usually made out of the same dough as the bottom layer. They look delicious and summery, and they were always on my to-do list. Until yesterday.
The second reason for making these bars (you do realize I'm just trying to justify my adding another pan of buttery baked goods to our kitchen?) was that I was looking for something to bake, so I went to one of my favorite food blogs, 17 and Baking. This was the first recipe I saw, and it looked perfect for what I had in mind; it was quick, summery, and (most importantly) yummy!
I loved how these came out. They are crumbly and a little thinner than I thought they would be, but still delicious. When I was in the middle of baking, I realized I had bought strawberry jam instead of raspberry - oh well! I cut down the butter by one tablespoon because that was all I had (whoops!), but I think it would have been even better with the original amount. Despite these bars being very sweet, they have an addictive quality to them! They also gave me lots of new ideas for flavor combos...
Enjoy! <3
Strawberry Oat Crumble Bars
(Slightly adapted from 17 and Baking)


1 1/4 cups flour
1/3 cup packed light brown sugar
1/2 tsp salt
5 oz (10 tablespoons) cold unsalted butter, cut into pieces
1 tablespoon milk
1 1/2 cups old fashioned oats
3/4 cup strawberry jam

Preheat oven to 375 degrees F.
Mix the flour, sugar, and salt in the bowl of a food processor, then add the butter and pulse until a dough starts to form. Blend in the milk. (If you don’t have a food processor you could do this with an electric mixer, a pastry cutter, or even a couple of forks or knives.) Transfer the dough-bits to a bowl and knead in the oats until well combined.
Put 3/4 cup dough off to the side (this will be used as the crumble.) Press the rest of the dough evenly into a buttered 9×9″ metal baking pan (Or line with parchment paper). Spread the jam evenly over the top (if the jam seems tough to spread, heat it up a little to thin it.) Crumble the reserved dough evenly over the top.
Bake in the center of the oven until golden, 20-25 minutes, and cool completely in the pan on a rack. Use a knife to loosen the sides, lift it out, and cut into bars on a cutting board.

Friday, June 15, 2012

TWD Rewind: Snickery Squares

Whenever I pick up a cookbook for the first time, I flip through it and look for the most attractive pictures. I'm pretty sure everybody does this - when you aren't familiar with a book, the first thing you do is try to find the tastiest thing in there! When I picked up BFMHTY, the picture of the Snickery Squares caught my eye right away. I mean, what was essentially homemade snickers?? I've had this book for years, so I have no idea why it took me so long to get around to making this recipe. I think I had always thought the middle layer was going to be some complicated homemade caramel recipe, but as I was reading the recipe last week when I decided I was finally going to make it, I realized it is really just a layer of store-bought dulce de leche. You can easily use homemade dulce de leche, but I have a brand I love that I buy at a Brazilian supermarket, and it's always in my kitchen.
This recipe is surprisingly simple to make, but seems like it took hours when you bite into one of the little squares. It starts with a simple shortbread on the bottom, which I made gluten-free by subbing in gluten-free all-purpose flour and a little xanthan gum for the wheat flour. Then comes a layer of dulce de leche sprinkled with caramelized peanuts. The peanuts were really quick to candy - the caramel cooked extremely fast and they were ready to break apart in just a few minutes. I would maybe have liked a thicker layer of "candy" on them, because it wasn't all that noticeable when eating the bars. After the peanuts comes a layer of bittersweet chocolate, followed by some more crushed peanuts. Yum!
I was so happy with how this recipe turned out, and can't believe it took me about four years to get around to making it! The recipe can be found in Baking From My Home To Yours, as always!
<3

Tuesday, May 1, 2012

TWD: Hungarian Shortbread

Thanks to Lynette of 1smallkitchen and Cher of The Not So Exciting Adventures of a Dabbler for hosting this week's Tuesdays with Dorie!
This is quite an interesting recipe. The word "shortbread" makes me think of the think, crumbly, buttery, sweet cookies from Christmastime (typing that just made me wish it was Christmas...), but this is nothing like that. The dough is simple enough, and is grated (grated???) into a pan, with a layer of homemade rhubarb jam in between. The jam was actually surprisingly simple to make, but I don't think the rhubarb we bought was the greatest - kind of tasteless.
This recipe has a LOT of butter in it, but somehow doesn't taste overly buttery. I cut down the sugar to 1 1/2 cups based on previous reviews, but it wasn't lacking sweetness. This really did not turn out like the shortbread I'm used to, but like a cake with a little sweet layer in the middle. The bottom line is, DELICIOUS. I didn't even top this with the extra powdered sugar, because it just didn't need it.
Please try this one out! The recipe can be found on the hosts' blogs. Enjoy! <3

Tuesday, November 2, 2010

TWD: Peanuttiest Blondies and Cranberry Upside-Downer


This week's Tuesdays with Dorie recipe was chosen by Nicole of Bakeology. She chose the Peanuttiest Blondies.
These blondies are fairly simple to make, and the part that takes the longest is just chopping up the peanuts.
I began making these thinking that they were going to be just a basic blondie, nothing to get too excited over. I think it's safe to say I was wrong! We loved these so much. They are kind of like a peanut butter cookie, due to the peanut butter in the batter, only thick and with peanut chunks and chocolate chips. I couldn't resist trying one right out of the oven, and they were yummy, but they were better once they cooled. If you want to try the recipe, you can find it in Dorie's book or here.


This week, I had some free time and also made a rewind for brunch on Saturday. I decided on the Cranberry Upside-Downer. This is made by boiling a whole lot of butter and sugar, pouring that in to a cake pan, and sprinkling on fresh cranberries and pecans. Then a simple cake batter is made (with plenty of cinnamon!), and it is poured over the cranberry/pecan/buttery-sugary-goodness layer. Forty minutes later, you take it out of the oven, flip it over, and are faced with a plate of deliciousness. Yum..... You can find the recipe in the book or here, because I know you're going to make it tonight.

Enjoy!

Wednesday, July 28, 2010

TWD: Lots of Ways Banana Cake and Chewy, Chunky Blondies

Sorry for not being here so much anymore. Hopefully when school starts again I can get back to posting on time! Anyways, I did make the last two Tuesdays With Dorie recipes, which were both hits here at home!


Last week's recipe was chosen by Kimberly of Only Creative Opportunities. She chose the Lots of Ways Banana Cake. This recipe has lots of flavor possibilities. I ended up not using the coconut milk, and I substituted white sugar in place of brown. As my add-in, I chose raisins. Also, instead of baking the cakes in round pans, I decided to make muffins. I got 28 good-sized ones. They were so yummy, and they got eaten quickly! If you want to try it for yourself, you can find the recipe here or in the book.


This week's recipe was chosen by Nicole of Cookies on Friday. She chose the Chewy, Chunky Blondies. I have made these SO many times, because they are my mom's absolute favorite thing I make. I decided that I had to make them again, for photography purposes ;)
Substitutions for the add-ins are fine for these - as long as you have 4 cups. I love love love these blondies, and you absolutely HAVE to make them. You can find the recipe here or in the book.

Enjoy! (P.S. - DB post up soon). :D

Wednesday, June 2, 2010

I'm Back!

And so sorry. I have been super busy these past few weeks. I've been baking, but just haven't had time to post. I'll be back on time next week! Let's start from the beginning, shall we?


Apple Apple Bread Pudding, a TWD pick from several weeks ago. This was quite easy and fun to make, and so delicious! Thanks to Elizabeth at Cake or Death for this great pick! You can find the recipe here.


The next TWD pick was Banana Coconut Ice Cream Pie. I didn't have time to make this one, but I have a rewind for you: Brown Sugar Pecan Shortbread! These were so yummy and flaky (in a good way). They have a unique but delicious taste. You can find the recipe here.


Next up: THIS week's TWD. It was white chocolate brownies, which I have been looking forward to for a long time. I think it was due to my egg whites still being cold and maybe my not beating them enough (?), but the meringue sort of melted into the brownies. So there is a very thin layer of meringue. The brownies are sort of dense but they are delicious and I will definitely be trying them again! Thanks to Marthe of Culinary Delights for this yummy pick. You can find the recipe here.


Finally, May's Daring Bakers challenge, a few days late.
The May 2010 Daring Bakers’ challenge was hosted by Cat of Little Miss Cupcake. Cat challenged everyone to make a piece montée, or croquembouche, based on recipes from Peter Kump’s Baking School in Manhattan and Nick Malgieri.
Croquembouche is basically a tower of cream puffs, held together by either chocolate or caramel. I chose to do chocolate. This was my first time making cream puffs, and I am so happy with the result. The tower was delicious! I will post the recipe below, but beware that the recipe for cream will not fill all of the puffs. Please make these - they are not as time-consuming as they look!

Croquembouche (May 2010 DB challenge)

For the Vanilla Crème Patissiere (Half Batch)
1 cup (225 ml.) whole milk
2 Tbsp. cornstarch
6 Tbsp. (100 g.) sugar
1 large egg
2 large egg yolks
2 Tbsp. (30 g.) unsalted butter
1 Tsp. Vanilla

Dissolve cornstarch in ¼ cup of milk. Combine the remaining milk with the sugar in a saucepan; bring to boil; remove from heat.

Beat the whole egg, then the yolks into the cornstarch mixture. Pour 1/3 of boiling milk into the egg mixture, whisking constantly so that the eggs do not begin to cook.

Return the remaining milk to boil. Pour in the hot egg mixture in a stream, continuing whisking.

Continue whisking (this is important – you do not want the eggs to solidify/cook) until the cream thickens and comes to a boil. Remove from heat and beat in the butter and vanilla.
Pour cream into a stainless steel/ceramic bowl. Press plastic wrap firmly against the surface. Chill immediately and until ready to use.

Pate a Choux (Yield: About 28)
¾ cup (175 ml.) water
6 Tbsp. (85 g.) unsalted butter
¼ Tsp. salt
1 Tbsp. sugar
1 cup (125 g.) all-purpose flour
4 large eggs

For Egg Wash: 1 egg and pinch of salt

Pre-heat oven to 425◦F/220◦C degrees. Line two baking sheets with parchment paper.

Preparing batter:
Combine water, butter, salt and sugar in a saucepan over medium heat. Bring to a boil and stir occasionally. At boil, remove from heat and sift in the flour, stirring to combine completely.

Return to heat and cook, stirring constantly until the batter dries slightly and begins to pull away from the sides of the pan.
Transfer to a bowl and stir with a wooden spoon 1 minute to cool slightly.

Add 1 egg. The batter will appear loose and shiny.
As you stir, the batter will become dry-looking like lightly buttered mashed potatoes.
It is at this point that you will add in the next egg. Repeat until you have incorporated all the eggs.

Piping:
Transfer batter to a pastry bag fitted with a large open tip (I piped directly from the bag opening without a tip). Pipe choux about 1 inch-part in the baking sheets. Choux should be about 1 inch high about 1 inch wide.

Using a clean finger dipped in hot water, gently press down on any tips that have formed on the top of choux when piping. You want them to retain their ball shape, but be smoothly curved on top.
Brush tops with egg wash (1 egg lightly beaten with pinch of salt).

Baking:
Bake the choux at 425◦F/220◦C degrees until well-puffed and turning lightly golden in color, about 10 minutes.

Lower the temperature to 350◦F/180◦C degrees and continue baking until well-colored and dry, about 20 minutes more. Remove to a rack and cool.
Can be stored in an air-tight container overnight.

illing:
When you are ready to assemble your piece montée, using a plain pastry tip, pierce the bottom of each choux. Fill the choux with pastry cream using either the same tip or a star tip, and place on a paper-lined sheet. Choux can be refrigerated briefly at this point while you make your glaze.

Use one of these to top your choux and assemble your piece montée.

Chocolate Glaze:
8 ounces/200 g. finely chopped chocolate (use the finest quality you can afford as the taste will be quite pronounced; I recommend semi-sweet)

Melt chocolate in microwave or double boiler. Stir at regular intervals to avoid burning. Use the best quality chocolate you can afford. Use immediately.

Assembly of your Piece Montée:
You may want to lay out your unfilled, unglazed choux in a practice design to get a feel for how to assemble the final dessert. For example, if making a conical shape, trace a circle (no bigger than 8 inches) on a piece of parchment to use as a pattern. Then take some of the larger choux and assemble them in the circle for the bottom layer. Practice seeing which pieces fit together best.

Once you are ready to assemble your piece montée, dip the top of each choux in your glaze (careful it may be still hot!), and start assembling on your cake board/plate/sheet. Continue dipping and adding choux in levels using the glaze to hold them together as you build up. (You may want to use toothpicks to hold them in place – see video #4 below).

When you have finished the design of your piece montée, you may drizzle with remaining glaze or use ribbons, sugar cookie cut-outs, almonds, flowers, etc. to decorate. Have fun and enjoy! Bon appétit!

Enjoy!

Thursday, April 29, 2010

TWD Rewind: Quintuple Chocolate Brownies


Last weekend, I had some spare time and wanted to do another Tuesdays with Dorie rewind. I decided on these Quintuple Chocolate Brownies. They have five types of chocolate:


White chocolate, unsweetened chocolate, unsweetened cocoa powder, milk chocolate, and semisweet chocolate (yes, we are one of those crazy families that buys the 72 oz. packages of chocolate chips at Costco).
The batter is fairly easy, but a bit time-consuming. Into the oven it goes! Once the brownies were cool (okay, mostly. we were hungry.), you melt white chocolate with cream and spread it on top of the brownies. Dorie says to take the brownies out of the pan before you put on the glaze. I did that, but the glaze wasn't very thick and dripped. Although I put the brownies (with the glaze on) in the fridge for 20 minutes, it still dripped (as you can see below). But they were delicious nonetheless.


These are very rich brownies, but also very delicious. They are decadent, but trust me, you won't want to eat one after the other (unless you want to be up all night with a stomach ache). I recommend these! If you want the recipe, you can find it here or in the book (which you REALLY should have by now). Enjoy!

Tuesday, February 9, 2010

TWD: Rick Katz's Brownies for Julia


This week's Tuesdays with Dorie recipe was chosen by Tanya of Chocolatechic. She chose Rick Katz's Brownies for Julia. According to Dorie, this was a recipe that was made by Rick Katz when she worked with him on the set of Julia Child's show. This is one of the recipes that I might have skipped over in the book if I was choosing a recipe myself, because it is a brownie recipe that requires so much time. And it dirties about every dish in the kitchen. And, you know, someone's gotta wash those dishes. Ewwwww.
Anyways, these are so worth it. I did have to bake them for ten minutes longer than Dorie said to, but they were still gooey when I took them out, like they are supposed to be. I heard from other TWD bakers on the P&Q that they had trouble cutting them because they were so gooey, so I waited until they were completely cool (do you have any idea how hard that is with the intoxicating fumes????????) to cut them. Yum! They were so good.... fudgey but not too sweet. They didn't last long.
If you haven't understood what I'm saying, here's a clarified version: Go buy yourself some butter and chocolate and make them! You can find the recipe in the book or here. Enjoy!

Wednesday, January 27, 2010

Daring Bakers: The World Comes to Canada

The January 2010 Daring Bakers’ challenge was hosted by Lauren of Celiac Teen. Lauren chose Gluten-Free Graham Wafers and Nanaimo Bars as the challenge for the month. The sources she based her recipe on are 101 Cookbooks and www.nanaimo.ca.

Lauren lives in Canada, and since the winter olympics are going to be there, she wanted to do a Canadian dessert. She also has celiac disease, so she can't eat gluten. This month the challenge had two parts to it. First was gluten-free graham crackers. We were allowed to use wheat flower, though, which I did, because I figured why buy three different types of flour that I probably will end up not using? The graham cracker dough was pretty easy to make, although it was very sticky. It chilled and was rolled out very thin. It was easy to roll out, but I found it super sticky and I had to use a LOT of flour.
The crackers were delicious! I made crumbs out of almost all of them, so I have a cup or two left for something else.

The second part of the challenge was Nanaimo Bars, which apparently is a popular canadian dessert. The first layer is made of butter, cocoa powder, sugar, eggs, graham cracker crumbs, coconut, and almonds. It is pressed into a pan. You are supposed put on the custard layer right away, but I refrigerated it for two days because of time issues.
Next comes the custard. This is made by beating butter, cream, confectioner's sugar, and vanilla custard powder. We were allowed to substitute vanilla pudding mix, which I did, because I couldn't find the powder. However, I think this affected the color, because mine was white while Lauren's was yellow.
Finally comes melted butter with chocolate. You spread it over, but the recipe didn't make a whole lot, so I couldn't get all the way to the edges.
All in all, this was a fun challenge. I loved the graham crackers, but thought that the bars were very rich and tasted a bit too much just like butter and sugar. I think they would be delicious with the same amount of the chocolate layers, but only half of the custard layer. I would recommend trying it this way. If you want to try, the original recipe is below. Enjoy!

Preparation time:
• Graham Wafers: 30 to 45 minutes total active prep, 2 ½ hours to overnight and 45 minutes inactive prep.
• Nanaimo Bars: 30 minutes.

Equipment required:
• Food Processor
• Bowls
• Parchment paper or silpats
• Cookie sheets
• Double boiler or pot and heatproof bowl
• 8 by 8 inch square pan
• Hand mixer or stand mixer (You may use a wooden spoon, but this makes it much easier!)
• Saucepan

For Gluten-Free Graham Wafers
Ingredients
1 cup (138 g) (4.9 ounces) Sweet rice flour (also known as glutinous rice flour)
3/4 cup (100 g) (3.5 ounces) Tapioca Starch/Flour
1/2 cup (65 g) (2.3 ounces) Sorghum Flour
1 cup (200 g) (7.1 ounces) Dark Brown Sugar, Lightly packed
1 teaspoon (5 mL) Baking soda
3/4 teaspoon (4 mL ) Kosher Salt
7 tablespoons (100 g) (3 ½ ounces) Unsalted Butter (Cut into 1-inch cubes and frozen)
1/3 cup (80 mL) Honey, Mild-flavoured such as clover.
5 tablespoons (75 mL) Whole Milk
2 tablespoons (30 mL) Pure Vanilla Extract

Directions:
1. In the bowl of a food processor fitted with a steel blade, combine the flours, brown sugar, baking soda, and salt. Pulse on low to incorporate. Add the butter and pulse on and off, until the mixture is the consistency of a coarse meal. If making by hand, combine aforementioned dry ingredients with a whisk, then cut in butter until you have a coarse meal. No chunks of butter should be visible.
2. In a small bowl or liquid measuring cup, whisk together the honey, milk and vanilla. Add to the flour mixture until the dough barely comes together. It will be very soft and sticky.
3. Turn the dough onto a surface well-floured with sweet rice flour and pat the dough into a rectangle about 1 inch thick. Wrap in plastic and chill until firm, about 2 hours, or overnight.
4. Divide the dough in half and return one half to the refrigerator. Sift an even layer of sweet rice flour onto the work surface and roll the dough into a long rectangle, about 1/8 inch thick. The dough will be quite sticky, so flour as necessary. Cut into 4 by 4 inch squares. Gather the scraps together and set aside. Place wafers on one or two parchment-lined baking sheets. Chill until firm, about 30 to 45 minutes. Repeat with the second batch of dough.
5. Adjust the rack to the upper and lower positions and preheat oven to 350 degrees Fahrenheit (180 degrees Celsius).
6. Gather the scraps together into a ball, chill until firm, and reroll. Dust the surface with more sweet rice flour and roll out the dough to get a couple more wafers.
7. Prick the wafers with toothpick or fork, not all the way through, in two or more rows.
8. Bake for 25 minutes, until browned and slightly firm to the touch, rotating sheets halfway through to ensure even baking. Might take less, and the starting location of each sheet may determine its required time. The ones that started on the bottom browned faster.
9. When cooled completely, place enough wafers in food processor to make 1 ¼ cups (300 mL) of crumbs. Another way to do this is to place in a large ziplock bag, force all air out and smash with a rolling pin until wafers are crumbs.

Nanaimo Bars
Ingredients:

For Nanaimo Bars — Bottom Layer
1/2 cup (115 g) (4 ounces) Unsalted Butter
1/4 cup (50 g) (1.8 ounces) Granulated Sugar
5 tablespoons (75 mL) Unsweetened Cocoa
1 Large Egg, Beaten
1 1/4 cups (300 mL) (160 g) (5.6 ounces) Gluten Free Graham Wafer Crumbs (See previous recipe)
1/2 cup (55 g) (1.9 ounces) Almonds (Any type, Finely chopped)
1 cup (130 g) (4.5 ounces) Coconut (Shredded, sweetened or unsweetened)

For Nanaimo Bars — Middle Layer
1/2 cup (115 g) (4 ounces) Unsalted Butter
2 tablespoons and 2 teaspoons (40 mL) Heavy Cream
2 tablespoons (30 mL) Vanilla Custard Powder (Such as Bird’s. Vanilla pudding mix may be substituted.)
2 cups (254 g) (8.9 ounces) Icing Sugar

For Nanaimo Bars — Top Layer
4 ounces (115 g) Semi-sweet chocolate
2 tablespoons (28 g) (1 ounce) Unsalted Butter

Directions:
1. For bottom Layer: Melt unsalted butter, sugar and cocoa in top of a double boiler. Add egg and stir to cook and thicken. Remove from heat. Stir in crumbs, nuts and coconut. Press firmly into an ungreased 8 by 8 inch pan.
2. For Middle Layer: Cream butter, cream, custard powder, and icing sugar together well. Beat until light in colour. Spread over bottom layer.
3. For Top Layer: Melt chocolate and unsalted butter over low heat. Cool. Once cool, pour over middle layer and chill.

-------------------------------
Additional Information:

These bars freeze very well, so don’t be afraid to pop some into the freezer.

The graham wafers may be kept in an airtight container for up to 2 weeks. Mine lasted about that long.

If making the graham crackers with wheat, replace the gluten-free flours (tapioca starch, sweet rice flour, and sorghum flour) with 2 ½ cups plus 2 tbsp of all-purpose wheat flour, or wheat pastry flour. Watch the wheat-based graham wafers very closely in the oven, as they bake faster than the gluten-free ones, sometimes only 12 minutes.

For the Nanaimo Bars, if making with wheat, replace the gluten-free graham wafer crumbs with equal parts wheat graham wafer crumbs!

Information on Celiac Disease: http://www.mayoclinic.com/health/celiac-disease/DS00319

Information on Vancouver 2010: http://www.vancouver2010.com/

City of Nanaimo: http://www.nanaimo.ca/EN/index.html

Gluten Free Flour Information: http://glutenfreemommy.com/gluten-free-grains-101-the-best-flour-blend/

Video on making Nanaimo bars: http://www.youtube.com/watch?v=x5aqa6R1jIM&feature=fvsr

Recipe and video for Vegan Nanaimo Bars (you didn’t think I’d leave you guys out?):http://www.everydaydish.tv/index.php?page=recipe&recipe=159

Recipe for gluten-free and vegan Graham Wafers: http://www.thesensitivepantry.com/the-sensitive-pantry/2009/8/3/grahams-...