Showing posts with label gluten-free. Show all posts

Monday, January 26, 2015

Chocolate Mousse with Raspberry Whipped Cream


 As an opera singer, I receive endless feedback from other musicians. As my coach said to me recently, "Being a singer is like constantly wearing a sign that says, 'Criticize Me!'" It's very easy to get wrapped up in desperate thoughts: They don't like my voice! But my voice is a part of me - that means they don't like who I am! I should just give up and go to medical school instead!
While it's important to simply ignore all this every now and then, it's also essential to recognize that everybody listens for different traits in a voice. One musician may be looking for a high, light soprano, while another may want a dark, dramatic mezzo; and this doesn't make either person wrong. 
 I'm quickly learning that no matter how intently I listen to recordings or how often I practice, there's simply no way to make everyone happy.
 With dessert, however, it's another story. Chocolate mousse is about as crowd-pleasing as you can get; it's rich, creamy, and chocolatey enough to satisfy that craving you've been having all week. Whipped cream is the perfect partner in crime; add in a swirl of puréed raspberries, and you've got a Valentine's Day dessert anyone will fall in love with.
Enjoy!
 Chocolate Mousse
  
6 ounces (170g) bittersweet or semisweet chocolate, chopped
6 ounces (170g) unsalted butter, cut into small pieces
1/4 cup (60ml) dark-brewed coffee
4 large eggs, separated
2/3 cup (170g), plus 1 tablespoon sugar
2 tablespoons (30ml) dark rum
1 tablespoon (15ml) water
pinch of salt
1/2 teaspoon vanilla extract

Heat a saucepan one-third full with hot water, and in a bowl set on top, melt together the chocolate, butter and coffee, stirring over the barely simmering water, until smooth. Remove from heat.
Fill a large bowl with ice water and set aside.
In a bowl large enough to nest securely on the saucepan of simmering water, whisk the yolks of the eggs with the 2/3 cup of sugar, rum, and water for about 3 minutes until the mixture is thick, like runny mayonnaise. (You can also use a handheld electric mixer.) This took me closer to 10 minutes.
Remove from heat and place the bowl of whipped egg yolks within the bowl of ice water and beat until cool and thick. Then fold the chocolate mixture into the egg yolks.
In a separate bowl, beat the egg whites with the salt until frothy. Continue to beat until they start to hold their shape. Whip in the tablespoon of sugar and continue to beat until thick and shiny, but not completely stiff, then the vanilla.
Fold one-third of the beaten egg whites into the chocolate mixture, then fold in the remainder of the whites just until incorporated, but don’t overdo it or the mousse will lose volume.
Transfer the mousse to a serving bowl or divide into serving dishes, and refrigerate for at least 4 hours, until firm.

 Raspberry Whipped Cream

1/2 pint (about 1 cup) fresh raspberries, plus more for garnish 
1 tablespoon confectioners' sugar, plus more to sweeten  
1 cup heavy cream 
1/2 teaspoon pure vanilla extract

Place raspberries in the bowl of a food processor; process until smooth. Pass through a fine strainer; discard seeds. Sweeten with sugar, if desired.
Combine cream, 1 tablespoon sugar, and vanilla in a large bowl; whisk together until soft peaks form. Gently fold in raspberry puree to form swirls.

Top servings of mousse with dollops of whipped cream; garnish as desired.

Sunday, January 11, 2015

Chewy Chocolate Meringues

     Young chefs are all about pushing culinary boundaries and breaking the rules. I think it's wonderfully fun when food's external experience leads the taster to expect something far from what's actually within; from a colorful 4th of July flag cake to shockingly tasty Earl Grey eclairs, playing around with expectations versus reality is what keeps things interesting!
     Upon first glance, these cookies appear to be traditional chocolate meringues, light and airy and crunchy. As soon as you take a bite, however, you realize that the inside is chewy and rich and incredibly tasty. I took these to a New Year's party, and they were the perfect culinary start to 2015.

Wishing you all a happy, healthy, crazy, delicious year!
     Enjoy!
Chewy Chocolate Meringues
(slightly adapted from Bakerella)

4 large egg whites
1 cup sugar
2 1/2 tablespoons cocoa powder
2 oz bittersweet chocolate, finely chopped
 
Preheat oven to 350 degrees.
Line baking sheets with parchment paper.
In a clean, dry heatproof bowl, whisk together egg whites and sugar. Set over, but not touching, simmering water in a saucepan.
Whisk constantly until the sugar is completely dissolved and remove from heat.
Beat the eggs on high using a mixer fitted with a whisk attachment. Beat until stiff and glossy.
Sift cocoa over the meringue. Sprinkle chopped chocolate on top.
Fold together gently with a spatula until combined.
Use a scoop to drop even amounts of batter onto prepared baking sheets about two inches apart. (I used a 1.5" scoop and got about 2 dozen cookies.)
Bake for about 8-9 minutes. Rotate the pans and bake for another 8-9 minutes, until the cookies are puffed and have a few cracks.
Transfer the cookies, leaving them on the parchment paper, to wire racks to cool.

Sunday, August 3, 2014

Honey, Lavender, and Vanilla Bean Ice Cream

 I got my first "real" job this summer. By "real," I mean doing something other than working as a camp counselor, which, as rewarding as it is, wasn't in my plans this year. Instead, I'm basically spending a couple of weeks doing secretarial work for a family friend who is a doctor; entering his patients' information into an online database and so on.
 While it's not exactly the most challenging job in the world, it's been surprisingly entertaining. Not only have I learned how to spell hundreds of last names I have no idea how to pronounce, I've had the Brandenburg Concertos on as background music more times than I'd care to admit. It also makes me smile every time I'm entering a baby's information, and the parents have listed five or six different emergency contact numbers. (The doctor says he's never once had to use an emergency number, much less six.)
 I try to make the time that I'm not working as "summery" as possible. Last week, I decided that a batch of freshly churned ice cream was in order.
  On their own, honey, lavender, and vanilla beans aren't particularly overwhelming flavors. But when mixed together, some kind of magical taste fairies make them incredibly warm and refreshing at the same time; put this together with smooth, rich ice cream, and you've got quite the summer afternoon ahead of you.
  Enjoy!

 Honey, Lavender, and Vanilla Bean Ice Cream
(adapted from The Perfect Scoop)

½ cup good quality honey
¼ cup dried or fresh lavender flowers
seeds from 1 large vanilla bean (scraped out)
1½ cups whole milk
¼ cup sugar
Pinch of salt
1½ cups heavy cream
5 large egg yolks

Heat the honey, 2 tablespoons of the lavender, and the vanilla in a small saucepan.  Once warm, remove from the heat and set aside to steep at room temperature for 1 hour.
Warm the milk, sugar and salt in a medium saucepan.
Pour the cream in a large bowl and set a mesh strainer on top.
Pour the lavender-infused honey into the cream through the strainer, pressing on the lavender flowers to extract as much flavour as possible, then discard the lavender and set the strainer back over the cream.
In a separate medium bowl, whisk together the egg yolks.
Slowly pour the warm mixture into the egg yolks, whisking constantly to avoid cooking, then scrape the warmed egg yolks back into the saucepan.
Stir the mixture constantly over medium heat with a heatproof spatula, scraping the bottom as you stir, until the mixture thickens and coats the spatula.
Pour the custard through the strainer and stir it into the cream.
Add the remaining 2 tablespoons lavender flowers and stir until cool over an ice bath. Chill the mixture overnight in the refrigerator.
The next day, before churning, strain the mixture, again pressing on the lavender flower to extract their flavour.
Discard the flowers, then freeze the mixture in your ice cream maker according to the manufacturer’s instructions.

Note: I used vanilla bean-infused honey, so if you happen to have some around, you can use that instead and leave out the fresh vanilla.

Saturday, May 31, 2014

Lemon Meringue Ice Cream Pie

The older I get, the more I realize how fast time goes by. This may seem ridiculous coming from a teenager (17 as of this week!), but it's true. My friends and I are shocked that the school year is ending so quickly, and while we're excited for all the fun plans we have for summer, it's also kind of terrifying.
This past year has been by far the busiest, most stressful of my life; but it's also been the greatest. I had a great time with my friends, got to know my teachers better, had the opportunity to travel to some amazing places, and became more involved in music.
I also watched the seniors at my school go through the crazy college application (and audition, for those pursuing music) process, and the idea of really starting that (and not just talking about it) can be a bit daunting.
That said, I'm excited to see what lies ahead, and wow I just realized how cheesy this post got. Anyway, right now I'm focusing on celebrating the start of summer, no matter how much German diction I have to learn, or how many application essays I have to write!
This dessert is perfect to kick off a season of fresh, bright flavors. The tart lemon curd and berries are a perfect contrast to the creamy, sweet vanilla ice cream, and it's all nestled inside a crunchy, almost cookie-like pie crust. And hey, what isn't better with toasted meringue?
(Shout-out to my best friend's mother for the recipe - it's quickly become one of my absolute favorites!)
Enjoy!
Lemon Meringue Ice Cream Pie
(slightly adapted from Epicurious)

For the lemon curd 
2 large eggs 
2 large egg yolks 
6 tablespoons (3/4 stick) unsalted butter 
1 cup sugar 
6 tablespoons fresh lemon juice 
2 teaspoons finely grated lemon peel 
Pinch of salt

For the crust 
1 1/2 cups finely chopped pecans 
1/4 cup sugar 
1/4 cup (1/2 stick) butter, melted 
3 cups vanilla ice cream, slightly softened, divided
1/2 cup chopped berries of your choice (I used raspberries)

For the meringue 
4 large egg whites, room temperature 
Pinch of cream of tartar 
6 tablespoons sugar

For the lemon curd
Whisk eggs and egg yolks in medium bowl. Melt butter in medium metal bowl set over large saucepan of simmering water. Whisk in sugar, lemon juice, lemon peel, and salt; gradually whisk in egg mixture. Whisk until thick and thermometer inserted into curd registers 178°F to 180°F, about 8 minutes. Transfer to small bowl. Press plastic wrap on top of curd; chill 4 hours.  


For the crust Preheat oven to 400°F. Mix pecans, sugar, and butter in medium bowl until moistened. Press pecan mixture onto bottom and up sides of 9-inch-diameter glass pie dish (mixture will be crumbly). Bake until crust is lightly toasted, about 12 minutes (crust will slip down sides of dish). Use back of spoon to press crust back into place. Cool crust on rack. Freeze crust 30 minutes.
Dollop 1 1/2 cups ice cream over crust; spread into even layer. Spread lemon curd over ice cream; freeze until firm, about 2 hours. Dollop 1 1/2 cups softened ice cream over lemon curd; spread into even layer. Cover and freeze until firm, about 2 hours.

For meringue Using electric mixer, beat egg whites in medium bowl until frothy. Beat in cream of tartar. With mixer running, gradually add sugar. Beat until stiff peaks form. Spoon meringue over pie, spreading to seal at edges and swirling decoratively. Freeze pie until ready to serve.
Using a kitchen butane torch, toast meringue until golden in spots; or, place pie in a preheated 500°F oven or broiler until meringue is golden in spots, watching to prevent burning, about 3 minutes. (Seriously, watch it the entire time - it can go from raw to burnt in a second.) Cut pie into wedges; serve immediately.

Thursday, March 13, 2014

Ultimate Nutella Mousse


 If you hadn't already realized it, I have a bit of a thing for Nutella. It basically takes the greatest food ever (chocolate) and mixes it with hazelnuts to make the creamiest, sweetest, most indulgent topping for just about anything. 
After a while, slathering the chocolatey goodness on various forms of carbohydrates gets a little old. I love finding ways to incorporate my favorite foods into desserts, and this mousse does just that. 
It has (theoretically) two ingredients. Two ingredients! Mousse!! Okay, so it may be a bit of a faux mousse, but it plays the part pretty amazingly. It's fluffy and creamy and kind of makes you want to eat the whole bowl. Top it with homemade dark-chocolate-covered strawberries, and this 5-minute dessert just got classy. 
Enjoy! 

Ultimate Nutella Mousse
(adapted from Bakers Royale)

9 oz. Nutella
2 cups heavy cream
1/2 teaspoon espresso powder
2 tablespoons confectioners' sugar
1/4 cup hazelnuts, roughly chopped
about 6 strawberries
1/2 cup dark chocolate chips 
1/4 cup white chocolate chips

Place Nutella and espresso powder in microwave safe bowl. Heat on low for 10 second intervals until mixture is thinned a bit. Stir to incorporate the espresso powder. Set aside and cool to room temperature.
Whip 1 1/2 cups cream until soft peaks form (be careful not to let it reach stiff peaks). Gently fold whipped cream into Nutella mixture. The mousse will be soft. Fill a bowl (roughly 1-quart capacity) and cover and refrigerate for at least 4 hours or overnight.
Once the mousse is chilled, whip the remaining 1/2 cup cream with the sugar until soft peaks form. Spread over the mousse, and top with chopped hazelnuts.
In the microwave or over a double boiler, heat the two chocolates separately. Dip the strawberries in the dark chocolate and place on a parchment-lined baking sheet; drizzle with white chocolate (I used a piping bag). 
Refrigerate strawberries for 1 hour, or until set; use as topping for mousse. 

*Note: This is really more of a concept than a rigid recipe; feel free to adapt it as you like!

Thursday, February 6, 2014

Earl Grey Ice Cream

 Seasons have always been a bit of an issue for me. I can't ever really get the timing of my feelings quite right - I'm in a beach mood in the middle of winter, and I've been known to sleep with a comforter in August. This used to be quite the problem, especially when it came to clothing; every year, my best friend (and/or my mother) had to yell at me to stop wearing boots in the spring or put on a coat in the fall. I'm telling you, teenage problems are so real.
Over the years, I've learned to embrace my lack of harmony with seasonal shifts, especially when it comes to food. Why not have soup in the summer, or fruit salad in the winter? Who says smoothies have to be a summer thing, and who made up the crazy rule that gingerbread is meant only for the month of December? Life needs a little spontaneity, right?
I'm of the belief that ice cream is a year-round food, just as enjoyable when you're curled up by a fireplace as when you're sitting by the pool. This one is creamy and just sweet enough, perfect for pairing with a fruity dessert. (I served mine with a French apple cake, recipe coming soon!) That said, it actually does include a little winter touch; the earl grey is a flavor you're probably used to getting in a steaming mug, and having it in ice cream is a little mind game totally worth playing.
 I'm a fan of earl grey tea in just about anything sweet (because everyone knows I'm actually an old lady at heart), but this ice cream is by far the best I've ever made. Winter or not.
Enjoy!
Earl Grey Ice Cream
(slightly adapted from Gimme Some Oven)

1 1/2 cups whole milk
1 1/2 cups heavy cream
3/4 cup sugar
1/4 cup loose earl grey tea leaves (from about 6 tea bags)
5 egg yolks
1 teaspoon vanilla extract

In a small saucepan, warm the milk, cream, and sugar over medium-heat, stirring occasionally. Once the milk is steaming (but not boiling), remove pan from heat. Place the tea in the pan, cover and steep at room temperature for 15-20 minutes, stirring occasionally. 
Meanwhile, in a separate bowl, whisk together the egg yolks and vanilla until frothy. Once the milk mixture is re-warmed, drizzle about 2 tablespoons of the hot milk mixture into the eggs, and quickly whisk in until combined. Repeat 2-3 more times with more of the milk mixture, then gradually pour in the remainder of the milk mixture into the egg yolks and whisk quickly until combined.
Return the new milk/egg mixture to the saucepan, and cook over medium heat, stirring and scraping the bottom of the pan constantly until the mixture thickens to a custard and coats the back of a wooden spoon.
Immediately strain through a fine-mesh strainer to remove tea leaves and any bits of egg, and then refrigerate until completely cooled (this can be done fairly quickly over an ice bath, or in the freezer). Then freeze with an ice cream maker according to manufacturer's instructions (mine took about 20 minutes), until it's the consistency of soft serve ice cream.

Monday, February 3, 2014

Little Almond Pancakes

I've mentioned this before, but making naturally gluten-free dishes is sometimes better (and often simpler) than trying to pull together flour mixtures and adjust moisture levels to adapt a recipe. I was recently making breakfast on a Saturday morning, and my mom requested that I keep it gluten-free so she could have it too. But I wanted pancakes. Um, issue.
Pancakes are one thing I've never been able to replicate really well using gluten-free flours. I decided to try a recipe I heard of a while back, that uses nothing but almond meal as a binder.
These are shockingly delicious. The almond gives a really nice flavor to an otherwise plain pancake, and they are actually pretty fluffy, with a little bit of crunch from the nuts. Most importantly, they get golden-brown and crispy on the outside, while still being soft enough inside to soak up plenty of maple syrup (or the topping of your choice; fruit compote would be delicious, but that involved way too much planning ahead for a weekend morning).
 Enjoy!
Little Almond Pancakes
(slightly adapted from The Nourishing Home)

1 1/2 cups blanched almond flour
1/2 teaspoon baking soda
1/4 teaspoon salt
3 large eggs, at room temperature
1/4 cup buttermilk 
1 tablespoon coconut oil (or butter, but the coconut oil adds a lovely flavor), melted
1 tablespoon pure maple syrup
1 teaspoon pure vanilla extract

In a small bowl combine the blanched almond flour, baking soda and salt.
Sparate the egg whites from the yolks. Place the egg whites in a medium bowl; set aside.
Place the egg yolks in a large bowl and whisk in the melted butter (or coconut oil). (Be sure the melted butter/oil has cooled to touch before adding.) Whisk in the milk, maple syrup and vanilla.
Add the dry mixture to the egg yolk mixture, whisking well to thoroughly combine, making sure there are no lumps in the batter.
Using a clean large wire whisk, whisk the egg whites rapidly until very foamy (about two minutes).
Then, use the whisk to gently fold the whipped egg whites into the batter until well combined. The batter will be thick; if you'd like to thin it out a little bit, add an additional tablespoon or two of milk.
Ladle a spoonful of batter onto the griddle to form a silver dollar size pancake (about 3” in diameter). (It's important to keep them fairly small in order to maintain the great texture.)
Cook for a few minutes, until pancakes begin to dry out at edges and the bottoms are a golden brown. They will cook quickly, so keep an eye on them.Carefully flip and cook another few minutes until done, but not over-browned.Serve hot with desired toppings. 
             -makes about 15 - 3" pancakes

Wednesday, September 11, 2013

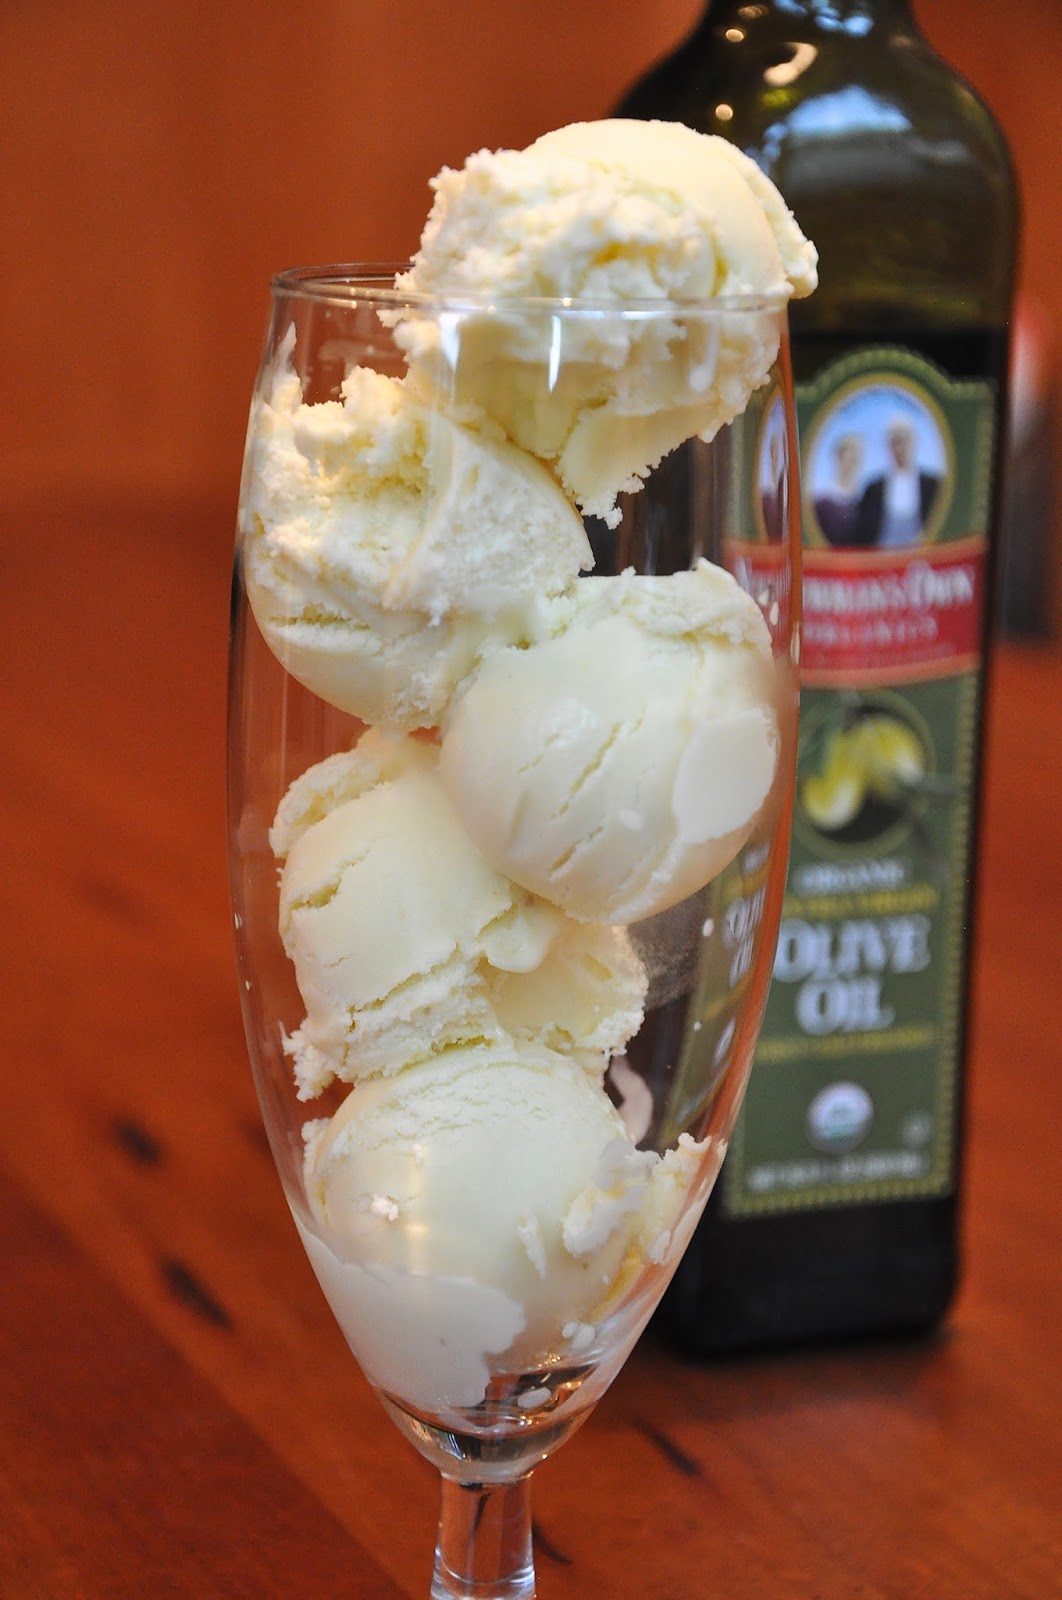
Olive Oil Ice Cream

 When you think of ice cream, olive oil probably isn't the first flavor that comes to mind. Deep dark chocolate, light and creamy vanilla bean, sweet and sour strawberry - those are more likely. But I'm here to tell you that olive oil beats them all.
 This recipe basically replaces some of the cream in a classic ice cream recipe with olive oil. The oil not only adds a great creamy texture, but a lovely flavor. When you first taste it, you might not detect the olive oil, but there's definitely something wonderfully different about the ice cream.
 The oil adds a fruitiness and depth that I've never been able to achieve at home. (Shoutout to two awesome friends of mine who gave me an ice cream machine for my birthday!)
 This was perfect served alongside an almond plum tart (recipe to come!), but I think it would be great with any fruity dessert. Get ready to turn your kitchen into a 5-star restaurant!
 Or, if you're like me, you can forget to photograph the ice cream with the tart, so just pile a bunch into a beer glass and call it a day. Whether you then eat the entire five scoops is entirely up to you.
 I promise not to judge.
Enjoy!
Olive Oil Ice Cream

2 cups whole milk
1 cup heavy cream
5  large egg yolks
1/2 cup sugar
pinch of salt
1/2 cup fruity extra-virgin olive oil
2 teaspoons pure vanilla extract


Set a heatproof bowl with a strainer set over it ready for the cooked custard.
Bring the milk and cream to a boil in a large heavy saucepan.  In a large bowl, whisk the yolks and sugar together until very well blended and just slightly thickened.  Whisking without stop, drizzle in about 1/3 of the hot liquid - adding it slowly will temper the eggs and prevent them from cooking.  Once the eggs are acclimated to the heat, you can whisk in the remaining liquid a little more quickly.  Add the salt and pour the custard back into the pan.  Cook the custard over medium heat, stirring constantly.  The custard should reach at least 170 degrees, but no more than 180 degrees.  
Immediately remove the pan from the heat and pour the custard through the strainer into the bowl.  Discard whatever remains in the strainer.  Add the olive oil and whisk.  Stir in the vanilla.  The custard needs to chill before you churn it.  Chill it and scrape the custard into your ice cream maker and make according to the appliance instructions.

Thursday, August 1, 2013

Chocolate Swirled Cheesecake


My Brazilian family members are a tricky crowd to cook for. I guess any family has its picky eaters, those who stick to essentially the same three meals every day and are uncomfortable going outside of those lines – but my family seems to have quite a large number of them. The week after my sweet 16, we had at least 15 people coming over to our house for dinner every night, often more, and I was generally in charge of dessert. I stuck to something that could be baked in one pan and required little assembly – my biggest success was this Nutella cake. One night, I decided to make a cheesecake, per request of my cousin.
Oh boy, I should not have told Brazilians that that was what I was making. I immediately got wrinkled noses and reactions like, “Really? Cheese in a cake? I’m gonna go get some ice cream…”


Nevertheless, I powered on. I made a classic New York cheesecake batter, mixing melted bittersweet chocolate into a portion of it and swirling that in with the plain batter. To keep with the chocolate-vanilla theme, I left behind the traditional graham cracker crust and instead used crushed (gluten-free) chocolate chip cookies. The result? A creamy, melt-in-your-mouth, insanely delicious double-flavored cheesecake. Even better when served with homemade chocolate sauce! All of my relatives except for one absolutely loved it. I think I’ll call that one a win and move on.
Enjoy!
Chocolate Swirled Cheesecake 
  
1 3/4 cups crunchy chocolate chip cookie crumbs
3 tablespoons sugar 
Pinch of salt 
1/2 stick (4 tablespoons) unsalted butter, melted
  
2 pounds (four 8-ounce boxes) cream cheese, at room temperature 
1 1/3 cups sugar 
1/2 teaspoon salt 
2 teaspoons pure vanilla extract 
4 large eggs, at room temperature 
1 1/3 cups sour cream or heavy cream, or a combination of the two
4 oz bittersweet chocolate, melted and cooled

Butter a 9-inch springform pan—choose one that has sides that are 2 3/4 inches high (if the sides are lower, you will have cheesecake batter leftover)—and wrap the bottom of the pan in a double layer of aluminum foil; put the pan on a baking sheet.  
Stir the crumbs, sugar and salt together in a medium bowl. Pour over the melted butter and stir until all of the dry ingredients are uniformly moist. (I do this with my fingers.) Turn the ingredients into the buttered springform pan and use your fingers to pat an even layer of crumbs along the bottom of the pan and about halfway up the sides. Don't worry if the sides are not perfectly even or if the crumbs reach above or below the midway mark on the sides—this doesn't have to be a precision job. Put the pan in the freezer while you preheat the oven.
Center a rack in the oven, preheat the oven to 350°F and place the springform on a baking sheet. Bake for 10 minutes. Set the crust aside to cool on a rack while you make the cheesecake.
Reduce the oven temperature to 325°F.
Put a kettle of water on to boil.
Working in a stand mixer, preferably fitted with a paddle attachment, or with a hand mixer in a large bowl, beat the cream cheese at medium speed until it is soft and lives up to the creamy part of its name, about 4 minutes. With the mixer running, add the sugar and salt and continue to beat another 4 minutes or so, until the cream cheese is light. Beat in the vanilla. Add the eggs one by one, beating for a full minute after each addition—you want a well-aerated batter. Reduce the mixer speed to low and stir in the sour cream and/or heavy cream.
Put the foil-wrapped springform pan in the roaster pan.
Give the batter a few stirs with a rubber spatula, just to make sure that nothing has been left unmixed at the bottom of the bowl, and separate about a third of the batter. Stir the bittersweet chocolate into this smaller portion of the batter.
Scrape the vanilla batter into the springform pan. Dollop the chocolate batter over the top and swirl the two together with a thin knife or skewer. The batter will reach the brim of the pan. (If you have a pan with lower sides and have leftover batter, you can bake the batter in a buttered ramekin or small soufflé mold.) Put the roasting pan in the oven and pour enough boiling water into the roaster to come halfway up the sides of the springform pan.
Bake the cheesecake for 1 hour and 30 minutes, at which point the top will be browned (and perhaps cracked) and may have risen just a little above the rim of the pan. Turn off the oven's heat and prop the oven door open with a wooden spoon. Allow the cheesecake to luxuriate in its water bath for another hour.
After 1 hour, carefully pull the setup out of the oven, lift the springform pan out of the roaster—be careful, there may be some hot water in the aluminum foil—remove the foil. Let the cheesecake come to room temperature on a cooling rack.
When the cake is cool, cover the top lightly and chill the cake for at least 4 hours, preferably overnight.

Sunday, July 21, 2013

Strawberry Sour Cream Ice Cream

the ice cream was eaten so quickly, this was the only picture I managed to snap!

As a birthday gift, I recently received an ice cream maker from two of my closest friends (although, let’s be real, I think everyone who knows me knows about my culinary obsession). I was lucky enough to get this from them a week after my old ice cream maker broke! See, my friends are so awesome, they can read my mind. Kind of.
Anywho, one of these two friends came over to make sweets for the fourth of July. Besides chocolate lava cakes and the absolutely necessary flag cake (not the fruit one, just click on the link and you’ll find out), we also decided to test out the new machine with a batch of fresh strawberry ice cream. We went with a recipe that included sour cream, because (a) it didn’t require any stovetop cooking in the New York City July heat, and (b) it came from David Lebovitz. And if it came from David Lebovitz, it’s gonna be good.
As we had hoped, it was. The strawberries’ natural sweetness shone through, and their delicate flavor wasn’t overwhelming. The tartness from the sour cream complemented the berries perfectly, creating a creamy, fruity dessert that should (and will) be repeated often this summer.
Enjoy!

Strawberry Sour Cream Ice Cream

1 pound fresh strawberries, rinsed and hulled
3/4 cup granulated sugar
1 tablespoon vodka or kirsch
1 cup sour cream
1 cup heavy cream
1/2 teaspoon freshly squeezed lemon juice

Slice the strawberries and toss them in a medium bowl with the sugar and vodka or kirsch. Stir until the sugar begins to dissolve and all of the strawberries are coated. Let stand at room temperature for 1 hour, stirring occasionally.
Pulse the strawberries and their liquid with the sour cream, heavy cream, and lemon juice in a blender or food processor until almost smooth, but still slightly chunky.
Refrigerate mixture for at least one hour. Freeze in your ice cream maker according to the manufacturer’s instructions.

Friday, July 12, 2013

3-Ingredient Nutella Strawberry Cake

 I'm sorry for the absence. Really. Please let me explain. And then I promise I'll make it up to you with some really, really good cake.
   After my sweet 16, I had a couple of crazy weeks with tons of family here. During this time, my computer completely crashed. After a few days of having work done on it, I'm left with a completely clean slate, and a camera with a few pictures on it. The entire lineup of food pictures I had for a series of summery posts? Gone. So I curled up onto my couch for a little while. And then I got back into the kitchen to try to make up for my lost picture-taking time.
 I made this cake a few nights after my party, for a bunch of family members who were over at my house for dinner. It looked simple enough, it was naturally gluten-free, and, most importantly, it was a cake that required only two ingredients. A base of beaten eggs, followed by an insane amount of nutella. Sounds like a party to me.
    So of course I made it way more complicated than it had to be. When it came out of the oven, instead of just serving it as-is like a normal person, I decided to drizzle some more nutella on top. But it looked so chocolatey, I needed something to break the richness, so in came a crown of sliced strawberries. I also served it with some fresh, lightly sweetened whipped cream, but that's not really necessary.
     This cake was absolutely perfect for the crowd we had at my house. It's rich enough that a little slice will satisfy that chocolate craving, and I was impressed by how light it was made just by the eggs. Often when Nutella is used in baked goods, its flavor gets masked by all the other ingredients, but the short ingredients list for this recipe let the spread's flavor shine. My only regret? Learning that with eggs and nutella, I can have an entire delicious cake at my fingertips within the hour. Because that's an extremely dangerous skill to possess.
   Enjoy!
3-Ingredient Nutella Strawberry Cake
(adapted from Kirbie's Cravings)

8 large or extra large eggs
17 ounces Nutella (weigh this out on a scale), plus more for topping
1 pint fresh strawberries, sliced

Grease a 9 or 10 inch round springform pan. Then line with parchment paper on sides and on bottom. Preheat oven to 350F. Beat eggs on highest speed with stand mixer until about triple in volume, about 8 minutes. The egg consistency is the key to making this recipe work, so don't try to save time on this step.
Measure out 17 ounces of Nutella into a glass bowl. Microwave Nutella for about 20 seconds to make it more liquidy. Add in 1/3 of the egg mixture. Gently stir with a spatula in the same clockwise direction until all of the egg is mixed in and no streaks remain. Then add another 1/3 of egg mixture and fold again until no egg streaks remain. Pour in remaining third, making sure to scrape the foam that sticks to the mixing bowl into the batter, and stir until no streaks remain. Make sure to do this in 3 batches because otherwise the whipped eggs may lose too much of the air that has been whipped into them.
Pour batter into springform pan. Bake for 20-25 minutes until knife inserted in the center comes out clean. Let cake cool completely before removing from pan.
Warm about 1/4 cup of remaining Nutella briefly in the microwave. Drizzle over cooled cake. Top with strawberries, and serve slices with lightly sweetened whipped cream (optional).

*Note: This recipe makes quite a large cake. Feel free to halve it and bake it in a 6 or 7 inch springform pan.

Wednesday, June 19, 2013

Flourless Chocolate Fudge Cookies

    The most important thing I've learned in my "quest" to make good gluten-free desserts for my mom is to try out recipes that are naturally gluten-free. This skips the messiness of dealing with a mixture of different flours and playing around with proportions. When it comes to these cookies, they are more delicious than any chocolate cookies I've had that do have wheat flour in them. These are fudgy and oh-so-chocolatey; when they come out of the oven, you will think they're under-baked, but they will set and become gooey perfection.

 I made these to take to dinner at my friend's house a couple of weeks ago, and they were a huge hit. This weekend is my sweet 16, and the night before we are having a dinner at my house for our relatives coming from out of town; I'm in charge of dessert, so this past week I made about 70 of these, and have stashed them in the freezer. And seriously, I've managed to restrain myself and not sneak very many out as a late-night snack (but only barely). This week I've been celebrating not only crazy party preparations, but also a new favorite cookie!
   Enjoy!
Flourless Chocolate Fudge Cookies
(slightly adapted from Picklee)

1 1/2 cups (9 oz) bittersweet chocolate chips
3 large egg whites, at room temperature
1 1/2 cups powdered sugar, divided
1/2 cup unsweetened cocoa powder
1 tablespoon cornstarch
1/4 teaspoon salt
1/3 cup hot chocolate mix or sweetened cocoa powder, for rolling cookies

Preheat oven to 350°F. Spray 2 large  baking sheets with nonstick spray or line with parchment paper. Melt 1 cup chocolate chips in glass bowl in microwave, stirring twice, about 2 minutes. Cool slightly.
Using electric mixer, beat whites in large bowl to soft peaks. Gradually beat in 1/2 cup sugar. Continue beating until mixture resembles soft marshmallow fluff.
Whisk 1 cup sugar, cocoa, cornstarch, and salt in medium bowl to blend. On low speed, add dry ingredients into meringue mixture.
Mix lukewarm chocolate mixture and 1/2 cup chocolate chips (dough will be very soft; let it sit for about a minute and it will thicken enough to roll).
Place hot chocolate mix or sweetened cocoa in a shallow bowl or on a plate. Roll 1 rounded tablespoon dough into ball; roll in chocolate, coating thickly. Place on prepared sheet. Repeat with remaining dough, spacing 2 inches apart.
Bake until puffed and tops crack, about 10 minutes. Cool on sheets on rack 10 minutes.
Transfer to rack, cool.
    -makes about 2 dozen cookies; recipe doubles/triples well

Thursday, April 4, 2013

Gluten-Free Fig Scones

    Since my mom was diagnosed with celiac disease a few years ago, I have done my best to recreate her favorite desserts. While it is great to succeed in making her favorite German chocolate cake or fruit tart, sometimes I forget about the everyday treats she misses out on due to her gluten allergy. Scones are one of her favorite baked goods, and a few weeks ago, I realized that I had never made them gluten-free for her. 
    I decided to take a basic gluten-free scone recipe and substitute the fruit it called for for dried figs, which we had around and are one of our favorites. This recipe worked out great: the scones were sweet and slightly crumbly, but also, as is so important in a scone, flaky! This is a great basic scone recipe, so feel free to adapt the spices and add-ins to your liking. Stay tuned for more variations...
Gluten-Free Fig Scones
(adapted from King Arthur Flour)

1 3/4 cups gluten-free all-purpose flour
1/4 cup sugar
2 teaspoons baking powder
1/2 teaspoon xanthan gum 
1/2 teaspoon salt
1/4 teaspoon nutmeg
1/2 cup (1 stick) cold butter
3/4 cup dried figs, roughly chopped (leave some pretty big pieces)
2 large eggs
1/3 cup cold milk
1 teaspoon vanilla extract
sparkling or cinnamon sugar, for topping (I just used regular sugar)

Preheat the oven to 400°F. Grease a divided scone pan, or grease (or line with parchment) a baking sheet.
Whisk together the flour or flour blend, sugar, baking powder, xanthan gum, salt, and nutmeg. 
Work in the cold butter till the mixture is crumbly. 
Stir in the figs.
Whisk together the eggs, milk, and vanilla till frothy.
Add to the dry ingredients, stirring till well blended. The dough should be cohesive and very sticky.
Drop dough by the 1/3-cupful into the scone pan or onto the baking sheet. Let the scones rest for 15 minutes.
Sprinkle the scones with sparkling sugar or cinnamon sugar, if desired. Bake for 15 to 20 minutes, till golden brown. Remove from the oven and let rest for 5 minutes or so before serving. Best enjoyed warm, with butter and jam.
   -makes 8 scones


Wednesday, April 3, 2013

5-Ingredient Hazelnut Ice Cream

     Let me start off by saying sorry for the absence. I went to Brazil for my spring break to spend time with family, and actually managed to get quite a lot of baking done with my cousins; but, I definitely didn't have the time/concentration for blogging! I did take pictures, though, so lots of recipes to come...
   This is a simple recipe that I made a while ago to have with some chocolate macarons for dessert. The flavors aren't too complicated, which can be nice sometimes - it just tastes like hazelnut, with the creamy goodness of frozen custard! While this recipe does require cooking the custard mixture (this is not a whipped-cream-based one), it has only 5 ingredients and comes together quickly. I loved that it was chock-full of hazelnuts; it makes it perfect for eating in small scoops with cookies. If, however, you want a creamier or smoother ice cream, you can reduce the quantity of hazelnuts (I think it would be great with half the amount of hazelnuts, chopped in larger pieces).
    Enjoy!
5-Ingredient Hazelnut Ice Cream
(adapted from Emeril for Food Network)
1 1/2 cups hazelnuts
4 cups half-and-half
1 cup granulated sugar
6 egg yolks
1 teaspoon vanilla
Preheat the oven to 400 degrees F.
Line a baking sheet with parchment paper. Place the hazelnuts on the baking sheet and roast until golden, about 4 minutes. Remove from the oven and cool completely. Chop the nuts (my mom was kind enough to finely chop them for me!) and set aside.
In a saucepan, over medium heat, combine the half-and-half and sugar. Bring to a simmer. In a small mixing bowl, whisk the egg yolks until smooth. Add 1 cup of the hot liquid to the egg yolks and whisk until smooth. Add the yolk mixture to the saucepan of liquid and whisk until incorporated. Bring the liquid back to simmer and continue to cook for 4 to 6 minutes or until the mixture coats the back of a spoon.
Pour the mixture into a glass bowl and stir in the vanilla. Place a piece of plastic wrap directly on top of the mixture. This will prevent a skin from forming while cooling. Cool the mixture completely. Stir in the nuts. Process the mixture in an ice cream machine until creamy and thick, usually about 20 minutes (but depends on the machine). Freeze until ready to eat.

Monday, March 18, 2013

Classic Guacamole

   As you've probably noticed, I almost never post savory food on here. That's mostly because I don't make a whole lot of it - I like to help out when my parents are cooking, but I usually don't feel like the dishes are really mine. I've been doing a lot more cooking lately, and would love to start sharing that on here, too, so I decided to start with one of my favorite recipes, one that I have come back to over and over again.
   This is a classic guacamole - simple ingredients, not too fussy, with a great flavor. I love to use perfectly ripe avocados for this when I can find them, but this has enough flavor that imperfect ones can still make for a great dip. I also love this because it's easily adaptable - I like to put in less jalapeño than the recipe calls for, or throw in some chopped tomatoes. I usually leave out the canola oil in the recipe, just because I've never found a need for it, but some people like it. Any way you do it, it's delicious.
   Enjoy!

Classic Guacamole

1/4 cup chopped fresh cilantro
3 tablespoons finely diced red onion
Few tablespoons canola oil, optional
3 ripe Hass avocado, peeled, pitted and diced
Juice of 2 limes
1 or 2 jalapenos, finely diced
Salt and freshly ground black pepper
 
Mash the cilantro, onions, canola oil, if using, avocados, lime juice and jalapenos together in a bowl, using a fork; guacamole should be chunky. Season with salt and pepper.

Monday, March 11, 2013

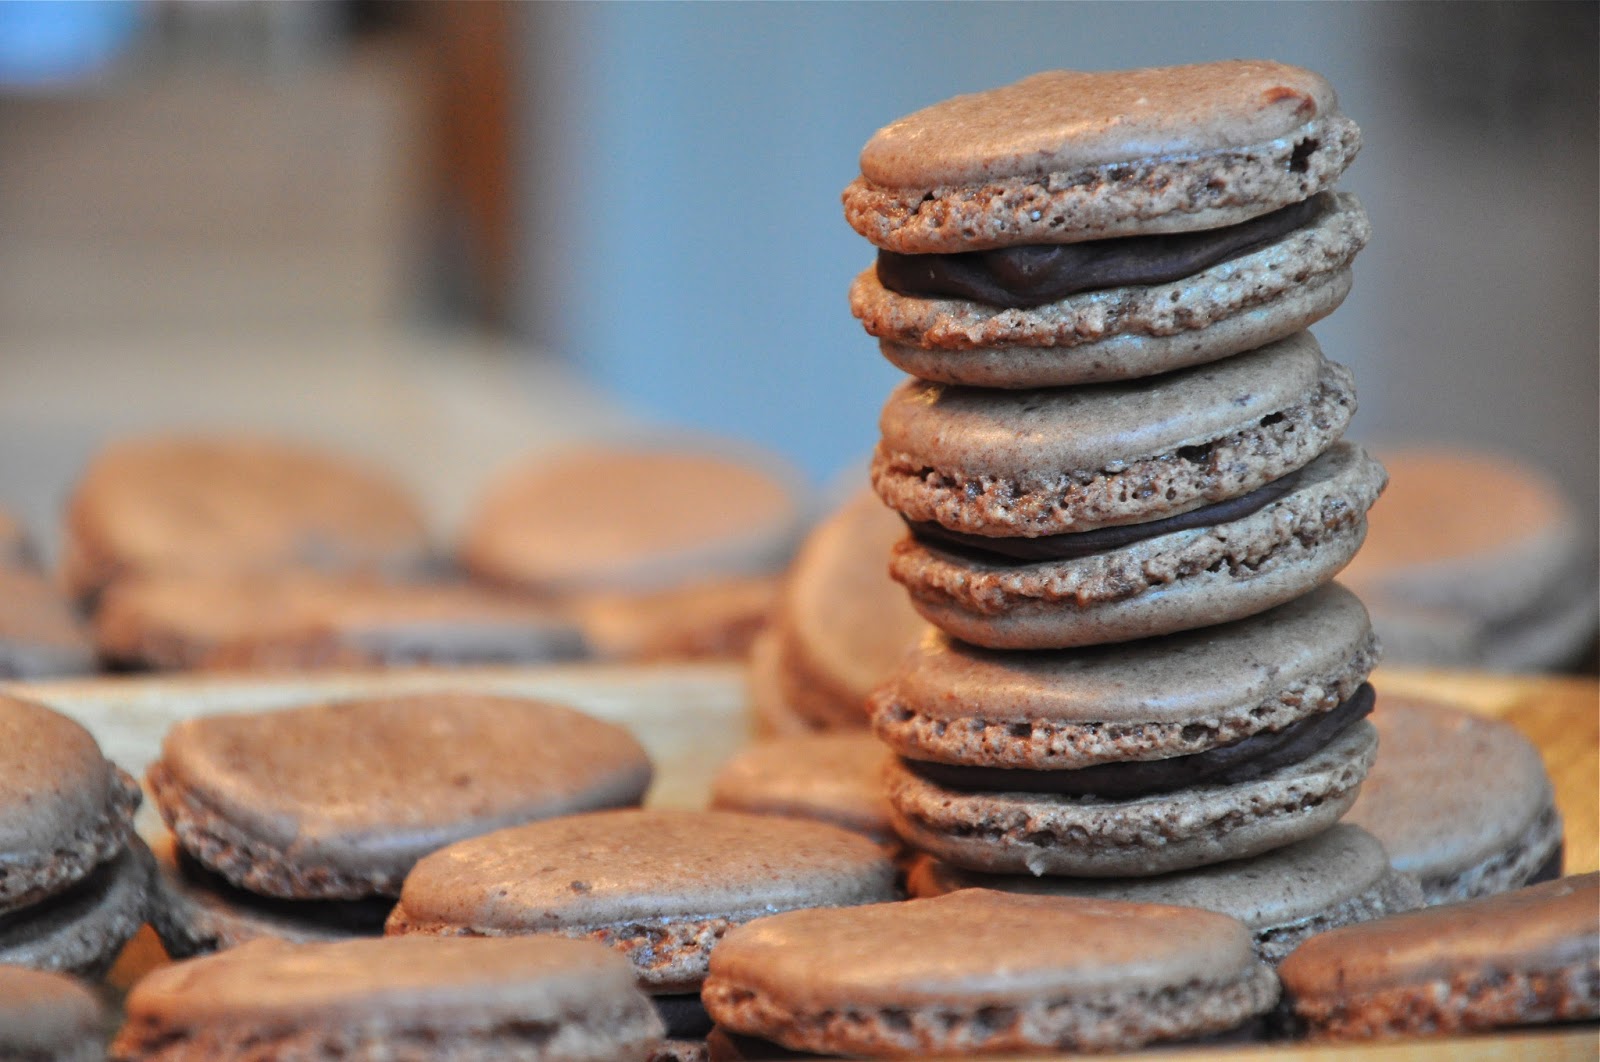
Ladurée Chocolate Macarons

    I've been wanting the Ladurée sweets cookbook for a long time. It's beautiful and, honestly, I'm pretty sure Ladurée's macarons are absolutely perfect. A few weeks ago, my mom surprised me with the book (thank you mom!), and I got to work on some macarons right away. I decided to start with chocolate, a classic. After my last macaron success, I was confident and jumped right in. Fast forward three or so hours, and you would find me sitting on my kitchen floor, staring into the oven with despair. The macarons spread and cracked and were just a fail - I was able to salvage enough to slap together a few sandwiches and leave them in the fridge overnight like the recipe says to, just to see what would happen.
     From the ingredients (and tasting the batter), I could tell that these were going to be good. Tasting one as soon as it was spread with filling, I thought it was tasty. But the next morning, eating one straight out of the fridge for the healthiest of breakfasts, I realized that these were really, really good. They were almost Ladurée.
    So this weekend, I started again. I measured more carefully, sifted more thoroughly and piped more quickly. The first two trays were just like the last batch - the macarons crumbled and cracked. After reading several "trouble-shooting macarons" blog posts (seriously, what is with these little cookies?!) and trying out a few different things, I realized that while Ladurée calls for leaving the piped batter on the counter for 10 minutes, it actually needs more like an hour. After that, everything went smoothly, and after their rest in the fridge, these were even more delicious than last time (and perfectly smooth on top).
   These are absolutely my new favorite recipe, and I can't wait to adapt it to make all of my favorite macaron flavors. Enjoy!
Chocolate Macarons (Macarons Chocolat)

Chocolate Ganache
10 oz / 290 g chocolate (minimum 70% cacao solids)
1 cup + 2 tbsp / 270 ml heavy (double) cream
4 tbsp / 60 g butter

Macaron Shells
2 3/4 cups / 260 g ground almonds (almond flour)
2 cups + 1 tbsp / 250 g confectioners' (icing) sugar
2 3/4 tbsp (15 g) unsweetened cocoa powder
2 oz / 65 g chocolate (minimum 70% cacao solids)
6 egg whites + 1/2 egg white
1 cup + 1 tbsp / 210 g granulated sugar 

Equipment
Piping bag fitted with a 1/2-inch / 10-mm plain tip

Chocolate Ganache
1. Prepare the ganache. Using a knife, finely chop the chocolate on a cutting board and place in a large bowl. In a saucepan, bring the cream to a boil. Pour the hot cream in 3 parts over the chopped chocolate, mixing with a wooden spatula between each addition to homogenize the preparation.
Cut the butter into small pieces and stir into the ganache until very smooth. Transfer to a baking dish and cover with plastic wrap, so that the plastic is in contact with the ganache. Allow the ganache to cool at room temperature and then refrigerate for 1 hour until it has a thick, creamy consistency.
Macaron Shells
2. Combine the ground almonds, confectioners' sugar and cocoa powder in a food processor and pulse to obtain a fine powder. Sift or strain through a sieve to remove any lumps. Melt the chocolate in a heatproof bowl set over a pan of gently simmering water or in the microwave oven until it is lukewarm (approx. 95 F / 35 C).
3. In a clean, dry bowl, whisk the 6 egg whites to a foam. Once they are frothy, add a third of the granulated sugar and whip until sugar is dissolved; add another third of the granulated sugar and whip for another minute; finally add the remaining granulated sugar and whip for 1 more minute. Pour the melted chocolate over the whipped egg whites. Using a rubber spatula, roughly incorporate the chocolate, and then immediately and delicately fold the sifted mixture of ground almonds, confectioners' sugar and cocoa powder into the chocolate and egg white mixture. In a separate small bowl, beat the remaining 1/2 egg white until just frothy. Then add to the final mixture, folding gently to slightly loosen the batter.
4. Transfer mixture to the piping bag fitted with a plain tip. On a baking sheet lined with parchment paper, pipe small macaron rounds 1 1/4 - 1 1/2 inches / 3-4 cm in diameter. Lightly tap the sheet so the macarons spread fully.
Preheat the oven to 300 F / 150 C / gas mark 2.
Allow the macarons to sit uncovered for 10 minutes and then place in the oven. Bake for approximately 15 minutes until they form a slight crust.
5. Remove baking sheet from the oven, and with a small glass, carefully pour a tiny amount of water in between the sheet and the parchment paper (lift the paper ever so slightly corner by corner). The moisture and steam that result from the water on the hot baking sheet will allow the macarons to peel off more easily once they are cool. Do not pour too much water as this could cause the macarons to become soggy. Allow to cool completely. Remove half of the macaron shells and place them upside down on a plate.
6. When the ganache has a creamy consistency, pour into a clean piping bag fitted with a plain tip. Pipe a coin of ganache onto the macaron shells resting upside down. Top each with the remaining macaron shells. Keep macarons in an airtight container in the refrigerator for 12 hours before tasting.

My notes:
-My biggest issue with this recipe is the 10 minutes of resting time - I had to increase this to an hour.
-I found that the step of pouring water onto the baking sheet to create steam was unnecessary - the macarons came right off the paper without a problem.
-Be sure to keep these in the fridge overnight - it makes a huge difference.
-Don't worry if your macarons crack or don't form feet on the first try (or, like me, the second or third try) - they might not look great, but they will taste almost the same!