Showing posts with label savory. Show all posts

Sunday, November 30, 2014

Swirly Cheese Buns

Growing up, Christmases spent with my dad's side of the family were events I looked forward to all year. The week would be spent sitting around the tree, rarely doing anything other than reading, watching movies, and sneaking off into other rooms to discretely wrap presents. We also spent a lot of time every single day in the kitchen; by the time the 25th came around, my grandmother, my aunts and I had churned out enough varieties of cookies to satisfy all my older cousins (who, strangely enough, would still rather eat raw dough than wait for the cookies to come out of the oven).
Waking up Christmas morning, the house was always filled with the smell of my great-grandmother's coffee cake (which is the most prized recipe I have and will most likely never be making its way online), along with the sweet scent of cinnamon buns. Hers were small and not at all like what you can buy at a mall food court, but they gave me a fondness for small, swirly rolls.
Around this time of year, I always start thinking of those cinnamon buns. They are a sacred tradition to me and I don't ever make them before December, but until then, I have to find substitutes. Last weekend, I threw together this savory variation. The dough recipe is similar to that of a traditional cinnamon bun, but they are filled with lots of gooey cheese, along with some shallots and herbs for extra flavor. They might just have to join in for this year's Christmas breakfast.
Enjoy!
 Swirly Cheese Buns

for the dough:
3 cups all-purpose flour
1 teaspoon salt
pinch of black pepper
1 tablespoon sugar
2 1/4 teaspoons instant yeast
1 cup milk
1/4 cup (1/2 stick) unsalted butter, melted and cooled to lukewarm, plus 1 tablespoon for brushing the rolls

for the filling:
1 small shallot, minced
1 1/2 cups grated fresh Mozzarella cheese
1/4 cup grated Parmesan cheese
1 teaspoon dried oregano (or finely chopped fresh herbs of your choice)
1/4 teaspoon salt
pinch of black pepper

To make the dough: In the bowl of a stand mixer fitted with the paddle attachment, combine the flour, salt, pepper, and sugar. Mix briefly to combine. In a medium measuring cup, whisk the yeast into the milk to dissolve. Add the yeast mixture and the melted butter to the mixer and beat on low speed just until a rough dough comes together. Switch to the dough hook and knead the dough on low speed for about 5 minutes, or until it is smooth and elastic.
Spray a large bowl with nonstick cooking spray. Shape the dough into a ball and place in the prepared bowl. Cover with plastic wrap and let rise for about 2 hours, or until doubled in size.
Meanwhile, in a small bowl, stir together all of the ingredients for the filling. Line two 9-inch round cake pans with parchment paper and set aside.
Turn the dough out onto a lightly floured work surface. Roll into a rectangle measuring about 12×16-inches. Spread the filling evenly over the dough, leaving about 1/2-inch border at the edge. Starting with a short side, roll the dough into a tight log. Cut the dough into 12 rolls, each about 1-inch wide. Place 6 of the rolls into each of the prepared pans, spacing them out evenly. Melt the remaining 1 tablespoon of butter and gently brush it over the rolls. Cover the pans with plastic wrap and let rise for about 2 hours, or until doubled in size.
Preheat oven to 350 F when the rolls are nearly done rising.
Remove the plastic wrap from the pans, and bake the rolls for 20-25 minutes, or until they’re golden brown and the cheese bubbles. Serve warm.

Sunday, August 25, 2013

TWD Rewind: Cheese and Tomato Galette

 For a while now, I've been trying to get back into Tuesdays with Dorie. It can be annoying at times, often having other people choose what I should bake this week, but ultimately I find that it makes me try new techniques and recipes that I wouldn't have attempted otherwise. So, while I try to catch up, here's an old recipe I missed a few months back!
 Sometimes, the group's chosen recipes can even turn out to be unexpected favorites. Like this galette.
 I made it expecting something kind of boring - like a classed-up pizza. It turned out to be absolutely delicious - I made the crust with white whole-wheat flour, which made it a little more substantial, and it has a lovely crunch from the cornmeal in it. The cheeses mix together really well, and pair perfectly with ripe summer tomatoes.
 It's perfect for a summery lunch or a light dinner alongside a salad, and it will definitely be made all the time!
As always, the recipe can be found in Baking with Julia, or here.
Enjoy!

Monday, March 18, 2013

Classic Guacamole

   As you've probably noticed, I almost never post savory food on here. That's mostly because I don't make a whole lot of it - I like to help out when my parents are cooking, but I usually don't feel like the dishes are really mine. I've been doing a lot more cooking lately, and would love to start sharing that on here, too, so I decided to start with one of my favorite recipes, one that I have come back to over and over again.
   This is a classic guacamole - simple ingredients, not too fussy, with a great flavor. I love to use perfectly ripe avocados for this when I can find them, but this has enough flavor that imperfect ones can still make for a great dip. I also love this because it's easily adaptable - I like to put in less jalapeƱo than the recipe calls for, or throw in some chopped tomatoes. I usually leave out the canola oil in the recipe, just because I've never found a need for it, but some people like it. Any way you do it, it's delicious.
   Enjoy!

Classic Guacamole

1/4 cup chopped fresh cilantro
3 tablespoons finely diced red onion
Few tablespoons canola oil, optional
3 ripe Hass avocado, peeled, pitted and diced
Juice of 2 limes
1 or 2 jalapenos, finely diced
Salt and freshly ground black pepper
 
Mash the cilantro, onions, canola oil, if using, avocados, lime juice and jalapenos together in a bowl, using a fork; guacamole should be chunky. Season with salt and pepper.

Sunday, February 3, 2013

Thick Gluten-Free Pizza Crust

    Since my mom was diagnosed with Celiac Disease almost two years ago, a lot has changed in how we eat in our house. I still eat lots of cakes and breads (God, I love bread...) when I go out or am at a friend's house, but at home, we don't have a whole lot of "glutenous," as we've come to call them, foods around.
   My mom and I used to love making our own pizza at home - we could make it just the way we wanted it, and it ended up being a lot healthier (and cheaper) than ordering one. A couple of weeks ago, we decided to try to make one gluten-free.
I was terrified when I was faced with this giant blob, but alas, we must persevere...
   The biggest problem we've found with the gluten-free pizzas that can be found in the frozen aisle of the supermarket is that the crusts are either tasteless (think cardboard) or soggy (think wet bread type thing...). I was assuming that our first try at a homemade crust would be pretty bad and we would have to tweak the recipe in the future, but it ended up being great! It is fluffy with a crisp bottom, just like a thick, classic pizza crust.
  I wish I could say I was responsible for the lovely asparagus circle, but my mom took care of everything after the crust-making. Whatever she did, this was one delicious dinner! This crust is actually surprisingly filling, too - one 12" pizza (with a side salad) served three people easily. This crust will definitely be made again in the future - dare I say it's even better than a regular wheat flour crust?!
  Enjoy!
Thick Gluten-Free Pizza Crust

 1 1/2 cups gluten-free all-purpose flour blend
2 tablespoons buttermilk powder or nonfat dry milk powder
1 tablespoon sugar or honey
1 teaspoon baking powder
3/4 teaspoon salt
1 teaspoon xanthan gum
1 1/2 teaspoons instant yeast
1 cup warm water
2 tablespoons olive oil (for dough)
2 tablespoons olive oil (for pan)

Place the dry ingredients (except the yeast) into a large mixing bowl; the bowl of your stand mixer is perfect. Mix until thoroughly blended.
Place the warm water, olive oil, yeast, and about 1/2 cup of the dry mixture into a small bowl. Stir to combine; a few lumps are OK. Set aside for 30 minutes or so, until the mixture is bubbly and smells yeasty.
Add this mixture to the dry ingredients, and beat on medium-high speed for 4 minutes. The mixture will be thick and sticky - don't worry, just keep going! Note: you must use a stand mixer or electric hand mixer to make this dough; mixing by hand doesn't do a thorough enough job.
Cover the bowl, and let the dough rest for 30 minutes or so.
Preheat the oven to 425°F.
Drizzle 2 tablespoons olive oil onto the center of a baking sheet or 12" round pizza pan. Scrape the dough from the bowl onto the puddle of oil.
Using your wet fingers, start at the center of the dough and work outwards, pressing it into a 12" to 14" circle.
Let the dough rest, uncovered, for 15 minutes.
Bake the crust for 8 to 10 minutes, just until it's set; the surface will look opaque, rather than shiny.
Remove from the oven and top with whatever you like (we used tomato sauce, cheese, and asparagus). Return to the oven to finish baking, about 10 to 15 minutes depending on the toppings you've chosen.
Remove from the oven, and serve warm.
   -one 12" to 14" pizza

Saturday, October 27, 2012

TWD: Bagels! (and Veggie Cream Cheese)

 I'm sorry. I'm sorry I've been gone for a week and a half. I'm sorry I haven't posted a new recipe in nearly three weeks. The kitchen being painted, our house's lack of heat due to a boiler switch, schoolwork, pottery classes, and various other shenanigans got in the way of baking these past couple of weeks. I actually made an okay gluten-free carrot cake last week, but it was kind of crumbly, and let's just say that the chocolate "glaze" resulted in a cracked, hard-as-rock layer of yuck. Overall, not a great culinary period of time...
 ...but. Last weekend, these bagels. Bagels have been on my to-bake list for years, and I never got around to making them. I was so excited when I saw that they had been chosen as last week's Tuesdays with Dorie! This week was actually a fifth Tuesday of the month, so we had a make-up week in case we wanted to go back and make something we missed. Perfect!
um, YUM!
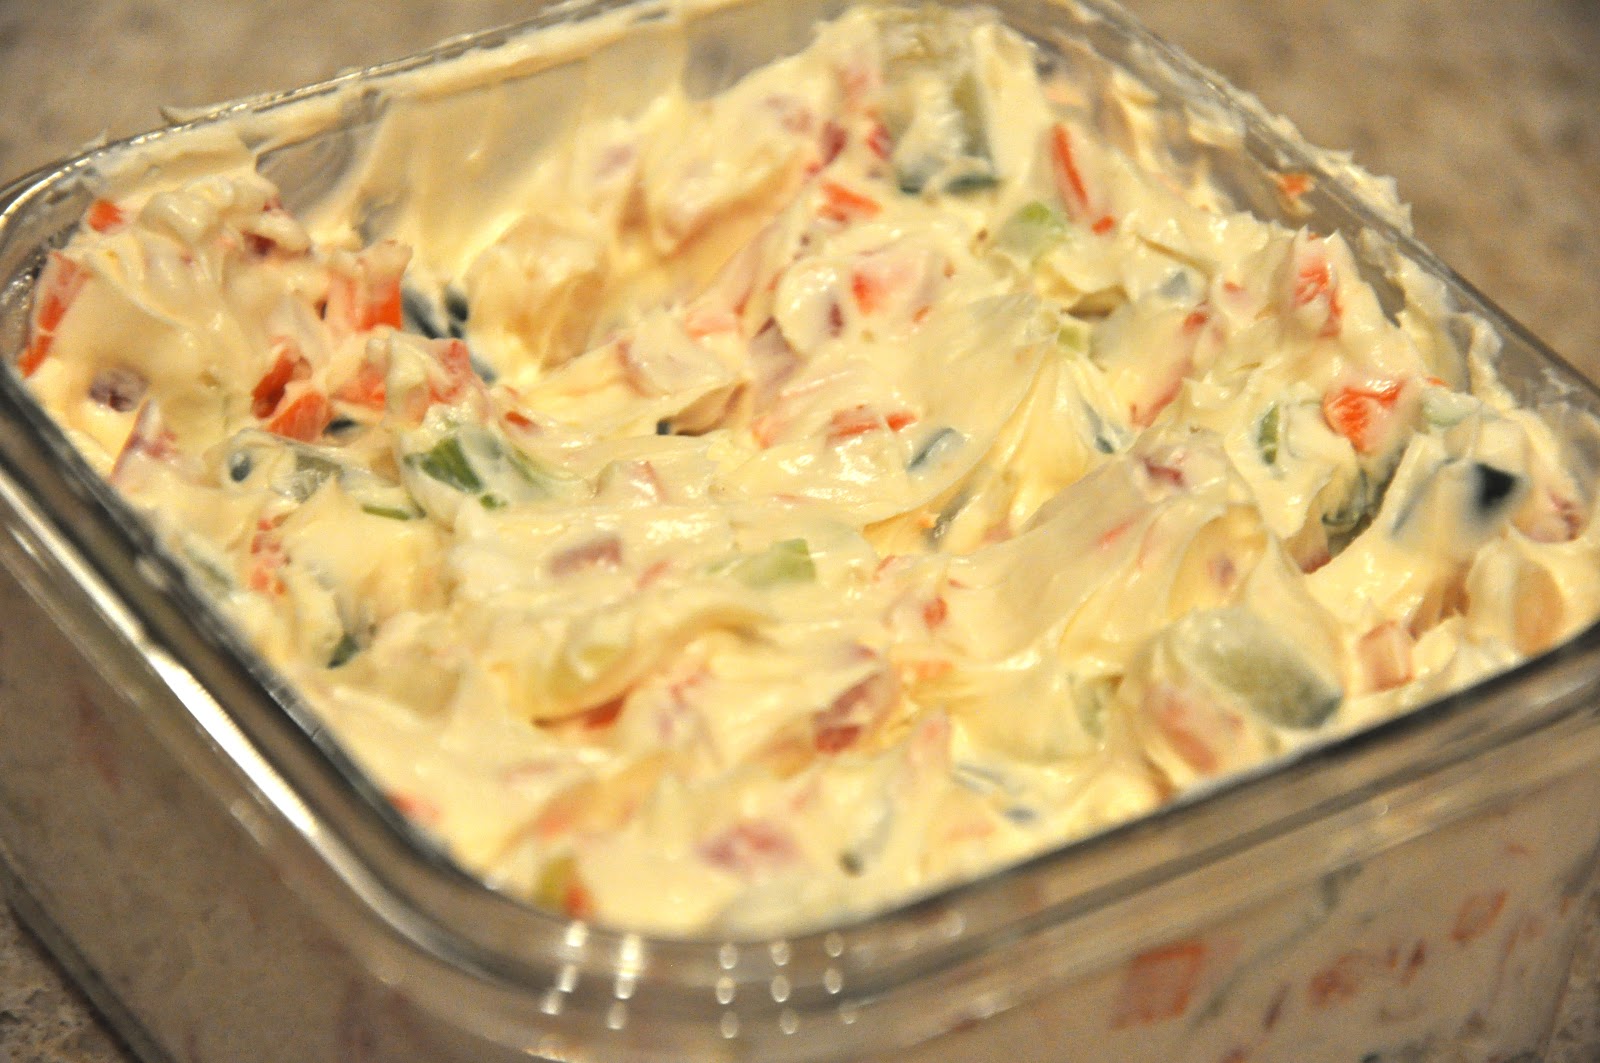
 The dough was kneaded, left to rise, deflated, left to rise, shaped into doughnut shapes, boiled, baked, and left to cool. I made the quick Vegetable Cream Cheese from the book, using red bell peppers instead of radishes. The cream cheese was light and refreshing, as opposed to the heavy, buttery spreads that can sometimes be piled onto deli bagels.
Listen, dears. (I feel that as I'm writing about a recipe made on Julia Child's show, calling you dears is appropriate. 'Kay?) The thing is, I live in New York City. My hometown basically is the bagel capital of the world (Montreal, I don't even want to talk about this with you). I was skeptical that these could live up to the chewy perfection two dollars can get you on my corner.
I was wrong to doubt this recipe. These bagels are tender, golden-brown bites of delicious. They are like a very, very good New York deli bagel (although not quite so huge, which is a good thing). I am so glad I got to try out making this usually-store-bought staple at home, and I know I will be making bagels again in the future; that said, I'm not promising to never buy one again.
If you live near a great bagel place, give this recipe a try and compare the two results. Let me know what you find? If you don't live near a great bagel place, you must give this recipe a try, if only to understand what all the fuss is about. ;) The recipe, as always, can be found in Baking with Julia or on the host's blog, Heather's Bytes. Thanks for hosting, Heather!
    Enjoy!

Wednesday, May 2, 2012

Cheesy Creole Tomato Pie

On our recent trip to New Orleans, my parents and I ate at some of the best restaurants we've ever been to. Sure, we went to the classic tourist places: Commander's Palace, Brennan's, and Cafe du Monde (I MUST make beignets soon. Like, you have no idea - if I learn how to make them, it may be a health hazard). But Easter was my dad's birthday, and my mom and I had decided to make a reservation before we even went. That reservation just so happened to be at Emeril's flagship restaurant. I was so excited to have dinner there, and it did not disappoint. They don't have a vegetarian entree, so when I told them I didn't eat meat, they just made up a dish for me. The meal was so delicious, on our last night in New Orleans we decided to go to NOLA, one of Emeril's other restaurants there. We eat a lot of good food living in New York City, but the flavors were something I had never tasted before.
I decided I had to have one of the cookbooks. When we asked our waiter which one they sold there, he came out with a stack of about 20 books. Let's just say we spent quite a while sitting at our little table, trying to decide which one to bring home. Well, we finally decided on one that had plenty of vegetarian options, and that had things I could bake! This week, my mom and I decided to try out some recipes.
We have tried several (five, actually - not one of which hasn't been delicious!), but this was the only one that could fall in to a "baked goods" section. This, my friends, is a cheesy creole tomato pie. A savory crust piled high with layers of cheese, tomatoes, onions, herbs, and deliciousness. It was super rich; do not serve this as a main dish with nothing else! We had it with a few different vegetables, and it was great. We did adapt it to make it gluten-free (really slight adjustments), but feel free to use regular bread crumbs and flour and leave out the xanthan gum if you don't need it gluten-free, and found that the crust could definitely use less salt. If we've noticed one thing from cooking Emeril's food, it's that you need to watch the salt! We also were not able to roll out the crust, it was too hard - so we patted it into the pan. Aaaaand, to give credit where it's due, I actually had no part in making the crust - my mom did it before I got home. Good job mommy!
We will definitely be making this pie again soon, and while it shouldn't be an everyday thing (take a look at the ingredients list and try to guess the amount of fat in this - I'm too scared to even try), it is worth the time it takes to make. Enjoy! <3

Cheesy Creole Tomato Pie
(slightly adapted from Farm to Fork by Emeril Lagasse)

1 recipe Savory Pie Crust dough (recipe follows)
1 egg, separated
2 pounds ripe Creole tomatoes or other regional variety, such as heirlooms or beefsteak
1/2 teaspoon salt
1/2 teaspoon freshly ground black pepper
4 tablespoons mayonnaise
1/3 cup unseasoned dry gluten-free breadcrumbs
3/4 cup thinly sliced Vidalia onions
1 tablespoon fresh thyme leaves
2 tablespoons thinly sliced fresh basil leaves
2 ounces Fontina cheese, grated (about 1/2 cup)
2 ounces mozzarella cheese, grated (about 1/2 cup)
2 tablespoons extra-virgin olive oil
2 tablespoons grated Parmigiano-Reggiano cheese

Roll out the pie dough on a lightly floured surface to fit a 9- or 10-inch deep-dish pie plate. Fit the dough into the pie plate and crimp the edges decoratively. Refrigerate, covered, for at least 30 minutes or up to a day.
Preheat the oven to 375 F.
Remove the pie shell from the refrigerator and line it with aluminum foil. Fill the shell with ceramic pie weights or dried beans, and bake for 13 minutes, or until lightly golden around the edges. Remove the foil and weights, return the shell to the oven, and bake for 3 minutes.
Remove the pie crust from the oven and place it on a wire rack. Lightly beat the egg white with a fork. Using a pastry brush, lightly coat the entire surface of the warm pie crust with the egg white (you will probably not use all the white). Then allow the pie shell to cool and the white to set. It will look glazed.
Slice the tomatoes into 1/4-inch-thick rounds, discarding the stem and root ends. Season the tomatoes with the salt and pepper.
Combine the mayonnaise with the egg yolk in a small bowl, and stir until smooth.
Sprinkle one third of the breadcrumbs over the bottom of the cooled pie crust. Layer half of the sliced tomatoes over the breadcrumbs in a circular pattern, and top with half of the sliced onions. Drizzle in half of the mayonnaise mixture, and top with half of the herbs, half of the Fontina, half of the mozzarella, and half of the remaining breadcrumbs. Make a second layer with the remaining tomato slices, onions, mayonnaise mixture, Fontina, mozzarella, and breadcrumbs. Drizzle the olive oil over the top, and sprinkle with the Parmesan cheese.
Bake the pie in the oven for 50 minutes to 1 hour, until it is bubbly hot and golden brown. Allow it to cool for at least 30 minutes or up to 5 hours before serving. This pie is at its best at room temperature.
6 to 8 servings

Savory Pie Crust

1 1/4 cups gluten-free all-purpose flour
1 teaspoon xanthan gum
1 teaspoon salt
1/2 teaspoon freshly ground black pepper
8 tablespoons (1 stick) cold unsalted butter, cut into pieces
3 to 4 tablespoons ice water

Place the flour, xanthan gum, salt, and pepper in the bowl of a food processor, and pulse to combine. Add the butter and process until the mixture resembles coarse crumbs. While the machine is running, gradually drizzle in the water, processing until the dough comes together to form a ball.
Transfer the dough to a lightly floured surface and shape it into a flat disk. Wrap it in plastic wrap and refrigerate it for at least 1 hour or up to overnight. (The dough can be frozen for up to a month; thaw in the refrigerator before using.)
One 9- or 10-inch pie shell

Tuesday, April 3, 2012

TWD: Pizza Rustica


Thanks to Emily of Capital Region Dining and Raelynn of The Place They Call Home for hosting this week's Tuesdays with Dorie recipe!It was a great one.
This is a pizza rustica, which is essentially a cheese pie (sort of like a firmer, cheesier quiche) baked in a sweet pie crust. It is supposed to have prosciutto for a salty, savory kick but I made it vegetarian by adding in sauteed mushrooms instead. I also subbed basil for parsley. It worked really well, but because the crust (which I also made gluten-free by using gluten-free all-purpose flour and adding a little xanthan gum)is so sweet, I think something saltier might have worked better. My mom suggested salty olives, which I think could be a good idea.

This was pretty good. We ate most of it on the first night! I had the leftovers for lunch cold the next day, and they weren't as good- I recommend eating it at room temperature. Overall it was a fairly quick recipe - I put it together in under an hour - and a dinner we will go back to again.

The recipe can be found on the hosts' blogs. Enjoy!

Sunday, January 8, 2012

Sea Salt Caramels and a cute appetizer


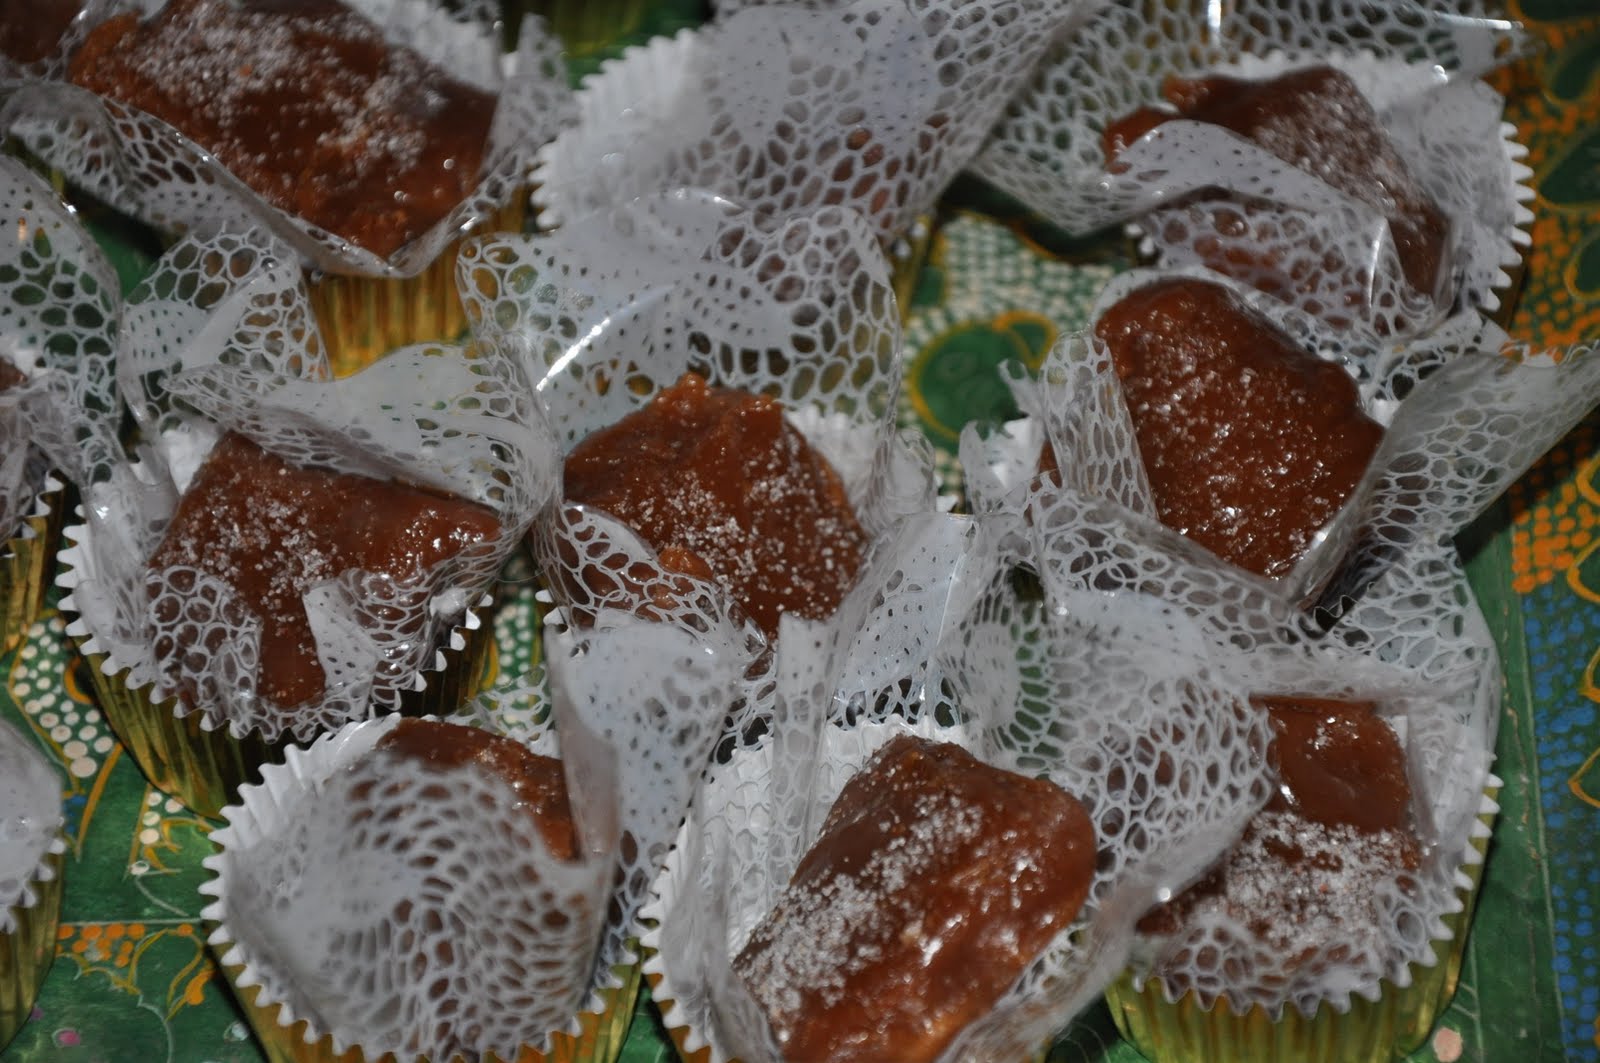
Happy New Year!! Last weekend we had a small party at our house on the 31st. We decided to make dinner be a whole bunch of appetizers instead of having a big sit-down ordeal, and it worked out great. I was in charge of dessert and decided to keep with the theme of bite-sized food and make various little sweets. I made a variety, and these were probably the most popular; sea salt caramels. I had never made caramel before but it was something I always wanted to try, so I was glad to have the chance. The recipe says that it will take about ten minutes for the sugar to turn a dark honey color, but mine took about eight, so I guess it depends on the stove/pan. I cut them just as soon as they were cool and they were EXTREMELY chewy and could pull out a tooth, but once it was time for dessert a few hours later they had softened and were perfectly chewy and delicious. I had no flakes of sea salt so I used regular table sea salt (less than a tablespoon though) and they were a bit too salty - I would stick to the flakes. Either way everyone loved them, and they were a definite hit!
Homemade Sea Salt Caramels (source: Baking Bites)
1/3 cup water
1/4 cup corn syrup
1 1/2 cups sugar
1 cup heavy cream
1/4 cup unsalted butter
1/2 tsp salt
1 – 2 tbsp sea salt (rec. Maldon brand)

Lightly grease a 9×9 -inch glass or pyrex baking dish with butter or a thin coat of vegetable oil.
In a large saucepan, combine water, corn syrup and sugar. Bring to a boil over high heat, then continue to boil until caramel turns a deep honey color (10-14 minutes).
While sugar cooks, combine cream and butter in a microwave-safe bowl and cook for 1-2 minutes on high heat, until butter is melted. Set aside.
When sugar is a deep honey color, pour in cream mixture. Caramel will bubble up vigorously. Stir until bubbles subside slightly, then stir in salt. Attach a candy thermometer to the side of the pan and continue to cook, stirring regularly with a silicone spatula, until caramel reaches 260F (5-10 minutes).
Pour caramel into prepared dish. Allow caramel to cool completely, then sprinkle evenly with sea salt.
Cut caramels into small squares or rectangles with a warm, sharp knife.
Caramels can be served immediately or wrapped in small squares of wax paper. Caramels will keep for a few weeks at room temperature.
Makes about 3-4 dozen, depending on the size of your caramels. <-- i cut mine into 36 and they were pretty large


This was one of our appetizers, and I thought it was such a cute idea. You just put little balls of fresh mozzarella (we couldn't find them so we just cut chunks) and cherry tomatoes on toothpicks, and set them out with a bowl of pesto for dipping. We made it ourselves using this recipe, which was delicious, and we added a little extra oil to make it thinner for dipping. (The little bowl is garlic-free for a friend who's allergic). Yummy!

Enjoy!!