Showing posts with label candy. Show all posts

Thursday, March 13, 2014

Ultimate Nutella Mousse


 If you hadn't already realized it, I have a bit of a thing for Nutella. It basically takes the greatest food ever (chocolate) and mixes it with hazelnuts to make the creamiest, sweetest, most indulgent topping for just about anything. 
After a while, slathering the chocolatey goodness on various forms of carbohydrates gets a little old. I love finding ways to incorporate my favorite foods into desserts, and this mousse does just that. 
It has (theoretically) two ingredients. Two ingredients! Mousse!! Okay, so it may be a bit of a faux mousse, but it plays the part pretty amazingly. It's fluffy and creamy and kind of makes you want to eat the whole bowl. Top it with homemade dark-chocolate-covered strawberries, and this 5-minute dessert just got classy. 
Enjoy! 

Ultimate Nutella Mousse
(adapted from Bakers Royale)

9 oz. Nutella
2 cups heavy cream
1/2 teaspoon espresso powder
2 tablespoons confectioners' sugar
1/4 cup hazelnuts, roughly chopped
about 6 strawberries
1/2 cup dark chocolate chips 
1/4 cup white chocolate chips

Place Nutella and espresso powder in microwave safe bowl. Heat on low for 10 second intervals until mixture is thinned a bit. Stir to incorporate the espresso powder. Set aside and cool to room temperature.
Whip 1 1/2 cups cream until soft peaks form (be careful not to let it reach stiff peaks). Gently fold whipped cream into Nutella mixture. The mousse will be soft. Fill a bowl (roughly 1-quart capacity) and cover and refrigerate for at least 4 hours or overnight.
Once the mousse is chilled, whip the remaining 1/2 cup cream with the sugar until soft peaks form. Spread over the mousse, and top with chopped hazelnuts.
In the microwave or over a double boiler, heat the two chocolates separately. Dip the strawberries in the dark chocolate and place on a parchment-lined baking sheet; drizzle with white chocolate (I used a piping bag). 
Refrigerate strawberries for 1 hour, or until set; use as topping for mousse. 

*Note: This is really more of a concept than a rigid recipe; feel free to adapt it as you like!

Saturday, December 15, 2012

Apple Cider Caramels

 Around this time of year, kitchens are filled with Christmas cookies, pies, and mugs of hot chocolate. I always like to give homemade candy as gifts; it's something that nearly everybody likes, and it can be enjoyed a few weeks after it's made, once the cookies and pies are long forgotten. Not that it ever lasts that long...
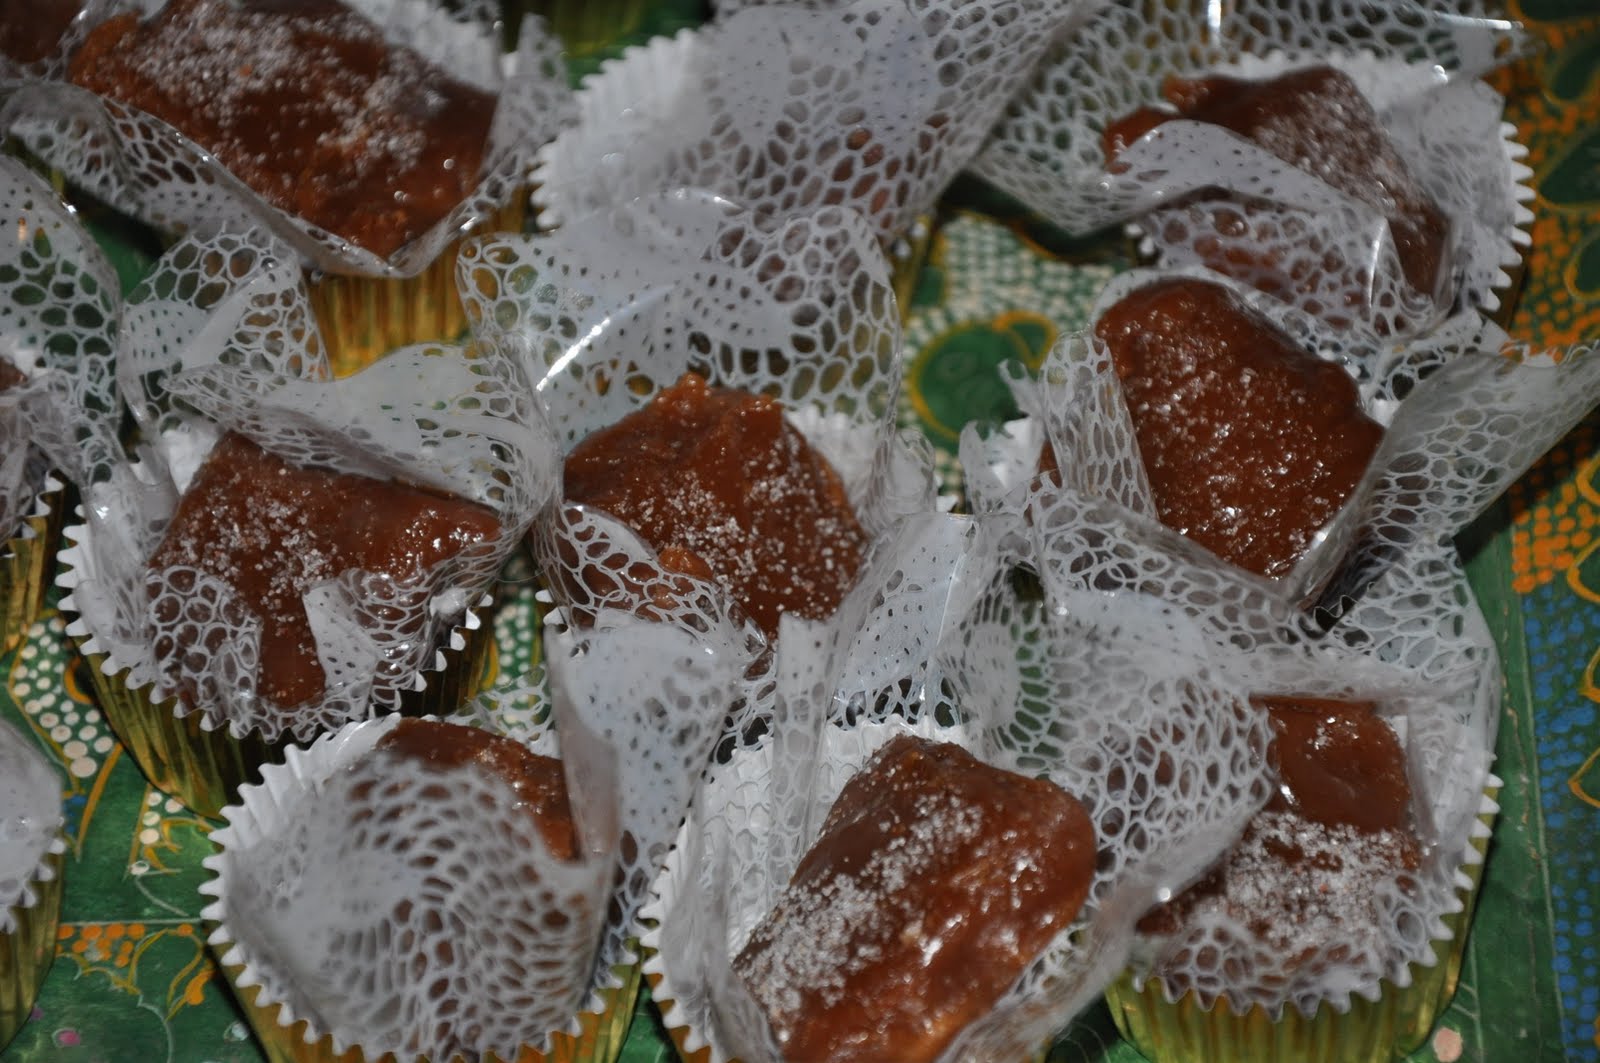
 My favorite winter drink is spiced apple cider. A big, steamy mug of it is the perfect way to start a cool morning or snowy afternoon. These caramels take everything that's so wonderful about this cozy drink and pack it into a bite-sized square, easy to nestle into decorative tins for gift-giving or slip into your bag for an afternoon treat.
  These apple cider flavor in these comes from several cups of apple cider, which are reduced into a syrupy consistency and made into a creamy candy with a hint of salt that makes them oh-so-addicting. These caramels are just the way I like them - chewy enough to make you take a minute or two of silence to eat them! If you want a slightly less chewy caramel, just cook the mixture for a bit less time than the recipe calls for. Wrap them up in paper, pack them up and make all of your loved ones worship you, or just eat half the pan straight from the fridge. It's okay, I won't judge.
 Enjoy!
 
Apple Cider Caramels

4 cups (945 ml) apple cider
1/2 teaspoon ground cinnamon
2 teaspoons flaky sea salt, or less of a finer one
1/2 cup (1 stick) unsalted butter, cut into chunks
1 cup granulated sugar
1/2 cup packed light brown sugar
1/3 cup heavy cream
Neutral oil for the knife

Boil the apple cider in a 3- to- 4- quart saucepan over high heat until it is reduced to a dark, thick syrup, between 1/3 and 1/2 cup in volume. This should take about 35 to 40 minutes. Stir occasionally.
  Meanwhile, get your other ingredients in order, because you won’t have time to spare once the candy is cooking. Line the bottom and sides of an 8- inch straight- sided square metal baking pan with 2 long sheets of crisscrossed parchment. Set it aside. Stir the cinnamon and salt together in a small dish.
  Once you are finished reducing the apple cider, remove it from the heat and stir in the butter, sugars, and heavy cream. Return the pot to medium- high heat with a candy thermometer attached to the side, and let it boil until the thermometer reads 252 degrees, only about 5 minutes. Keep a close eye on it. (Don’t have a candy or deep- fry thermometer? Have a bowl of very cold water ready, and cook the caramel until a tiny spoonful dropped into the water becomes firm, chewy, and able to be plied into a ball.)
  Immediately remove caramel from heat, add the cinnamon- salt mixture, and give the caramel several stirs to distribute it evenly. Pour caramel into the prepared pan. Let it sit until cool and firm—about 2 hours, though it goes faster in the fridge. Once caramel is firm, use your parchment paper sling to transfer the block to a cutting board. Use a well- oiled knife, oiling it after each cut, to cut the caramel into 1-by-1-inch squares. Wrap each one in a 4-inch square of waxed paper, twisting the sides to close. Caramels will be somewhat on the soft side at room temperature (less chewy after sitting for a day), and chewy/firm from the fridge.

Thursday, August 30, 2012

Brigadeiros (Brazilian Chocolate Truffles)

If there's one thing that you'll find at just about every party, of somebody of any age, from 1 to 100, at least in the U.S., it's probably... Well, I don't know. We don't really have that one thing- it might be pizza, soda, maybe a birthday cake? In Brazil, there is one thing you will always find: Brigadeiros.
These are the simplest chocolate truffles- a can of sweetened condensed milk, a few tablespoons of sweetened cocoa powder or hot chocolate mix, cooked until the right consistency, refrigerated, rolled into balls and then in chocolate sprinkles. Make them the size you want, throw them in some little candy cups (don't use mini cupcake wrappers, unless you want enough richness in each one to last you a week), and these chewy chocolate bites will be a huge hit. They are sweet, chocolatey, the perfect texture for everyone from babies to great-grandparents. If you don't want the fuss of rolling, spoon the hot mixture into shot glasses and it will be like having a little grown-up pudding cup. Either way, delicious, and a Brazilian classic. Enjoy! <3
Brigadeiros

1 14-oz. can sweetened condensed milk
1/4 cup sweetened cocoa powder or hot chocolate mix
chocolate sprinkles, for rolling

Stir together milk and chocolate in a large microwave-safe bowl.
Microwave for two minutes, stir, two minutes, stir. Microwave in one-minute increments until the mixture reaches the consistency of a thick caramel sauce: too thin for scooping but too thick for easy drizzling (this should only take an additional 2-3 minutes, but depends on your microwave.)
Refrigerate until completely cool and thickened, about 3 hours. Once cool, scoop into small balls (less than a tablespoon usually, but the size is up to you) and roll in chocolate sprinkles. Place in candy cups and leave at room temperature until serving.
Note: while in the microwave, the mixture may overflow; just pause, stir, and continue.

Wednesday, March 28, 2012

Salted Cashew Toffee


Sorry for the lack of posts in the past week. I had a whole folder of previously-made recipes I hadn't gotten around to posting yet, but it seems I've now posted all of them! So this weekend, I figured it was time to get baking! I wanted something quick, but also delicious. I've recently discovered the amazingness (is that even a word?) that is candy making, because it doesn't take too long and has endless variations. Have I ever mentioned how wonderful homemade peanut butter cups are? But more on that another time...
Several years ago my best friend gave me a cookbook for Christmas. The recipes all look delicious and decadent, and it's one of those books you can just look through like a catalog. It makes you almost drool. That book is Sticky, Chewy, Messy, Gooey. It's become pretty famous,and my friend didn't know this, but I had actually been meaning to find someplace to buy it for a while. I was happy to get it! This weekend I was flipping through the book for inspiration, and I found the perfect candy recipe. It was so quick but so delicious!
This candy is crunchy (VERY crunchy - be warned, those of you that happen to be older / are babies. It is sweet but definitely salty, due to both the salted cashews and the salt in the toffee itself. I'm loving this salty-sweet thing - it all started with these caramels! I have made toffee several times before, and always make this almond-chocolate toffee, but this is completely different. Equally good, but a whole different idea. Try it for yourself!

Salted Cashew Toffee
(from Sticky, Chewy, Messy, Gooey)

1 1/4 cups (2 1/2 sticks) unsalted butter
2 tablespoons water
2 cups sugar
1/2 teaspoon fresh lemon juice
1/2 teaspoon baking soda
3/4 teaspoon salt [I might actually cut this down to 1/2 - it was a little much]
2 heaping cups salted cashew halves

Spray a large baking sheet with nonstick cooking spray.
In a large saucepan, combine the butter, water, sugar, and lemon juice.
Cook over medium-low heat, stirring constantly with a wooden spoon. When the mixture starts to boil, stop stirring and cook until the mixture reaches the hard-crack stage (about 300F - when dropped in cold water, syrup will immediately harden into brittle threads that break easily when handled - careful when touching, it is hot!), 5 to 8 minutes.
Immediately remove the pan from the heat and stir in the baking soda, salt, and the cashews. The syrup will boil and puff up when the baking soda is added - just keep stirring until it simmers down. (Adding baking soda aerates the syrup for a crisp, light-textured candy that won't break your tooth when you bite into it.)
Pour the candy mixture onto the prepared baking sheet. Using a rubber spatula, work quickly as the candy cools to spread it onto an approximately 9-by-13-inch rectangle, keeping the nuts in a single layer.
Set the baking sheet on a wire rack and let the candy cool completely.
When the candy is hard, break it into medium-size pieces to serve.
Makes about 2 pounds.

Enjoy!

Sunday, January 8, 2012

Sea Salt Caramels and a cute appetizer


Happy New Year!! Last weekend we had a small party at our house on the 31st. We decided to make dinner be a whole bunch of appetizers instead of having a big sit-down ordeal, and it worked out great. I was in charge of dessert and decided to keep with the theme of bite-sized food and make various little sweets. I made a variety, and these were probably the most popular; sea salt caramels. I had never made caramel before but it was something I always wanted to try, so I was glad to have the chance. The recipe says that it will take about ten minutes for the sugar to turn a dark honey color, but mine took about eight, so I guess it depends on the stove/pan. I cut them just as soon as they were cool and they were EXTREMELY chewy and could pull out a tooth, but once it was time for dessert a few hours later they had softened and were perfectly chewy and delicious. I had no flakes of sea salt so I used regular table sea salt (less than a tablespoon though) and they were a bit too salty - I would stick to the flakes. Either way everyone loved them, and they were a definite hit!
Homemade Sea Salt Caramels (source: Baking Bites)
1/3 cup water
1/4 cup corn syrup
1 1/2 cups sugar
1 cup heavy cream
1/4 cup unsalted butter
1/2 tsp salt
1 – 2 tbsp sea salt (rec. Maldon brand)

Lightly grease a 9×9 -inch glass or pyrex baking dish with butter or a thin coat of vegetable oil.
In a large saucepan, combine water, corn syrup and sugar. Bring to a boil over high heat, then continue to boil until caramel turns a deep honey color (10-14 minutes).
While sugar cooks, combine cream and butter in a microwave-safe bowl and cook for 1-2 minutes on high heat, until butter is melted. Set aside.
When sugar is a deep honey color, pour in cream mixture. Caramel will bubble up vigorously. Stir until bubbles subside slightly, then stir in salt. Attach a candy thermometer to the side of the pan and continue to cook, stirring regularly with a silicone spatula, until caramel reaches 260F (5-10 minutes).
Pour caramel into prepared dish. Allow caramel to cool completely, then sprinkle evenly with sea salt.
Cut caramels into small squares or rectangles with a warm, sharp knife.
Caramels can be served immediately or wrapped in small squares of wax paper. Caramels will keep for a few weeks at room temperature.
Makes about 3-4 dozen, depending on the size of your caramels. <-- i cut mine into 36 and they were pretty large


This was one of our appetizers, and I thought it was such a cute idea. You just put little balls of fresh mozzarella (we couldn't find them so we just cut chunks) and cherry tomatoes on toothpicks, and set them out with a bowl of pesto for dipping. We made it ourselves using this recipe, which was delicious, and we added a little extra oil to make it thinner for dipping. (The little bowl is garlic-free for a friend who's allergic). Yummy!

Enjoy!!

Thursday, January 14, 2010

Chocolate-Almond Saltine Toffee

A couple of years ago, we were making gift packages to send out for Christmas. We wanted a candy recipe, and we came across this one in Food and Wine magazine. We decided to try it out, and loved it. It is different from most toffee recipes, because the bottom layer is saltine crackers. Then comes the toffee, which is tricky to make, because it takes a while to reach the right color. I think the first time we made this, we had to make the toffee layer twice, because we messed it up the first time. Anyways, after you cook it, you spread it over the toffee, and while it's still hot, you sprinkle on bittersweet chocolate chips. You wait for them to start melting and then use a spatula to spread them. When you sprinkle them on, they won't look like enough, but trust me, they are. Then comes toasted almonds. As you can see in the picture above, we burned some of ours. But we picked out the worst ones and the rest tasted fine.
We love this recipe, and it's a keeper in our house. Please try it - you won't regret it. Here it is. Enjoy!

Chocolate-Almond Saltine Toffee (recipe source here)

INGREDIENTS

  1. 1 1/2 cups sliced almonds (6 ounces)
  2. Approximately 60 saltine crackers (not low-sodium)
  3. 1 1/2 cups sugar
  4. 3 sticks (3/4 pound) unsalted butter
  5. 2 tablespoons light corn syrup
  6. 1/2 pound bittersweet chocolate, chopped into 1/2-inch pieces
  7. DIRECTIONS

    1. Preheat the oven to 350°. Spread the almonds on a baking sheet and toast for about 6 minutes, until golden.
    2. Line a 12-by-17-inch rimmed baking sheet with a silicone mat or lightly buttered parchment paper. Arrange the saltine crackers on the baking sheet in a single layer, patching any holes with cracker bits; slight gaps are okay.
    3. In a medium saucepan, combine the sugar, butter and corn syrup and cook over low heat until the sugar is melted. Brush the side of the pan with a moistened pastry brush to wash down any sugar crystals. Cook the syrup over moderate heat without stirring until it starts to brown around the edge, about 5 minutes. Insert a candy thermometer into the syrup and simmer, stirring with a wooden spoon, until honey-colored caramel forms and the temperature reaches 300°, about 6 minutes longer.
    4. Slowly and carefully pour the caramel over the crackers, being sure to cover most of them evenly. Using an offset spatula, spread the caramel to cover any gaps. Let cool for 3 minutes, then sprinkle the chopped chocolate evenly on top. Let stand until the chocolate is melted, about 3 minutes, then spread the chocolate evenly over the toffee. Spread the almonds evenly over the chocolate. Freeze the toffee until set, about 15 minutes.
    5. Invert the toffee onto a work surface and peel off the mat or paper. Invert again, break into large shards and serve.

    MAKE AHEAD

      The chocolate-almond saltine toffee can be refrigerated for up to 2 weeks in an airtight container. (and it ships well!)