Showing posts with label whipped cream. Show all posts

Monday, January 26, 2015

Chocolate Mousse with Raspberry Whipped Cream


 As an opera singer, I receive endless feedback from other musicians. As my coach said to me recently, "Being a singer is like constantly wearing a sign that says, 'Criticize Me!'" It's very easy to get wrapped up in desperate thoughts: They don't like my voice! But my voice is a part of me - that means they don't like who I am! I should just give up and go to medical school instead!
While it's important to simply ignore all this every now and then, it's also essential to recognize that everybody listens for different traits in a voice. One musician may be looking for a high, light soprano, while another may want a dark, dramatic mezzo; and this doesn't make either person wrong. 
 I'm quickly learning that no matter how intently I listen to recordings or how often I practice, there's simply no way to make everyone happy.
 With dessert, however, it's another story. Chocolate mousse is about as crowd-pleasing as you can get; it's rich, creamy, and chocolatey enough to satisfy that craving you've been having all week. Whipped cream is the perfect partner in crime; add in a swirl of puréed raspberries, and you've got a Valentine's Day dessert anyone will fall in love with.
Enjoy!
 Chocolate Mousse
  
6 ounces (170g) bittersweet or semisweet chocolate, chopped
6 ounces (170g) unsalted butter, cut into small pieces
1/4 cup (60ml) dark-brewed coffee
4 large eggs, separated
2/3 cup (170g), plus 1 tablespoon sugar
2 tablespoons (30ml) dark rum
1 tablespoon (15ml) water
pinch of salt
1/2 teaspoon vanilla extract

Heat a saucepan one-third full with hot water, and in a bowl set on top, melt together the chocolate, butter and coffee, stirring over the barely simmering water, until smooth. Remove from heat.
Fill a large bowl with ice water and set aside.
In a bowl large enough to nest securely on the saucepan of simmering water, whisk the yolks of the eggs with the 2/3 cup of sugar, rum, and water for about 3 minutes until the mixture is thick, like runny mayonnaise. (You can also use a handheld electric mixer.) This took me closer to 10 minutes.
Remove from heat and place the bowl of whipped egg yolks within the bowl of ice water and beat until cool and thick. Then fold the chocolate mixture into the egg yolks.
In a separate bowl, beat the egg whites with the salt until frothy. Continue to beat until they start to hold their shape. Whip in the tablespoon of sugar and continue to beat until thick and shiny, but not completely stiff, then the vanilla.
Fold one-third of the beaten egg whites into the chocolate mixture, then fold in the remainder of the whites just until incorporated, but don’t overdo it or the mousse will lose volume.
Transfer the mousse to a serving bowl or divide into serving dishes, and refrigerate for at least 4 hours, until firm.

 Raspberry Whipped Cream

1/2 pint (about 1 cup) fresh raspberries, plus more for garnish 
1 tablespoon confectioners' sugar, plus more to sweeten  
1 cup heavy cream 
1/2 teaspoon pure vanilla extract

Place raspberries in the bowl of a food processor; process until smooth. Pass through a fine strainer; discard seeds. Sweeten with sugar, if desired.
Combine cream, 1 tablespoon sugar, and vanilla in a large bowl; whisk together until soft peaks form. Gently fold in raspberry puree to form swirls.

Top servings of mousse with dollops of whipped cream; garnish as desired.

Thursday, March 13, 2014

Ultimate Nutella Mousse


 If you hadn't already realized it, I have a bit of a thing for Nutella. It basically takes the greatest food ever (chocolate) and mixes it with hazelnuts to make the creamiest, sweetest, most indulgent topping for just about anything. 
After a while, slathering the chocolatey goodness on various forms of carbohydrates gets a little old. I love finding ways to incorporate my favorite foods into desserts, and this mousse does just that. 
It has (theoretically) two ingredients. Two ingredients! Mousse!! Okay, so it may be a bit of a faux mousse, but it plays the part pretty amazingly. It's fluffy and creamy and kind of makes you want to eat the whole bowl. Top it with homemade dark-chocolate-covered strawberries, and this 5-minute dessert just got classy. 
Enjoy! 

Ultimate Nutella Mousse
(adapted from Bakers Royale)

9 oz. Nutella
2 cups heavy cream
1/2 teaspoon espresso powder
2 tablespoons confectioners' sugar
1/4 cup hazelnuts, roughly chopped
about 6 strawberries
1/2 cup dark chocolate chips 
1/4 cup white chocolate chips

Place Nutella and espresso powder in microwave safe bowl. Heat on low for 10 second intervals until mixture is thinned a bit. Stir to incorporate the espresso powder. Set aside and cool to room temperature.
Whip 1 1/2 cups cream until soft peaks form (be careful not to let it reach stiff peaks). Gently fold whipped cream into Nutella mixture. The mousse will be soft. Fill a bowl (roughly 1-quart capacity) and cover and refrigerate for at least 4 hours or overnight.
Once the mousse is chilled, whip the remaining 1/2 cup cream with the sugar until soft peaks form. Spread over the mousse, and top with chopped hazelnuts.
In the microwave or over a double boiler, heat the two chocolates separately. Dip the strawberries in the dark chocolate and place on a parchment-lined baking sheet; drizzle with white chocolate (I used a piping bag). 
Refrigerate strawberries for 1 hour, or until set; use as topping for mousse. 

*Note: This is really more of a concept than a rigid recipe; feel free to adapt it as you like!

Monday, June 18, 2012

TWD: French Strawberry Cake

Hi! If this is your first time visiting my blog, welcome! I'm Sophia, a fifteen-year-old baker in New York City. I am beyond excited to be hosting Tuesdays with Dorie this week! Actually, I'm not sure what to be more excited about - that I'm hosting, or that I made a genoise. Considering that three days ago, I had no idea what a genoise even was.
When I volunteered to host, I hadn't actually seen the recipe. After I was chosen, I read it and started to get nervous - I had no idea what this cake was supposed to be. How was I supposed to post about a complete failure when it's my turn to host??
I made the recipe exactly as stated, sifting and measuring every little detail. I swear I over-folded the genoise batter, and there were still some lumps of flour after it baked because I was so scared to mix it too much. I don't know what I managed to do, but it worked! The bottom layer was a little tough, and I had some trouble with slicing into 3 layers, but it was delicious nonetheless. I was so happy with how this cake turned out, and am grateful to TWD for opportunities like this one. Without the group, I would never had made a recipe like this and discovered how much I loved it.
When I was thinking about what to write for this post, I realized that there are some things words just can't describe. The feeling of folding and pouring the batter; the curiosity over whether the first bite would be delicious; the look on my dad's face when he walked into the kitchen and saw his father's day cake. As food bloggers, all we can do is describe these as best as we can.
Go make this cake for yourself to find out what I'm talking about; the recipe is right below, or on my fellow host's beautiful blog, Sleep Love Think Dine! Be sure to stop by the TWD website and see everybody's lovely cakes.

French Strawberry Cake
from Baking with Julia by Dorie Greenspan

1 recipe Perfect Genoise Batter (recipe below)
2 pints ripe fresh strawberries, hulled and sliced
1/4 to 1/3 cup sugar,(depending on the sweetness of the fruit)

Position a rack in the lower third of the oven and preheat the oven to 350F. Grease the bottom and sides of an 8-inch round cake pan with solid shortening, dust with flour, and tap out the excess. Fit the bottom with a parchment or waxed paper circle.
Baking the cake:
Carefully pour the batter into the prepared pan, smoothing the top with a rubber spatula, working from the center outward and creating a slightly raised ridge around the sides. Bake for 25 to 27 minutes, or until the top springs back when lightly prodded and the cake starts to come away from the sides of the pan. Transfer the cake to a rack and let it rest for 5 to 10 minutes.
To remove the cake from the pan, first test its readiness: Tilt and rotate the pan, then gently tap it on the counter. If it doesn't seem as if the cake is releasing from the pan, or you are the cautious type, run a thin blade between the cake and the sides of the pan, freeing the sides and letting a little air get under the cake. Invert the cake onto a rack and remove the pan. Slowly peel off the paper liner, turn it over, and put it back on the cake. Cover the cake with another rack and invert again. Remove the top rack and let the cake cool completely right side up. The cake can remain uncovered at room temperature for a day, but it should be wrapped in plastic if you won't be using it within 2 days. For longer storage, wrap it well and freeze it for up to 10 days. Thaw, still wrapped, at room temperature.
Preparing the Berries:
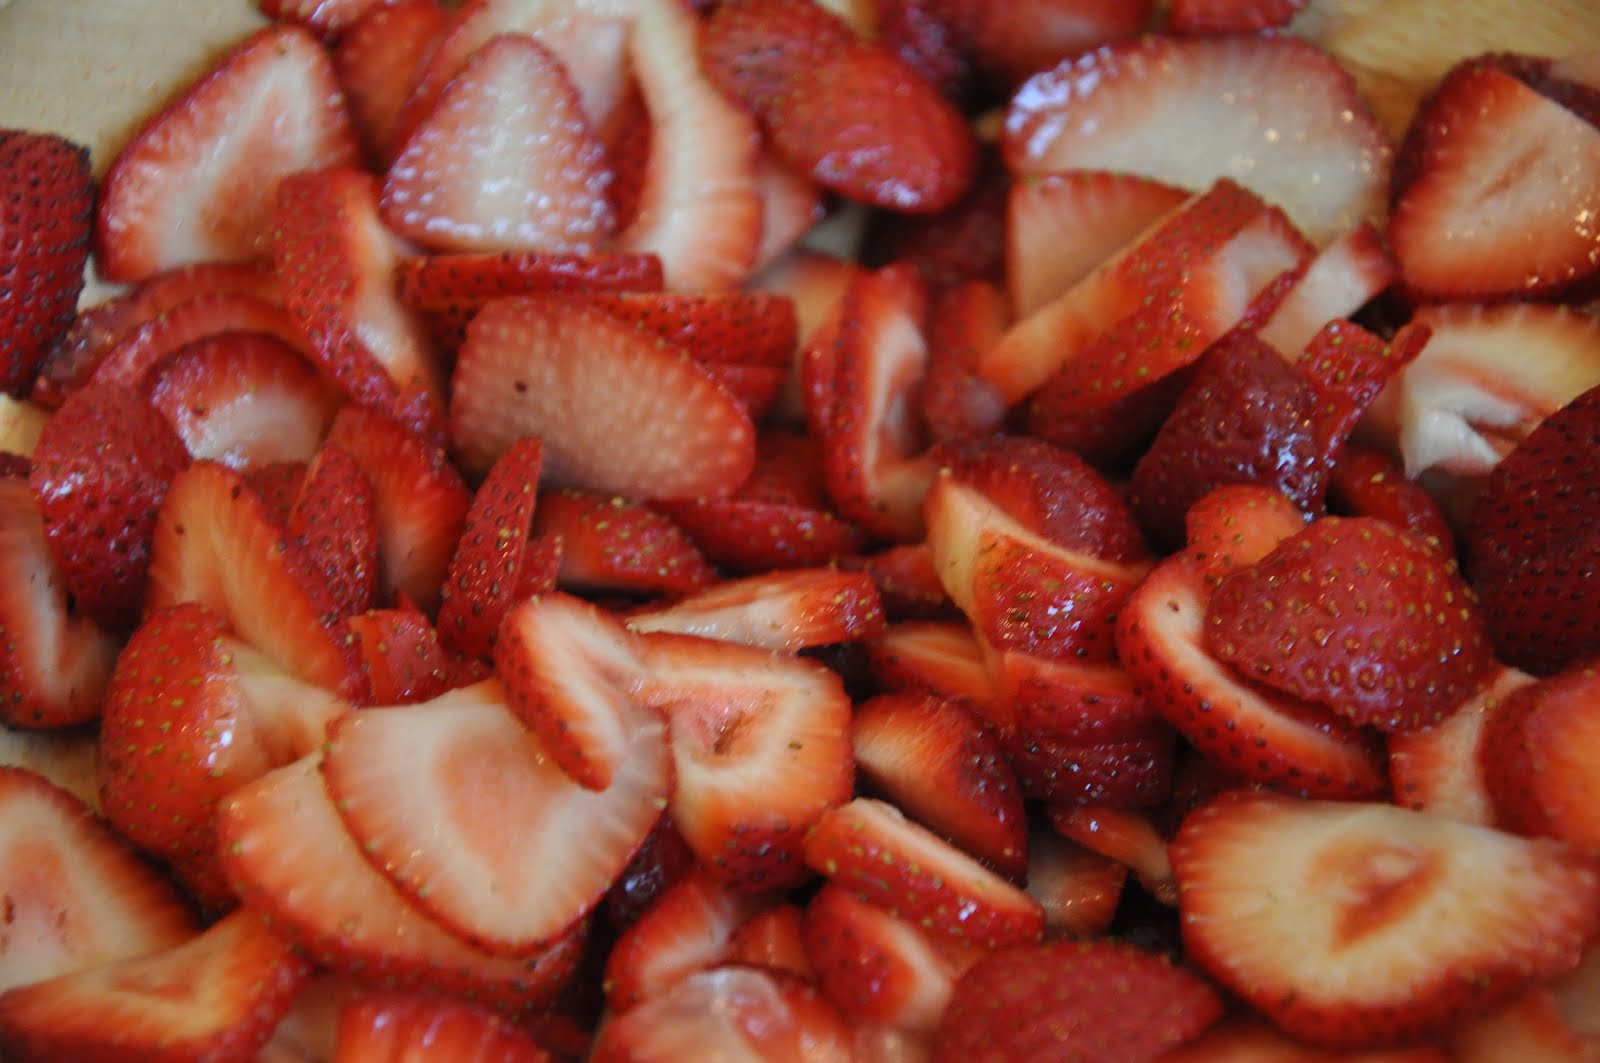
Toss the sliced berries with the sugar in a large bowl and leave them, uncovered, at room temperature for at least 2 hours.
Coarsely mash the berries with the tines of a fork and toss them again; let them stand for 1 hour longer. You can do this the day before, but the berries should be refrigerated after they are mashed.
The Cream
1 1/4 cups heavy cream
2 tablespoons sour cream
2 tablespoons sugar
1 teaspoon pure vanilla extract
5 large strawberries (with hulls)

Using a mixer fitted with the whisk attachment or a hand-held mixer, whip the heavy cream, sour cream, sugar, and vanilla together until the mixture forms soft peaks. The cream is the proper consistency when the tracks made by the whisk close slowly and almost disappear. Cover and refrigerate the cream until you're ready to frost the cake. Just before using the cream, give it a turn or two by hand with a whisk to bring the mixture together again.
Finishing the cake:
Using a serrated knife and a gentle sawing motion, cut the cake horizontally into 3 layers. Place the bottom layer cut side up on a cardboard cake round or the removable bottom of a tart pan. Lifting the berries from the bowl with a slotted spoon so that most of the liquid drains off, spoon half of the mashed strawberries over the cake layer, then spread a thin layer of the whipped cream over the berries. Top with the middle cake layer, spoon on the rest of the strawberries, and spread another thin layer of cream over the berries. Center the top layer over the filling.
Working with a flexible metal icing spatula, frost the top and sides of the cake with whipped cream, leaving about 1/2 cup of the cream for decoration. Spoon the remaining whipped cream into a pastry bag fitted with a 1/4-inch star tip and pipe 10 rosettes around the top of the cake, positioning the rosettes about an inch in from the edge and leaving an inch between each rosette.
Slice each berry in half from blossom to stem, leaving some of the hull on each half. Prop a berry half, cut side down, on top of each rosette and refrigerate the cake for at least an hour before serving.
Storing:
The cake can be refrigerated for several hours before serving. Keep it away from any foods in the refrigerator with strong odors, as cream picks up odors quickly. It would be ideal if you could store the cake in a box.
Contributing Baker Flo Braker

Perfect Genoise
2 tablespoons unsalted butter, melted
1 cup sifted cake flour
1/2 cup sugar
1/8 teaspoon salt
4 large eggs, at room temperature
1 teaspoon pure vanilla extract

Pour the melted butter into a 1-quart bowl; reserve.
Return the sifted flour to the sifter or sieve and add 1 tablespoon of the sugar and the salt; sift onto a piece of waxed paper and set aside.
Put the eggs and the remaining sugar into the bowl of a heavy-duty mixer (or work with a hand-held mixer). Holding the whisk attachment from the mixer in your hand, beat the mixture to blend the ingredients. With the bowl and whisk attachment in place, whip the mixture on medium speed until it is airy, pale, and tripled in volume, like softly whipped cream, 4 to 5 minutes. You'll know that the eggs are properly whipped when you lift the whisk and the mixture falls back into the bowl in a ribbon that rests on the surface for about 10 seconds. If the ribbon immediately sinks into the mixture, continue whipping for a few more minutes. Pour in the vanilla extract during the last moments of whipping.
Detach the bowl from the mixer. Sprinkle about one third of the sifted flour mixture over the batter. Fold in the flour with a rubber spatula, stopping as soon as the flour is incorporated. Fold in the rest of the flour in 2 more additions.
Gently spoon about 1 cup of the batter into the bowl with the bmelted butter and fold the butter in with the rubber spatula. Fold this mixture into the batter in the mixer bowl. (This is the point at which the batter is at its most fragile, so fold gingerly.) The batter should be poured into a prepared pan and baked immediately.
<3

Tuesday, May 15, 2012

Strawberry Meringue Trifle

a.k.a. the easiest dessert you will ever make. And one of the most delicious.
In my house, I always somehow get volunteered to make dessert for any sort of party or dinner. Okay, maybe not "get volunteered" - I usually demand dessert rights ;) Anyway, sometimes I forget about the rest of my life besides baking and don't have time to make something elaborate. This "recipe" is really a simple mixture of whipped cream, strawberries, and store-bought meringues. Of course you can make them yourself to add another level of deliciousness, but that would sort of defeat the purpose of a quick recipe.
My mom taught me how to make this yummy mess. She grew up eating it, and it was one of those things that when I tasted it, it felt like I had tasted it lots of times before. I guess my mom made it for me before I started becoming the dessert maker in our house? Or maybe it's just natural comfort food. Either way, this is super easy and quick, and so delicious. Serve it in big scoops in bowls!
*I'm not sure this would technically be called a trifle, but I thought it sounded good so there you go! Enjoy <3
Strawberry Meringue Trifle
2 cups heavy cream
1/2 cup confectioner's sugar
1 large package meringue stars (you know, the kind that come in the plastic tub), broken in to large pieces
1 1/2 pints strawberries, chopped

Beat heavy cream until it holds soft peaks. Beat in the confectioner's sugar.
Layer the cookies, whipped cream, and strawberries in a large dish (a deep 11x7" is what I used, but any large dish should work). Chill until serving. Yum!
These measurements are all really guesses. Feel free to adjust it as you like. Adding something like chocolate shavings or nutella would be delicious! Be right back, I have to go buy some cream....

Wednesday, June 9, 2010

TWD: Tender Shortcakes


Only one day late this week. Getting better, right? Right.
This week's Tuesdays with Dorie was chosen by Cathy of The Tortefeasor. She chose Tender Shortcakes. I liked this pick, because we had a lot of options for fillings (fill with berries and whipped cream, eat like biscuits, etc....).
The shortcakes were really quick to make. I heard people say that theirs came out huge, so I made 4 cakes out of 1/3 of the recipe. I could have made five, because mine were still really big. The dough was very crumbly, so I sort of patted it together on the baking sheet, but once they came out of the oven they held together well.
It was easier than I thought to cut them in half. For the filling, I defrosted some frozen mixed berries (we didn't have any fresh and I didn't want to go out and get them :D ). I sprinkled on some sugar and let them sit for a while. I then put the berries on the bottom half of the shortcakes (with plenty of their juice) and topped them with sweetened whipped cream and the top of the shortcakes.
These were quick and easy to make, and I will make them again. They were so delicious! These would be great for a BBQ/ other summer party. If you want the recipe, you can find it here or in THE BOOK. Enjoy!

Friday, April 23, 2010

TWD Rewind: Chocolate Cream Tart


Easter lunch. I'm making dessert. Better be good, right? Well, why not trust Dorie? Again. Oooh, there's a big list of rewinds to still do! Okay, I'll make the Creamiest Lime Cream Meringue Pie and the Chocolate Cream Tart. Chocolate, citrus, meringue, whipped cream... something for everyone, right? Right. Okay, why not spread it out over a few days? Day one: The crust.
This was a really quick and easy crust. It's very similar to the usual tart dough, only it has cocoa powder. Whir some ingredients together in the food processor, pat the dough into the pan, and stick it in the freezer. Half an hour later, into the oven it goes. Another half hour later, onto a cooling rack. All done!
Day two: The pastry cream.
Again, the usual deal. Sugar, egg yolks, cornstarch... temper with the milk... put in the rest of the milk... stir in melted chocolate (I used bittersweet).... stir in some butter. Stick it in the fridge.
Day 3: The whipped cream.
ONCE AGAIN, no big deal. Whip some cream. Add some sugar and vanilla. Great.
Now, time for assembly. Spread the pastry cream in the tart shell. Spread the whipped cream on top. Finally, some chocolate shavings (to this day, I cannot manage to make curls).
Easter morning we put the tart on a plate and got in the car to go to a friend's house. That was probably the most stressful car ride of my life. The plate was on my lap, and I stupidly didn't put anything under the tart to keep it from sliding, so the crust cracked in a few places. But it got there looking fine.
Time for dessert. At this point, I was nervous. I had tasted along the way, but didn't know how it would come together. Luckily, it was great! The crust was great, and so was the whipped cream. My only complaint was the pastry cream - I would have liked it to be a bit sweeter, so next time I'll use semi-sweet instead of bittersweet chocolate. But the people who love dark chocolate said it was great.
Basically what I'm saying is that if you ever need an impressive yet simple dessert, try out this tart. You can find the recipe here or in the book. Enjoy!

Sunday, March 28, 2010

Daring Bakers: Orange Tian

The 2010 March Daring Baker’s challenge was hosted by Jennifer of Chocolate Shavings. She chose Orange Tian as the challenge for this month, a dessert based on a recipe from Alain Ducasse’s Cooking School in Paris.

Sorry, I'm still away without the camera, so no pictures until Tuesday. So this month's Daring Bakers challenge was Orange Tian. I had never heard of this before, so I was excited to try it. When I looked over the recipe, no one part of it seemed particularly hard, there were just a lot of steps. So here we go:

Step one: Orange Segments. I didn't know how to segment an orange, so I used a youtube video, which really helped (link at the bottom). It got easy after a while!

Step two: Caramel. This was fairly easy to make, except for a quick scare when I added the juice and it bubbled like crazy. I think I may have over-cooked it, though, because it came out tasting sort of bitter.

Step three: Pate Sablee. This was very easy to make, since basically you are just dumping stuff in a food processor! I liked that it was very easy to roll out. I had some left over, so I baked some into plain cookies, which were very yummy.

Step four: Orange Jam. I had never made jam before, and it was a lot of fun. The only thing I found annoying was the blanching, because it took a really long time. I made a double batch so that we could keep some for toast and things like that, and we loved it.

Step five: Whipped Cream. This was simple. The only issue I had was that the jam didn't mix in easily (it stayed in clumps). I used agar agar instead of gelatin, because I'm vegetarian, and it worked out fine.

Step six: Assembling. I don't have individual cookie cutters that have high enough sides, so I used a springform pan, which was fine. First you put in a layer of orange segments. Then comes the whipped cream, then a jam-covered round of pate sablee. In to the freezer it goes!

Step seven: EAT. I thought it was just okay. The pate sablee and the jam were great, but the caramel was bitter and the whipped cream was sort of bland.

All in all, this was a fun challenge. The finished dessert was okay, but I probably won't use this recipe again. If you want to give it a try for yourself, let me know how it goes! Enjoy!

Orange Tian:

Equipment required:
• Cookie cutters . Ideally, you should have about 6 cookie cutters to build the desserts in and cut the circles of dough (see photo). The cookie cutters will be the size of your final dessert, so they should be the size of an individually-sized tart mold. If you don’t have round cookie cutters you could use an individually-sized cheesecake mold without its base.
• A food processor (although the dough could be made by hand too)
• A stand-up or hand mixer
• Parchment paper or a silicone sheet
• A baking sheet
• A rolling pin

For the Pate Sablee:

Ingredients U.S. Imperial Metric Instructions for Ingredients
2 medium-sized egg yolks at room temperature
granulated sugar 6 tablespoons + 1 teaspoon; 2.8 oz; 80 grams
vanilla extract ½ teaspoon
Unsalted butter ¼ cup + 3 tablespoons; 3.5 oz; 100 grams ice cold, cubed
Salt 1/3 teaspoon; 2 grams
All-purpose flour 1.5 cup + 2 tablespoons; 7 oz; 200 grams
baking powder 1 teaspoon ; 4 grams

Directions:
Put the flour, baking powder, ice cold cubed butter and salt in a food processor fitted with a steel blade.

In a separate bowl, add the eggs yolks, vanilla extract and sugar and beat with a whisk until the mixture is pale. Pour the egg mixture in the food processor.

Process until the dough just comes together. If you find that the dough is still a little too crumbly to come together, add a couple drops of water and process again to form a homogenous ball of dough. Form into a disc, cover with plastic wrap and leave to rest in the fridge for 30 minutes.
Preheat your oven to 350 degree Fahrenheit.

Roll out the dough onto a lightly floured surface until you obtain a ¼ inch thick circle.

Using your cookie cutter, cut out circles of dough and place on a parchment (or silicone) lined baking sheet. Bake for 20 minutes or until the circles of dough are just golden.

For the Marmalade:

Ingredients U.S. Imperial Metric Instructions for Ingredients
Freshly pressed orange juice ¼ cup + 3 tablespoons; 3.5 oz; 100 grams
1 large orange used to make orange slices
cold water to cook the orange slices
pectin 5 grams
granulated sugar: use the same weight as the weight of orange slices once they are cooked

Finely slice the orange. Place the orange slices in a medium-sized pot filled with cold water. Simmer for about 10 minutes, discard the water, re-fill with cold water and blanch the oranges for another 10 minutes.

Blanch the orange slices 3 times. This process removes the bitterness from the orange peel, so it is essential to use a new batch of cold water every time when you blanch the slices.

Once blanched 3 times, drain the slices and let them cool.

Once they are cool enough to handle, finely mince them (using a knife or a food processor).

Weigh the slices and use the same amount of granulated sugar . If you don’t have a scale, you can place the slices in a cup measurer and use the same amount of sugar.

In a pot over medium heat, add the minced orange slices, the sugar you just weighed, the orange juice and the pectin. Cook until the mixture reaches a jam consistency (10-15 minutes).

Transfer to a bowl, cover with plastic wrap and put in the fridge.

For the Orange Segments:

For this step you will need 8 oranges.

Cut the oranges into segments over a shallow bowl and make sure to keep the juice. Add the segments to the bowl with the juice.

[See YouTube video in the References section below for additional information on segmenting oranges.]

For the Caramel:

Ingredients U.S. Metric Imperial Instructions for Ingredients
granulated sugar 1 cup; 7 oz; 200 grams
orange juice 1.5 cups + 2 tablespoons; 14 oz; 400 grams

Place the sugar in a pan on medium heat and begin heating it.

Once the sugar starts to bubble and foam, slowly add the orange juice. As soon as the mixture starts boiling, remove from the heat and pour half of the mixture over the orange segments.

Reserve the other half of the caramel mixture in a small bowl — you will use this later to spoon over the finished dessert. When the dessert is assembled and setting in the freezer, heat the kept caramel sauce in a small saucepan over low heat until it thickens and just coats the back of a spoon (about 10 minutes). You can then spoon it over the orange tians.

[Tip: Be very careful when making the caramel — if you have never made caramel before, I would suggest making this step while you don’t have to worry about anything else. Bubbling sugar is extremely, extremely hot, so make sure you have a bowl of ice cold water in the kitchen in case anyone gets burnt!]

For the Whipped Cream:

Ingredients U.S. Metric Imperial Instructions for Ingredients
heavy whipping cream 1 cup; 7 oz; 200 grams
3 tablespoons of hot water
1 tsp Gelatine
1 tablespoon of confectioner's sugar
orange marmalade (see recipe above) 1 tablespoon

In a small bowl, add the gelatine and hot water, stirring well until the gelatine dissolves. Let the gelatine cool to room temperature while you make the whipped cream. Combine the cream in a chilled mixing bowl. Whip the cream using a hand mixer on low speed until the cream starts to thicken for about one minute. Add the confectioner sugar. Increase the speed to medium-high. Whip the cream until the beaters leave visible (but not lasting) trails in the cream, then add the cooled gelatine slowly while beating continuously. Continue whipping until the cream is light and fluffy and forms soft peaks. Transfer the whipped cream to a bowl and fold in the orange marmalade.
[Tip: Use an ice cold bowl to make the whipped cream in. You can do this by putting your mixing bowl, cream and beater in the fridge for 20 minutes prior to whipping the cream.]

Assembling the Dessert:

Make sure you have some room in your freezer. Ideally, you should be able to fit a small baking sheet or tray of desserts to set in the freezer.

Line a small tray or baking sheet with parchment paper or a silicone sheet. Lay out 6 cookie cutters onto the parchment paper/silicone.

Drain the orange segments on a kitchen towel.

Have the marmalade, whipped cream and baked circles of dough ready to use.

Arrange the orange segments at the bottom of each cookie cutter. Make sure the segments all touch either and that there are no gaps. Make sure they fit snuggly and look pretty as they will end up being the top of the dessert. Arrange them as you would sliced apples when making an apple tart.

Once you have neatly arranged one layer of orange segments at the bottom of each cookie cutter, add a couple spoonfuls of whipped cream and gently spread it so that it fills the cookie cutter in an even layer. Leave about 1/4 inch at the top so there is room for dough circle.

Using a butter knife or small spoon, spread a small even layer of orange marmalade on each circle of dough.

Carefully place a circle of dough over each ring (the side of dough covered in marmalade should be the side touching the whipping cream). Gently press on the circle of dough to make sure the dessert is compact.

Place the desserts to set in the freezer to set for 10 minutes.

Using a small knife, gently go around the edges of the cookie cutter to make sure the dessert will be easy to unmold. Gently place your serving plate on top of a dessert (on top of the circle of dough) and turn the plate over. Gently remove the cookie cutter, add a spoonful of caramel sauce and serve immediately.

Resources:

http://www.wisegeek.com/what-is-a-tian.htm (An article about the dessert known as tian.)

YouTube link on how to segment an orange: http://www.youtube.com/watch?v=ZG5mcEEBlcI

To learn more about Pectin: http://en.wikipedia.org/wiki/Pectin

What to substitute for Pectin: http://www.gourmetsleuth.com/Dictionary/P/Pectin-6222.aspx


Sunday, January 17, 2010

TWD Rewind: Black and White Chocolate Cake

This week I got an order for a birthday cake. I was told that the birthday "boy" (he's an adult, by the way), likes "wet" cakes and the combination of chocolate and strawberries. I wasn't sure what he meant by "wet" - did he mean moist, or truly wet, like cakes soaked in a liquid? I decided to consult BFMHTY, and I found what I needed. Plus, it's a TWD rewind. Yay! I figured since this has three layers of filling, it would be plenty "wet".
The party was yesterday, so on Friday I set about making the cake. First was the buttermilk layers. Those were quick and easy to do. Then came the bittersweet chocolate pastry cream. A little bit of egg stuck to the bottom, but other than that, smooth sailing. The white chocolate whipped cream? Um, not so much. You start off by melting white chocolate and cream together. Took a while, but worked out fine. Then you beat the rest of the cream until it "holds soft peaks". I, not being and expert on whipped cream, beat it until it had... um... stiffer-than-soft peaks. Then when I added the chocolate, it had been beaten too much. It became butter. This had never happened to me before, so I didn't know what was going on. I called my mom for advice - she told me what had happened and that I would have to start again. This resulted in some frustration and another trip to the store. Oh well. It worked out fine the second time.
Next came the assembly of the cake. I read on some other blogs that some people didn't have enough whipped cream to fill one layer and ice it. When I looked at mine, I found this was true, so I did three layers of the bittersweet chocolate and just covered the cake in the white. In order to get in the strawberry idea, I put some on top of the cake. I was going to put some in the layers of cream, too, but forgot. Oh well. I attempted to make chocolate curls for the top, but ended up with shavings. It looked pretty anyways. I heard back that everybody liked the cake and the birthday boy was happy. If you want to try it for yourself, you can buy the book (link above) or find it here. Please make it. Please. And let me know how it turned out. Enjoy!