Showing posts with label frosting. Show all posts

Tuesday, November 4, 2014

Pumpkin Spice Latte Cupcakes

 As any high school student will tell you, senior year requires a lot of caffeine. From staying up late writing college application essays to running to rehearsals and club meetings, we all lead pretty busy lives. My friends and I have an odd obsession with pumpkin spice lattes - besides being overly sweet and artificial in a strangely delicious way, they provide us with the extra bit of energy needed to get through the rest of the day.
 This drink has a bit of a cult following. It's begun a "pumpkin spice" trend, which - with mixed reviews - has been popping up everywhere from donuts to burgers. (Pumpkin spice English muffins, by the way, are not highly recommended. Trust me on this one.) So why not cupcakes?
 These pumpkin spice cupcakes have a generous dose of caffeine themselves. The fluffy cakes have pumpkin, spices, and espresso powder in them; they're then soaked in coffee and topped with the lightest frosting ever. (This frosting is essentially whipped cream with a touch of sugar and cream cheese, but it's insanely delicious.) Top it off with a green straw, and there's your morning coffee.
Enjoy!
Pumpkin Spice Latte Cupcakes 
(slightly adapted from Brown Eyed Baker)

for the cupcakes:
1⅓ cups all-purpose flour
4½ teaspoons espresso powder
1 teaspoon baking powder
1 teaspoon baking soda
½ teaspoon salt
½ teaspoon ground cinnamon
Pinch of ground nutmeg
Pinch of ground cloves
¾ cup canned pumpkin
½ cup granulated sugar
½ cup dark brown sugar
½ cup vegetable oil
2 eggs
¼ cup brewed coffee, for brushing

Preheat oven to 350 degrees F. Line a 12-cup muffin pan with paper liners; set aside.
In a medium bowl, whisk together the flour, espresso powder, baking powder, baking soda, salt, cinnamon, nutmeg and cloves; set aside.
In a large bowl, whisk together the pumpkin, both sugars and the vegetable oil until completely combined, making sure to break up any chunks of brown sugar so no lumps remain. Whisk in the eggs, one at a time. Add the flour mixture in two additions, folding with a rubber spatula until no flour pockets remain.
Divide the batter between the baking cups, filling each about two-thirds full. Bake until a skewer inserted into the center comes out clean, 18 to 22 minutes. Allow to cool in the pan for 5 to 10 minutes, then remove to a wire rack. While the cupcakes are still warm, brush the tops with the brewed coffee. Let each coat soak in before applying the next. Allow the cupcakes to cool completely before frosting.

for the frosting:
8 ounces cream cheese, at room temperature
½ cup granulated sugar
1½ teaspoons vanilla extract
2 cups heavy cream 
cinnamon and straws, for decorating (if desired)

On medium speed, beat the cream cheese, sugar and vanilla extract in a mixer with the whisk attachment until smooth and completely combined, about 3 minutes. Slowly add the heavy cream, scrape the sides of the bowl, then increase speed to medium-high and whip until stiff peaks form.
Pipe the frosting onto the cupcakes, then sprinkle with cinnamon. Cut straws into small pieces and insert in frosting. Serve immediately, or store in an airtight container in the refrigerator for up to 3 days.

Friday, August 29, 2014

Spiced Zucchini Cake with Orange Cream Cheese Frosting

 I'd like to take a moment to talk about mutant vegetables. Zucchini, to be more exact.
Around this time of year, food bloggers tend to start a trail of complaints along the lines of, "OMG, I can't even deal with how much zucchini is growing in my backyard and I'm so overwhelmed and it's taking over my kitchen and my life is really hard."
 The thing is, I live in New York City, where if your backyard is big enough to hold one small zucchini, you should consider yourself lucky. So I don't have a whole lot of sympathy.
Above is my dog, lying next to a zucchini we were given by a friend with her own little vegetable patch. Guys, this was one crazy zucchini - it was over a foot long. I didn't even know this ridiculous, genetically outrageous thing was possible in nature. Seriously, what?!
Regardless, I suddenly had a lot more understanding of the complaints popping up on my computer screen constantly, and I decided to tone down my own sass. And that's my life lesson for the day. (Is there even a lesson in there? I don't know. You're welcome anyway.)
This cake is crazy delicious. As in, way better than I ever thought a dessert based on a vegetable could be. (Although to be fair, that's pretty much the only healthy thing about it.) It's full of shredded zucchini, making it really moist, and it's studded with bittersweet chocolate chips. (These make everything better. We've been through this before.) I topped it with a quick cream cheese frosting made with both orange zest and juice (I used a blood orange, but you can use any kind), which adds a nice little pop of flavor to this summery cake.
Enjoy!
Spiced Zucchini Cake with Orange Cream Cheese Frosting
(adapted from Emeril Lagasse's Farm to Fork)

for the cake:
3 eggs
3/4 cup vegetable oil
1 1/2 cups sugar
2 cups grated unpeeled zucchini
2 teaspoons vanilla extract
2 1/2 cups all-purpose flour
1 tablespoon ground cinnamon
3/4 teaspoon baking soda
3/4 teaspoon salt
1/4 teaspoon baking powder
3/4 cup bittersweet chocolate chips (or chopped chocolate)

for the frosting
6 ounces cream cheese, at room temperature
1 cup confectioners' sugar
3 tablespoons orange juice
grated zest of one orange

Preheat the oven to 325 degrees F, and grease an 8" square cake pan.
In the bowl of an electric mixer, beat the eggs until foamy. Add the vegetable oil, sugar, zucchini, and vanilla extract and mix well. Add the flour, cinnamon, baking soda, salt, and baking powder, and mix until well blended. Stir in the chocolate. Pour the batter into the pan, and tap it gently on the counter to release any air bubbles.
Bake until the cake has risen and is golden brown and a tester inserted into the center comes out clean, 45 to 50 minutes. Allow the cake to cool in the pan for 5 minutes; then turn it out onto a wire rack to cool.
Once the cake is completely cooled to room temperature, make the frosting. With an electric mixer, beat the cream cheese until fluffy. Beat in the confectioners' sugar, the orange juice and the orange zest. Add more sugar or juice, until it reaches the desired consistency. Spread on top of cake (if you'd like to frost the sides as well, double the frosting recipe).

Monday, January 13, 2014

Chocolate Cupcakes with Salted Caramel Frosting (and homemade salted caramel sauce!)

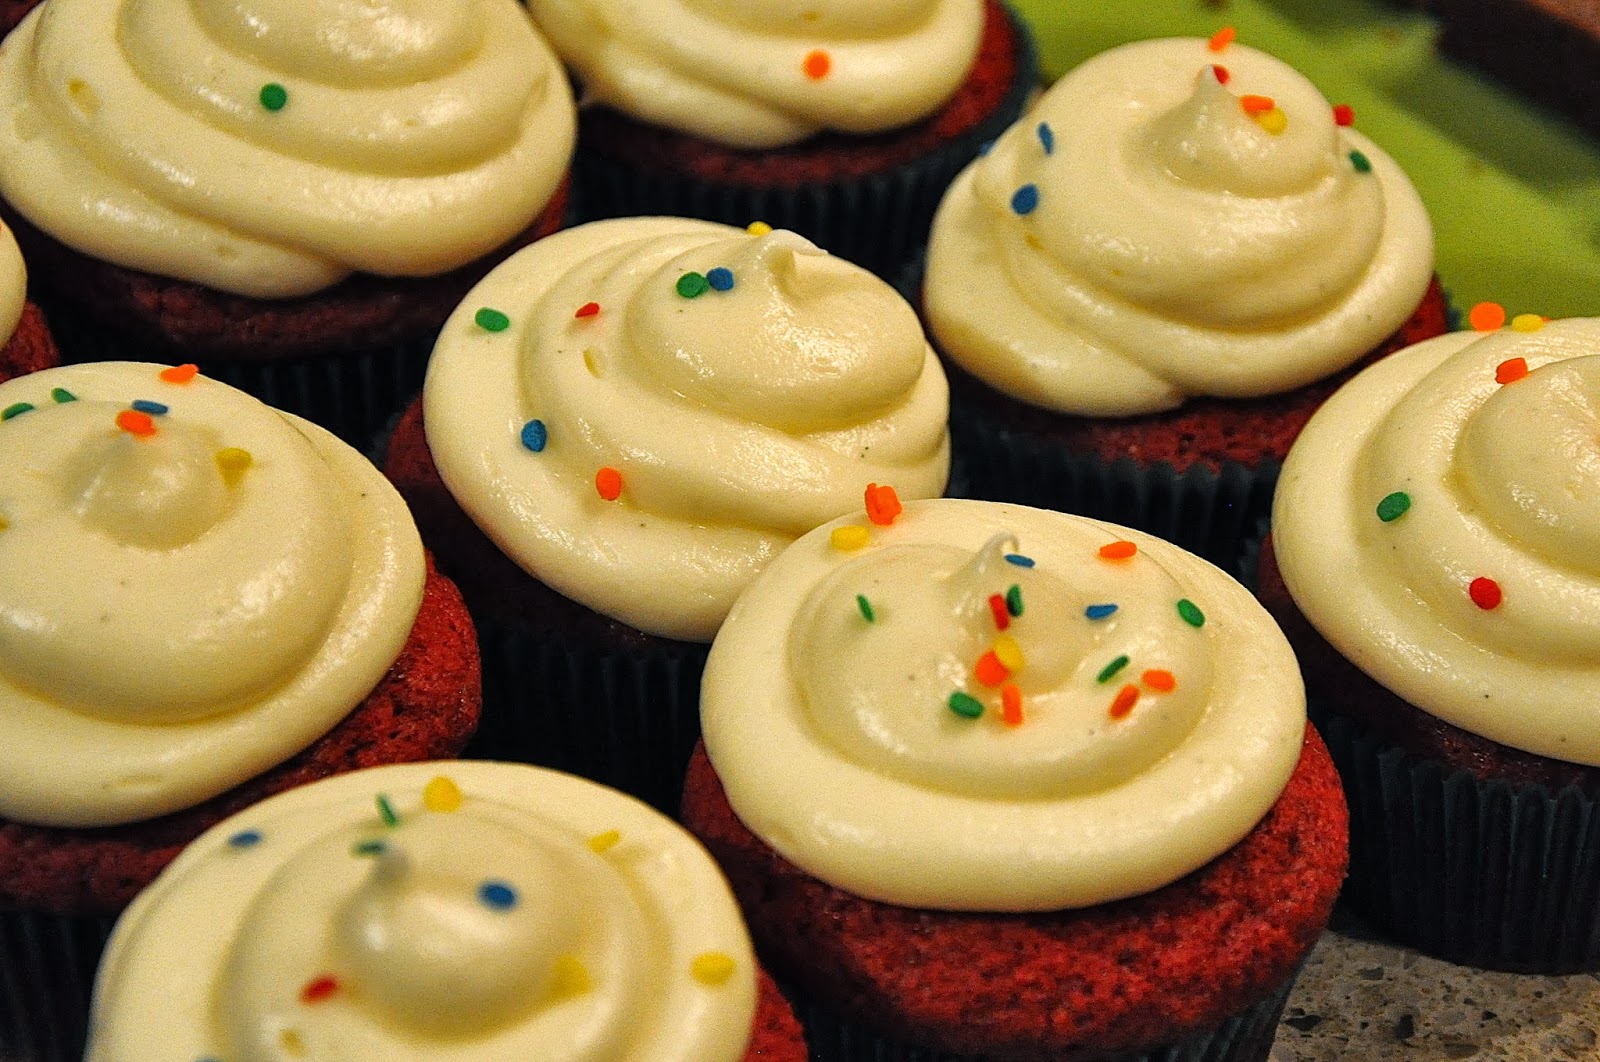
 Figuring out what to bake for a big group can be tricky. Some people like something simple, light and fruity; other people require a serious dose of chocolate. A couple of weeks ago, I put together a little cupcake display for a party, and I think I got the balance down pretty well! The bottom tier was a light red velvet cupcake with tangy cream cheese frosting (recipe 
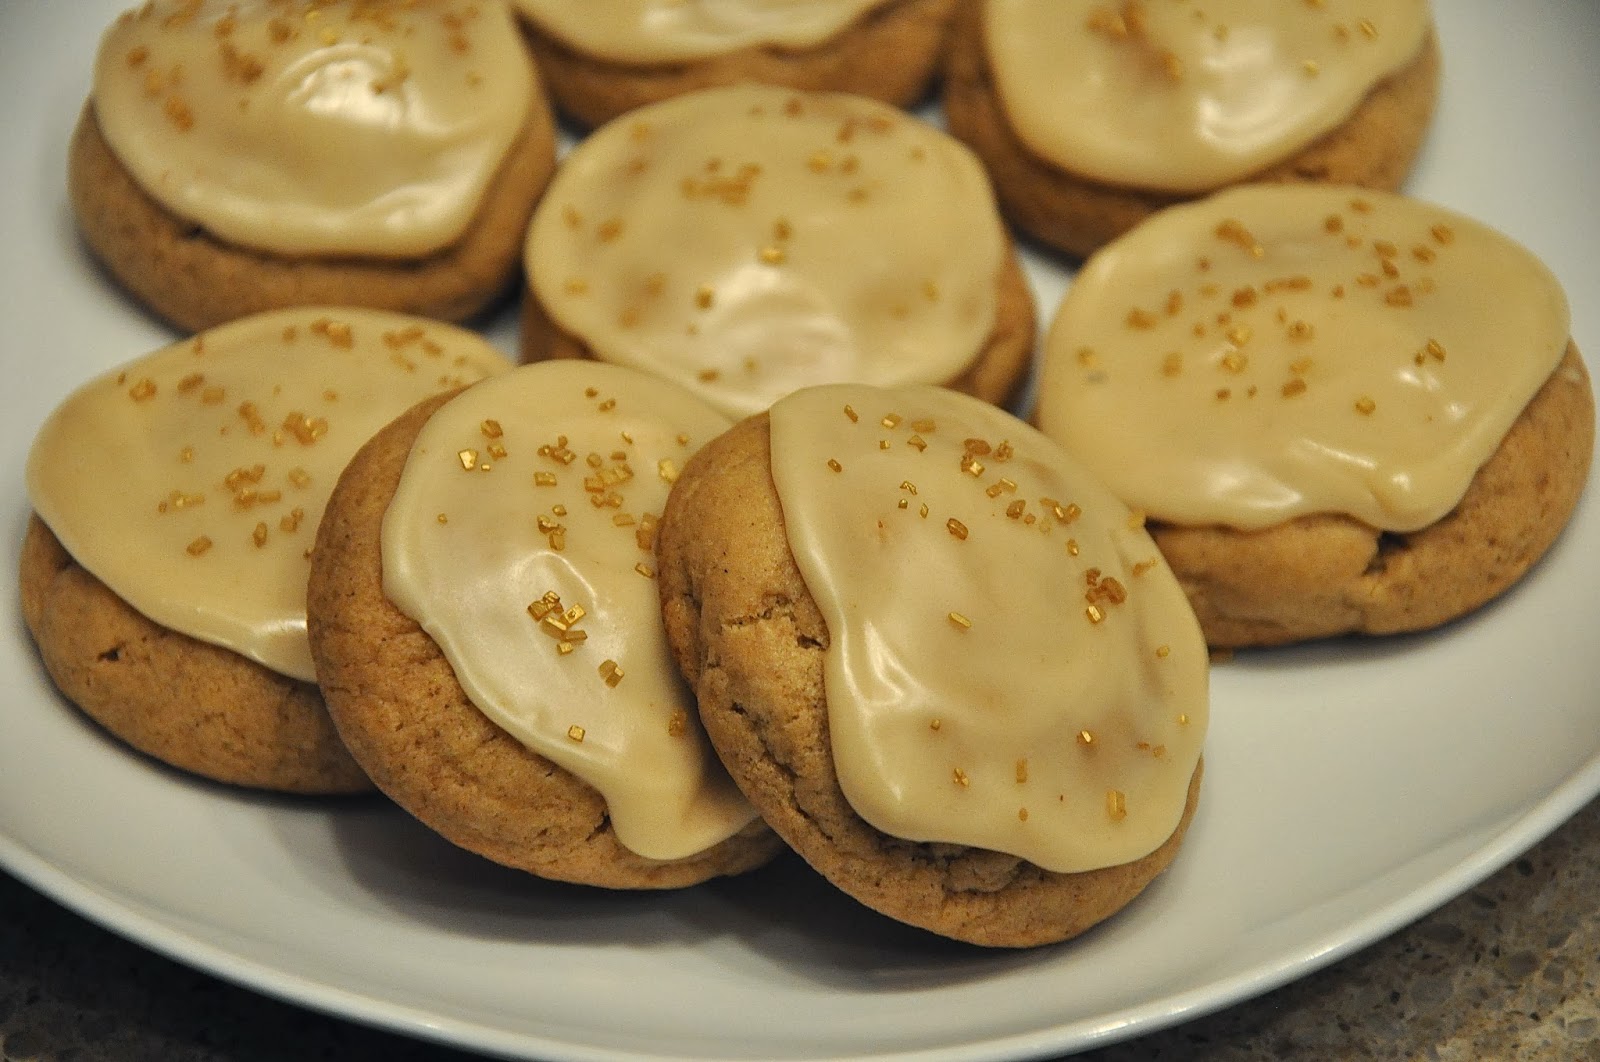
here). For the top two tiers, I went with something kind of over-the-top but wonderfully indulgent and delicious. Tender chocolatey cupcakes are topped with a light and fluffy salted caramel frosting - it's all drizzled with golden-brown salted caramel sauce and topped off with a sprinkling of coarse sea salt.
The salt isn't overwhelming, and it's the perfect balance to the caramel and chocolate. Definitely take the time to make the sauce at home - it's better than anything store-bought. These are a crowd-pleaser for sure, and I have a few friends in mind who will definitely be getting birthday boxes of these sometime soon!
Enjoy!
Chocolate Cupcakes with Salted Caramel Frosting

for the cupcakes:
1/2 cup plus 1 tablespoon cocoa powder
1/2 cup plus 1 tablespoon hot water
2 1/4 cups all-purpose flour
3/4 teaspoon baking soda
3/4 teaspoon baking powder
1/2 teaspoon salt
1 cup plus 1 tablespoon unsalted butter, at room temperature
1 2/3 cups granulated sugar
3 eggs
1 tablespoon vanilla extract
3/4 cup sour cream

for the salted caramel frosting:
1 cup unsalted butter, at room temperature
8 ounces cream cheese, at room temperature
1/2 cup salted caramel sauce (recipe below)
4 cups powdered sugar

to garnish:
leftover salted caramel sauce
fleur de sel (or other flaky sea salt)

Make the cupcakes:
Preheat oven to 350 F. Line 2 standard-size, 12-cup muffin pans with paper liners.
In a small bowl, whisk together the cocoa powder and hot water until smooth. In a separate medium bowl, whisk together the flour, baking soda, baking powder, and salt.
Combine the butter and sugar in a medium saucepan set over medium heat. Cook, stirring occasionally, until the mixture is smooth, and the butter is completely melted. Transfer the mixture to the bowl of an electric mixer and beat on medium-low speed until the mixture is cool, about 4-5 minutes.
Add the eggs one at a time, mixing well after each addition, and scraping down the sides of the bowl as needed. Add the vanilla and then the cocoa mixture, beating until smooth.
Reduce the mixer speed to low, and add the flour mixture in three additions, alternating with the sour cream, beginning and ending with the flour mixture. Mix each addition until just incorporated.
Divide the batter evenly between the prepared liners, filling each about 2/3 full. Bake until a toothpick inserted in the center comes out clean, 18-20 minutes, rotating the pans halfway through baking. Let cool in the pan for 10 minutes, then transfer to a wire rack to cool completely.
Make the frosting:
Beat together the butter and cream cheese on medium-high speed for 5 minutes. Pour in the salted caramel and beat until combined. Reduce the speed to medium-low and slowly add the powdered sugar, a little at a time, until it has all been incorporated. Increase the speed to medium-high and beat for an additional 2-3 minutes, until light and fluffy.
To finish, pipe frosting onto the top of each cupcake (or use an offset spatula to spread the frosting), drizzle with some additional salted caramel sauce, and sprinkle with a pinch of fleur de del.
-makes 20-24 cupcakes

Homemade Salted Caramel Sauce

2 cups granulated sugar
12 tablespoons unsalted butter, at room temperature, cut into pieces
1 cup heavy cream, at room temperature
1 tablespoon fleur de sel (or any other flaky sea salt)

Add the sugar in an even layer over the bottom of a heavy saucepan, with a capacity of at least 2 or 3 quarts. Heat the sugar over medium-high heat, whisking it as it begins to melt. You'll see that the sugar will begin to form clumps, but that's okay; just keep whisking, and as it continues to cook, they will melt back down.
Stop whisking once all of the sugar has melted, and swirl the pan occasionally while the sugar cooks.
Continue cooking until the sugar has reached a deep amber color. It should look almost reddish-brown, and have a slight toasted aroma. Be very careful not to burn it - this can happen in a matter of seconds!
Once the caramel is golden-brown, add the butter all at once. Be careful, as the caramel will bubble up when the butter is added. Whisk the butter into the caramel until it is completely melted.
Remove the pan from the heat and slowly pour the cream into the caramel. Again, be careful because the mixture will bubble up like crazy again.
Whisk until all of the cream has been incorporated and you have a smooth sauce. Add the fleur de sel and whisk to incorporate.
Set the sauce aside to cool for 10-15 minutes and then pour into a glass jar and let cool to room temperature. Sauce can be refrigerated for up to 2 weeks; warm up before using.
-makes about 2 cups of salt
Note: Brown Eyed Baker has a wonderful tutorial on making the sauce; my one note is that mine was done long before reaching 350 F. 

Thursday, January 2, 2014

Glazed Apple Cider Cookies

 Happy New Year! Sorry for the absence over the last month or so - I had a crazy few weeks, with lots of holiday preparations, schoolwork, and (although they may kill me for being so cheesy) music with some pretty great people. The week before holiday vacation, I suddenly realized that I hadn't been baking nearly enough holiday sweets, and I had about 20 people on my gift list needing some serious cookie love. Let's just say there were quite a few late nights of cookie baking and toffee making (that was totally not supposed to rhyme, but let's move on).
 I made quite an assortment of cookies, mixing it up with some old favorites (these are always super popular) and a bunch of new ones. I tried this recipe on a whim - it seemed like a sugar cookie with some reduced apple cider thrown in, so I figured why not?  They're also super simple to put together; a bunch of my teachers got cookie boxes with chocolate fudge cookies, gingerbread stars, and graham cracker toffee, and I threw these in at the last minute.
The result was shockingly delicious. The cider adds a burst of flavor and a tart edge, and the texture is perfectly tender. The glaze, which is simply reduced cider and confectioner's sugar, is a great addition and adds a totally bakery-style touch. So save this seasonal treat for next time, or take a minute to treat yourself in the new year.
Enjoy!
Glazed Apple Cider Cookies
(slightly adapted from Food Network Magazine)

1 1/2 cups apple cider
1 cinnamon stick
1 1/2 cups all-purpose flour
3/4 teaspoon ground cinnamon
1/2 teaspoon baking powder
1/4 teaspoon baking soda
1 stick unsalted butter, at room temperature
2/3 cup packed light brown sugar
1 large egg
2/3 cup confectioners' sugar
Coarse gold sugar, for decorating

Bring the apple cider and cinnamon stick to a simmer in a small pot over medium-high heat. Cook until reduced to 1/4 cup, about 12 minutes; set aside to cool. Remove the cinnamon stick.
Whisk the flour, ground cinnamon, baking powder and baking soda in a medium bowl. Beat the butter and brown sugar in a large bowl with a mixer on medium-high speed until light and fluffy, 3 to 5 minutes. Add the egg and half of the cider mixture and beat until combined. Reduce the mixer speed to low; add the flour mixture and beat until just incorporated. Cover with plastic wrap and refrigerate until firm, about 1 hour.
Position racks in the upper and lower thirds of the oven and preheat to 350 degrees F. Line 2 baking sheets with parchment paper. Form the dough into 3/4-inch balls and arrange 2 inches apart on the prepared baking sheets. Bake, switching the pans halfway through, until golden brown, 9 to 11 minutes. Let cool 5 minutes on the baking sheets, then transfer to racks to cool completely.
Make the glaze: Whisk the confectioners' sugar and the remaining cider mixture in a small bowl until smooth. Spread the glaze on the cookies and top with the coarse sugar. Let set until firm to the touch, about 30 minutes.

Wednesday, October 23, 2013

Classic Red Velvet Cupcakes with Cream Cheese Frosting

 Being interested in a career in the culinary world, it's often easy to get caught up in all of the new, inventive flavor combinations and techniques. My favorite thing to do is add my own twists to classics, but this week I was reminded that sometimes it's important to go back to basics!
 I got an "emergency" phone call one night last week, from a friend of my cousin's, who needed a last-minute box of goodies for her boyfriend (a certain unnamed cookie company messed up her bouquet order delivery date). With the liberty to fill a box with whatever I thought he would like, plus the excitement of an early-morning delivery of a box of sugar to the gym where he works, how could I say no?
I made my choices pretty quickly - this guy likes chocolate, so brownies (salted, of course!) were a given; and who doesn't like peanut butter? Cookies it was. I wanted something additional that screamed "birthday," so I decided to go with a classic, rainbow-sprinkled red velvet cupcake. Until I realized I didn't have a go-to recipe!
  I went back to a few different recipes I've used as a basis for variations in the past (did you know red velvet cake and orange marmalade are a match made in heaven?!), and was able to find a great one I hadn't made in years. It's my favorite, and I think it's a wonderful go-to.
 The cupcake is tender, fluffy, and not too sweet. The frosting provides a great sweet touch, and is the perfect consistency for spreading or piping simply (if you want to get crazy with the decoration, just add in a little extra sugar to get a thicker mixture). So, emergency missing recipe crisis averted - on to the next twist!
  Enjoy!
All packed and ready for delivery!
Classic Red Velvet Cupcakes with Cream Cheese Frosting
(from Food Network)

Cupcakes
2 1/2 cups all-purpose flour
1 1/2 cups sugar
1 teaspoon baking soda
1 teaspoon salt
1 teaspoon cocoa powder
1 1/2 cups vegetable oil
1 cup buttermilk, room temperature
2 large eggs, room temperature
2 tablespoons red food coloring
1 teaspoon white distilled vinegar
1 teaspoon vanilla extract

Preheat the oven to 350 degrees F. Line 2 (12-cup) muffin pans with cupcake papers.
In a medium mixing bowl, sift together the flour, sugar, baking soda, salt, and cocoa powder. In a large bowl gently beat together the oil, buttermilk, eggs, food coloring, vinegar, and vanilla with a handheld electric mixer. Add the sifted dry ingredients to the wet and mix until smooth and thoroughly combined.
Divide the batter evenly among the cupcake tins about 2/3 filled. Bake in oven for about 20 to 22 minutes, turning the pans once, half way through. Test the cupcakes with a toothpick for doneness. Remove from oven and cool completely before frosting.

Cream Cheese Frosting
                                                        1 pound cream cheese, softened
                                                              2 sticks butter, softened
                                                             1 teaspoon vanilla extract
                                                          4 cups sifted confectioners' sugar

In a large mixing bowl, beat the cream cheese, butter and vanilla together until smooth. Add the sugar and on low speed, beat until incorporated. Increase the speed to high and mix until very light and fluffy.
Spread or pipe onto cooled cupcakes. Decorate as desired.

Sunday, October 20, 2013

Pumpkin Cinnamon Rolls

If your Pinterest feed is anything like mine, you're probably being bombarded by pumpkin-scented, spice-filled, warm-out-of-the-oven everything. You might be looking forward to gingerbread or even next spring's fresh fruit by now, but if you're like me, you're excited to take any opportunity to bake up something that's even slightly reminiscent of a pumpkin spice latte (because let's be honest, those are the greatest drink in the world, and nobody should even consider having coffee in any other way, ever).

In my opinion, these rolls (or buns.. what's the difference between cinnamon rolls and cinnamon buns?) bring together the best of fall baking. They're incredibly light and fluffy, and the dough has a light pumpkin flavor. (The pumpkin in the dough does make it hard to roll out due to how soft it is, but get through it and you will be rewarded.) The generous amount of cinnamon sugar swirled in brings in the perfect amount of sweetness and spice, and the cream cheese frosting provides a nice contrast to the sweetness of the swirl.
It all comes together into one pillowy, warm, indulgent breakfast/lunch/dinner/dessert/snack/anytime food, and I promise one bite of these will make you excited to pull on a sweater and curl up by a fireplace. My friend declared them the best thing I've ever baked, and I just might have to agree with her.
Enjoy!
Pumpkin Cinnamon Rolls

Dough
6 tablespoons (85 grams) unsalted butter, to be divided
1/2 cup (120 ml) whole milk, warmed (but not over 116 degrees)
2 1/4 teaspoons active dry yeast (from 1 .25-ounce or 7 gram envelope yeast)
3 1/2 cups (440 grams) all-purpose flour, plus extra for rolling out
1/4 cup (packed) (50 grams) light or dark brown sugar
1/4 cup (50 grams) granulated sugar
1 teaspoon (6 grams) table salt
1/2 teaspoon ground cinnamon
1/4 teaspoon freshly grated nutmeg
1/8 teaspoon ground cardamom (optional)
1/4 teaspoon ground ginger
2/3 cups (160 grams) pumpkin puree, canned or homemade
1 large egg
Oil for coating rising bowl
Filling
3/4 cup (packed, 145 grams) light or dark brown sugar
1/4 cup (50 grams) granulated sugar
1/8 teaspoon table salt
2 teaspoons (5 grams) ground cinnamon
Glaze
4 ounces (115 grams) cream cheese, softened
2 tablespoons (30 ml) milk or buttermilk
2 cups (240 grams) powdered sugar, sifted
1 teaspoon vanilla extract

Make your dough: Melt your butter and set aside to cool slightly.
Combine your warmed milk and yeast in a small bowl and set aside. After five to seven minutes, it should be a bit foamy. If it’s not, you might have some bad yeast and should start again with a newer packet.
In the bottom of the bowl of an electric mixer combine flour, sugars, salt and spices. Add just 1/4 cup (or two-thirds of; leave the rest for assembly) of your melted/browned butter and stir to combine. Add yeast-milk mixture, pumpkin and egg and mix combined. Switch mixer to a dough hook and run it for 5 minutes on low.
Scrape mixture into a large oiled bowl and cover with plastic wrap. Set aside for 1 hour in a draft-free place; it should just about double.
While it is rising, line the bottom of two 9-inch round cake pans (8-inch round should work too, as does an 8-inch square) with parchment paper and butter the sides of the pan and the paper.
Assemble buns: Scoop dough onto a very well floured surface and flour the top of it well. With a rolling pin, roll the dough to an approximately 16×11-inch rectangle. Brush reserved melted/browned butter over dough. Stir together remaining filling ingredients and sprinkle mixture evenly over dough. Starting on a longer side, roll the dough into a tight spiral. It’s going to make a mess because the dough is crazy soft and some stuff spills off the ends; don’t sweat it. It will all be delicious in the end.
To cut cinnamon rolls without squishing their pretty spirals: With a sharp serrated knife, using absolutely no pressure whatsoever (only the weight of the blade should land on the dough) gently saw your log with a back-forth motion into approximately 1-inch sections. When a soft dough like this is rolled, it tends to grow longer, which means that you’ll have the option to either make more buns (say, 18 instead of 16) or just cut them a little larger (in generous inches).
Divide buns between two prepared pans. You can sprinkle any sugar that fell off onto the counter over them. Cover each pan with plastic wrap and let rise for another 45 minutes.
If you’re doing this ahead of time, you can now put them in the fridge overnight. In the morning, leave them out for an hour to warm up and finish rising.
15 minutes before you’re ready to bake them, heat the oven to 350°F. Meanwhile, you can make the glaze. Beat your cream cheese until it is light and fluffy. Add powdered sugar and vanilla. Drizzle in milk until you get the consistency you’re looking for, either thick enough to ice or thin enough to drizzle.
Finish your buns: Remove the plastic and bake buns for 25 minutes, until puffed and golden and the aroma is perfection. Transfer pans to wire cooling racks and drizzle/spread with cream cheese glaze before enjoying, preferably while still warm.

Wednesday, October 9, 2013

Bittersweet Brownies with Pumpkin Cream Cheese Frosting

 Remember last week, when I mentioned something special I was working on? Well, this week was supposed to be pumpkin week here, but... life (and a pretty cool order that I'll tell you about soon) got in the way, and we're left with 2 pumpkiny recipes. But they're pretty great.
  I am slightly obsessed with anything "fall-flavored," from pumpkin spice lattes to cinnamon pancakes. I tried out something totally different with these brownies, and to my surprise, it totally worked.
 The brownies are dark, chewy, thin, and super chocolatey. They may be a new favorite, especially to use as a base for other variations. On top comes a cream cheese frosting mixed with pumpkin puree that is insane - it's sugar and spice and everything nice. (Too much? Sorry...)
 These are unlike any other fall treat that might be sitting in one of your Pinterest boards, and totally worth a shot - who knows, they might become a new Fall go-to for you, too!
  Enjoy!
Bittersweet Brownies with Pumpkin Cream Cheese Frosting

Bittersweet Brownies
3 ounces (85 grams) unsweetened chocolate, roughly chopped
1 stick (4 ounces or 115 grams) unsalted butter, plus extra for pan
1 1/3 cups (265 grams) granulated sugar
2 large eggs
1 teaspoon (5 ml) vanilla extract
1/2 teaspoon flaky sea salt or 1/4 teaspoon table salt (about 2 grams)
2/3 cup (85 grams) all-purpose flour

Heat oven to 350°F. Line an 8×8-inch square baking pan with parchment, extending it up two sides, or foil. Butter the parchment or foil or spray it with a nonstick cooking spray.
In a medium heatproof bowl over gently simmering water, melt chocolate and butter together until only a couple unmelted bits remain. Off the heat, stir until smooth and fully melted. You can also do this in the microwave in 30-second bursts, stirring between each. Whisk in sugar, then eggs, one at a time, then vanilla and salt. Stir in flour with a spoon or flexible spatula and scrape batter into prepared pan, spread until even. Bake for 25 to 30 minutes, or until a toothpick inserted into the center comes out batter-free.
Let cool before frosting.


Pumpkin Cream Cheese Frosting
(adapted from Chow)
3 cups powdered sugar, sifted
1/2 teaspoon ground cinnamon
1/8 teaspoon freshly ground nutmeg
6 ounces cream cheese, at room temperature
4 tablespoons unsalted butter (1/2 stick), at room temperature
1/4 cup pumpkin purée (not pie filling)

Place the sugar, cinnamon, and nutmeg in a medium bowl and whisk to combine; set aside.
Place the cream cheese and butter in the bowl of a stand mixer fitted with a paddle attachment and beat on medium speed until fully combined and smooth, about 1 minute.
Reduce the speed to low, slowly add the powdered sugar mixture, and beat until fully incorporated and smooth, about 3 minutes.
Turn the mixer to medium speed, add the pumpkin, and mix until fully incorporated and smooth, about 1 minute. You may need to add more powdered sugar to reach desired consistency.


Frost pan of cooled brownies. (You may have frosting left over. Just eat it with a spoon use it on cupcakes!) Refrigerate frosted brownies for about 15 minutes before cutting.
   -Makes about 20 brownies, depending on how large you cut them.

Monday, August 26, 2013

Teatime Lavender Cupcakes

 Lately I've been loving using herbs and teas in sweets. From earl grey ice cream to rosemary shortbread, the idea is all over - and these cupcakes are a great example. A while back, I bought a big bag of "culinary lavender" for these shortbread cookies, and I've been trying to find other recipes to use it up. I've had my eye on this one for a while, so I decided to finally try it out.
 These are the perfect way to infuse some flowery flavor into a baked good without making it seem like a bite of perfume. A little bit of lavender is ground up into the sugar, and then sprinkled on top (use a sprig of lavender to garnish if you have it). The icing was interesting because it's kind of a take on royal icing - just egg white and confectioner's sugar. It's very sweet, but in a thin layer it's a nice contrast to the cake.
  These are perfect with a cup of tea in the afternoon. Or for breakfast, because ya know... it's tea. Kind of.
   Enjoy!
Teatime Lavender Cupcakes
(from Cupcakes)

1/2 cup granulated sugar
1/4 teaspoon dried lavender flowers (safe for culinary use)
1/2 cup (8 tablespoons) unsalted butter, at room temperature
2 eggs
1 cup self-rising flour
2 tablespoons milk

1 1/2 cups confectioners' sugar, sifted
1 egg white
lilac food coloring
dried or fresh lavender, for decorating

Preheat the oven to 350 degrees F, then line a 12-cup muffin pan with paper liners.
Put the sugar and lavender flowers in a food processor and process briefly to combine. Tip the lavender sugar into a bowl with the butter and beat together until pale and fluffy.
Beat the eggs into the butter mixture, one at a time, then sift in the flour and fold in. Stir in the milk, then spoon the mixture into the muffin cups. Bake for about 18 minutes until risen and golden and a skewer inserted in the center comes out clean, then transfer to a wire rack to cool.
To decorate, gradually beat the confectioners' sugar into the egg white in a bowl, then add a few drops of food coloring and stir to achieve a lavender-colored icing. Spoon the icing over the cupcakes, then top each one with a sprig of fresh lavender (or a few bits of dried lavender). Let icing set before serving.
   -makes 12 cupcakes

Monday, June 3, 2013

Whipped White Chocolate Ganache

Finalsfinalsfinalsfinals. That's just about what's going through everyone's head at my school right now - it seems like AP exams just ended and now we have to take our finals! Luckily, this time around none of mine are too bad, so I don't have to be studying all the time. I wanted to share this cake that I made back in April, which I have put off sharing mainly out of vanity (on behalf of my pictures) - see the picture of the full cake below.
When I was in Brazil, it was around midnight when my cousin realized that the next day was her friend's birthday, and we knew we had to make her a cake. Her favorite is white chocolate, so I decided to go with my go-to yellow cake, with a light white chocolate frosting. The problem was that we were at my grandma's house, who doesn't ever make layer cakes - so we had to make do with piping "Parabéns!" ("Happy Birthday!") out of chocolate syrup. Oh well...
This is really just ganache that has been whipped after being chilled. I had no idea it would be so delicious! It's light and fluffy, almost like a white-chocolate-flavored whipped cream (which I guess it is, but nevermind...). It's so easy to spread, and it pairs perfectly with the light vanilla flavor in the cake.
Enjoy!
my chocolate syrup piping...
Whipped White Chocolate Ganache
(adapted from Food.com)

6 ounces white chocolate, chopped
2 cups heavy cream

Have the white chocolate ready in a medium bowl of a stand mixer.
In a small saucepan, heat the heavy cream until boiling. Pour over the white chocolate and let stand for 30 seconds.
Stir in concentric circles, from the outside in and then the inside out, until the chocolate is completely melted. Cool in the fridge until cold.
Beat on high speed with the mixer until light and fluffy. Be careful not to over-beat.

Wednesday, February 20, 2013

Chocolate Cupcakes with Nutella Buttercream


    Valentine's day can be a total downer for girls without boyfriends. This year, my friend and I decided to have a girls' night in to celebrate the fun parts of the holiday for single girls like us - takeout, romantic comedies, and most importantly, chocolate!
   We took a basic yet delicious chocolate cupcake recipe (with amazingly tasty, slightly chewy edges!) and wanted something to make it incredible. We found a recipe for buttercream. With an entire jar of Nutella added in. This frosting takes everything great about the chocolatey spread and multiplies it by a thousand, making it light enough to eat by the spoonful! Although, who am I kidding, we ate some plain Nutella by the spoonful too...
   Enjoy!
Basic Chocolate Cupcakes

2 cups sugar 
1-3/4 cups all-purpose flour 
3/4 cup unsweetened cocoa powder
1-1/2 teaspoons baking powder 
1-1/2 teaspoons baking soda 
1 teaspoon salt 
2  eggs 
1 cup milk 
1/2 cup vegetable oil 
1 cup boiling water  
2 teaspoons vanilla extract

Heat oven to 350 degrees F. Line 30 cupcake cups with paper liners, or grease.
Stir together sugar, flour, cocoa, baking powder, baking soda and salt in large bowl. Add eggs, milk, oil and vanilla; beat on medium speed of mixer 2 minutes. Stir in boiling water (batter will be thin). Divide batter amongst prepared pans.
Bake 22 to 25 minutes or until wooden pick inserted in center of a cupcake comes out clean. Cool 10 minutes; remove from pans to wire racks. Cool completely.

Nutella Buttercream 
(slightly adapted from Cannella Vita)
1 stick unsalted butter, softened
1/2 cup vegetable shortening
1 13-ounce jar Nutella
pinch of fine grain sea salt
1 tablespoon vanilla extract
1.5 pounds confectioners’ sugar

6-8 tablespoons milk

In a large mixing bowl, cream butter and shortening until well combined, thick and fluffy, about 5 minutes. Slowly add in confectioner’s sugar, and continue mixing until well blended.
Add salt, vanilla, and 3 tablespoons of heavy cream or milk. Blend on low speed until moistened. Add an additional 3-5 tablespoons of heavy cream or milk until you reach the desired consistency. Beat at high speed until frosting is smooth and fluffy, about 3 minutes. 
Add the Nutella and beat for another 3 minutes.

Thursday, September 27, 2012

Fluffy Double Chocolate Buttercream

 Although I don't think I've ever talked about it here, I kind of have my own "business." It's not huge or fancy, but I love making cakes for other people. My customers are mostly my parents friends, with a few of my own here and there. The reason I haven't mentioned it before is just that when I'm being payed to make a dessert for somebody's party, that's not exactly the best time to try out new recipes. Better to stick to the tested, old favorites.
swirly little swirls
 This weekend, I was hired to make a cake for a little boy's first birthday. Happy birthday Sam! I made my favorite moist yellow cake recipe, but the only request for frosting was to make it chocolatey. The recipe I usually use is this one, but I wanted something creamier and fluffier. And this little creation was born.
 This recipe is actually quite similar to the one I used to use- I basically just added some more chocolate and beat it for longer to make it so fluffy, I wanted to eat it straight out of the bowl. Somehow, those two little changes made quite the big difference. And by the way, that's not to say that I didn't eat a few spoonfuls out of the piping bag once I was done making those little swirls...
a cake for the family, and a cupcake for the birthday boy to smash :)
 The chocolate flavor really comes through, and this frosting is perfect for any flavor of cake you can think up. A spicy ginger cake for the holidays, tall, dark, chocolatey layers, or my favorite (and the birthday boy's parents'), classic yellow vanilla. This is so easy to spread, but still firm enough to pipe without a problem. I used a star tip for the swirls on the cake above, but feel free to decorate as you wish. Enjoy!
happy 1st birthday!

Fluffy Double Chocolate Buttercream
(adapted from Savory Sweet Life)

1 cup (2 sticks) unsalted butter, at room temperature
3 1/2 cups powdered sugar
3 tablespoons milk
2 teaspoons vanilla extract
1/2 teaspoon salt
1/2 cup unsweetened cocoa powder
1/2 cup dark chocolate, melted and cooled

Beat the butter with a mixer at medium speed until light and fluffy, about 2 minutes. 
Beat in the powdered sugar, milk, vanilla extract, and salt. (At this point, I removed about 1/4 cup of frosting to use for the white letters.)
Add in the cocoa powder, and beat for about 3 minutes, until smooth and airy. Beat in the melted dark chocolate. Decorate as desired.
     -makes enough to generously frost and fill one 9" 2-layer cake

Monday, July 16, 2012

Devil's Food Cupcakes with Chocolate Mousse Buttercream

A few weeks ago, a friend of mine and I were hanging out at my house. Our plan was to bake something, but we simply couldn't decide what. I pulled out one of my favorite baking books, Sticky, Chewy, Messy, Gooey, and we decided that the recipe had to come from it. (FIY, no, this is not a paid or even sponsored book review, I just think the book is beautiful and has delicious recipes.) When my friend flipped to the page with a glossy picture of a sky-high chocolate mousse cake, we knew that was it.
My friend had never baked before in her life. I mean, never. Not even a chocolate chip cookie. So I figured that a cake that large probably wasn't the greatest first recipe. We decided to make it into cupcakes instead. Little did I know, this recipe would take us several hours! The actual cupcake batter didn't take too long, but we had some issues with the frosting. It never totally emulsified like the recipe says it will - it was delicious, but had tiny bits of butter spread out through it. I think our problem was that we didn't soften the butter enough when we pounded it, so the butter was never beaten as much as it needed to be.
That said, the cake part of the cupcakes was so delicious, the buttery bits in the frosting didn't matter. The cake was super moist, rich, and dark, and nobody minded that the recipe made a huge batch of about 3 dozen cupcakes! Looking back, maybe this wasn't the best first recipe for a new teenage baker, but hey, she won't be easily intimidated by recipes in the future, right? We agreed that these cupcakes are delicious and so worth the time that goes into them.
Enjoy! <3
Devil's Food Cupcakes with Chocolate Mousse Buttercream
(slightly adapted from Sticky, Chewy, Messy, Gooey)

Devil's Food Cupcakes
1/3 cup dutch-processed cocoa powder, sifted
1 teaspoon instant espresso powder
4 ounces semisweet chocolate, finely chopped
1 cup boiling water
2 teaspoons pure vanilla extract
1 cup buttermilk
1/2 cup (1 stick) unsalted butter, at room temperature
1/2 cup vegetable oil
1 cup packed light brown sugar
1 cup granulated sugar
3 large eggs
2 1/4 cups flour
1 teaspoon baking soda
1/2 teaspoon salt

Position a rack in the middle of the oven and preheat to 350 F. Lightly grease 36 cupcake cups, or line with paper liners.
In a large bowl, combine the cocoa powder, espresso powder, and chocolate. Pour in the boiling water and stir until the chocolate is melted and the mixture is smooth. Stir in the vanilla. Let the mixture cool, then stir in the buttermilk.
In another bowl, using an electric mixer set at medium speed, beat the butter and oil together until light and fluffy. Add the sugars and beat until creamy. Beat in the eggs, one at a time, beating well after each addition.
Sift together the flour, baking soda, and salt. Add one third of the flour mixture to the batter and beat at low speed for a few seconds, just until combined. Beat in half of the chocolate-buttermilk mixture, again beating for just a few seconds, just until combined. Scrape down the sides of the bowl with a rubber spatula. Beat in another one third of the remaining flour mixture for no more than a few seconds, just until combined. Add the remaining chocolate-buttermilk mixture, beating just for a few seconds until combined. Finally, fold in the remaining one third of the flour mixture by hand, using a large balloon whisk or rubber spatula, just until no streaks of flour remain.
Divide the batter between the prepared cupcake tins. Bake until a wooden skewer inserted in the center of a cupcake comes out clean, about 20-25 minutes (start checking at 15). Transfer to wire racks and let cool completely.

Chocolate Mousse Buttercream
6 large eggs
1 1/2 cups sugar
2 tablespoons dutch-processed cocoa powder
1 teaspoon pure vanilla extract
1 1/2 pounds (6 sticks) cold unsalted butter
8 to 12 ounces semisweet chocolate, melted

Whisk together the eggs, sugar, and cocoa powder in the metal bowl of a stand mixer.
Fill a large sauté pan or skillet with water and bring to a simmer over medium-high heat. Place the mixing bowl in the simmering water and whisk the egg mixture constantly until the sugar is completely dissolved and the mixture is thick and fluffy and very hot, 3 to 4 minutes. Use an instant-read thermometer to check the temperature of the mixture; it should be anywhere between 120 and 140 F.
Remove the bowl from the simmering water and, using the whisk attachment, beat the eggs at medium-high speed until they are tripled in volume and form soft peaks and the bottom of the bowl is completely cool to the touch, about 10 minutes. Beat in the vanilla and salt.
While the eggs are mixing, unwrap the individual sticks of butter and rewrap them loosely in plastic wrap. Pound the butter 5 or 6 times with a rolling pin, or until the butter is soft and malleable but still cool.
With the mixer speed still on medium-high, add the butter, approximately 2 tablespoons at a time, to the egg mixture, beating in each addition until it is incorporated. Don't start to panic if the buttercream seems too liquidy or looks curdled as you beat in the butter. It will magically emulsify into a smooth, creamy frosting by the time the last bit of butter is mixed in. Hold your breath and keep going!
When the buttercream is smooth and glossy with a subtle brown tint from the cocoa powder, turn off the mixer and, using a rubber spatula, carefully fold in about two thirds of the melted chocolate. Taste the buttercream. You can add as much of the remaining melted chocolate as you like for an evern richer, denser buttercream.

Frost cupcakes with the mousse buttercream. You will probably have some extra frosting depending on how much you use for the cupcakes, but I'm sure you can find something to do with it! If you feel like using it for some vanilla cupcakes, these are delicious.

Thursday, May 24, 2012

Moist Vanilla Cupcakes with Rich Chocolate Frosting

These are perfect cupcakes for celebrating a birthday. Mine is actually this weekend, and while I will be away for the weekend, I would love to celebrate with a batch of these when I get back. These were made by me and my friend for my mom's friend. He was having a birthday barbeque, and I (of course) offered to bring dessert. We have this sort of ongoing joke about making everything from scratch (I made this birthday cake for his wife a few months ago), so we made the cupcakes super colorful. I claimed that I made every sprinkle from scratch, and he pretended to believe me. As always. :)
This vanilla cake is moist with a light vanilla flavor. It's perfect for any sort of yellow cake you want - whether it's in a layer cake piled high with swirls of frosting, or in a simple bite-sized dessert like this. The frosting is simple but always delicious. Enjoy! <3

Moist Vanilla Cupcakes
(adapted from Allrecipes)


1 cup butter, softened
1 1/2 cups white sugar
4 eggs
3/4 cup milk
1 1/2 teaspoons vanilla extract
2 cups flour
2 teaspoons baking powder
1/2 teaspoon salt

Preheat oven to 350 degrees F (175 degrees C). Grease and flour 24 cupcake cups, or line with paper wrappers. Sift together the flour, baking powder and salt. Set aside.
In a large bowl, cream together the butter and sugar until light and fluffy. Beat in the eggs one at a time, then stir in the vanilla. Beat in the flour mixture alternately with the milk, mixing just until incorporated. Pour batter into prepared pans.
Bake in the preheated oven for about 15 minutes, or until tops spring back when lightly tapped. Cool slightly minutes before turning out onto cooling racks.
-makes 24 cupcakes

Rich Chocolate Frosting
(from Baking Bites)


1/4 cup butter
1 cup chopped semisweet chocolate (or chocolate chips)
1 1/2 cups confectioners’ sugar
1/4 cup milk (lowfat is fine)
1 tsp vanilla extract

Melt together butter and chocolate in a medium-sized, microwave safe bowl. Work in 30 second intervals, stopping to stir frequently, and continuing until the mixture is smooth. Let cool slightly (about 3-5 minutes).
Add in confectioners’ sugar, milk and vanilla and beat on medium-high speed with an electric mixer until smooth.

Tuesday, February 14, 2012

Chocolate Cake with Raspberry Mousse Filling


Okay, so technically this was a birthday cake (if you're reading this, happy birthday Alicia!), but it would be PERFECT for Valentine's day. It was for my mom's friend's party, and she had asked me to make the cake. She said she liked raspberries, dark chocolate, and mocha. Figuring out how to combine ingredients like those is the fun part!
I started off with a simple chocolate cake recipe. I use it for all my chocolate cakes, because it's super simple and comes out moist and delicious every time. It's one of those "wacky cakes", which doesn't take any dairy or eggs but instead uses a chemical reaction with vinegar and baking soda. So yes, if you didn't smother it in cream and butter like I did, it would be vegan :) OK, so I'm going on about how easy this is, but I really messed it up. Like, dropped-a-cake-while-pulling-it-out-of-the-oven-and-had-to-start-all-over messed it up. Oh well, it just went from simple to time-consuming!!

The filling was the hardest thing for me to decide on. I knew from the start that raspberry mousse would be a good choice, but I couldn't find a recipe. Most of the recipes call for raw egg whites, but we knew there would be a little kid there, so that was out. (By the way, she asked me to make her a "rainbow ladybug cake" for her birthday. looking forward to trying to figure that one out...) I finally found one that used gelatin instead, which was another problem for my vegetarian-ness, but it was easily fixed by swapping in agar-agar (made from seaweed but works the same way).

The frosting was a simple chocolate buttercream. The cake was not hard to put together, especially because the layers aren't crumbly at all. I used some leftover mousse to write on top, but we still had TONS left. No worries, it was happily consumed with cake scraps. Enjoy!!
*Those silver balls? Put on with tweezers. One by one. Just saying.

Easy Chocolate Layer Cake (from Baking Bites)
(a.k.a. “Wacky Cake”)
3 cups unbleached all-purpose flour
2 cups sugar
1/3 cup unsweetened cocoa
2 tsp baking soda
1 tsp salt
2 tsp vanilla extract
1 1/2 tbsp vinegar
1/2 cup vegetable oil
2 cups cold water
1 tbsp coffee powder

Preheat the oven to 350F. Grease two 9-inch round cake pans, line with circles of parchment paper, and grease again.
In a large mixing bowl, mix flour, sugar, cocoa, soda and salt. Make three wells in the flour mixture. In one put vanilla; in another the vinegar, and in the third the oil. Dissolve the coffee powder in the cold water (or just use cold coffee for a slightly more mocha taste) and pour the water over the mixture. Stir until smooth. Divide evenly into prepared pans.
Bake for 30-35 minutes, or until a toothpick inserted into the center comes out clean.
Cool in pans on wire racks for 15 minutes. Turn cakes out of pans onto a plate (or another rack), remove parchment paper, and reinvert onto racks to cool completely before frosting.
If storing overnight before frosting (they can be made a day ahead), just wrap completely in plastic wrap and keep at room temperature.


Raspberry Mousse Filling (from Cook From The Hip)
10 oz bag frozen raspberries
1 cup sugar
1 envelope unflavored gelatin (I substituted an equal quantity of agar-agar)
1 1/2 cups heavy cream

Heat the raspberries and sugar in a small saucepan. Stir until all of the raspberries break down and are heated through. Run the raspberries through a strainer and into a new saucepan. Add the gelatin to the raspberries and heat until the gelatin is dissolved. Remove from the heat and set aside.
In the bowl of an electric stand mixer, whip the heavy cream until it form soft peaks. Fold the cooled raspberries into the whipped cream.


Chocolate Buttercream Frosting (from Savory Sweet Life)
1 cup unsalted butter (2 sticks or 1/2 pound), softened (but not melted!)
3 1/2 cups confectioners (powdered) sugar
1/2 cup cocoa powder
1/2 teaspoon table salt
2 teaspoons vanilla extract or 1 teaspoon almond extract
2-4 tablespoons milk or heavy cream

Cream butter for a few minutes in a mixer with the paddle attachment on medium speed. Turn off the mixer. Sift 3 cups powdered sugar and cocoa into the mixing bowl. Turn your mixer on the lowest speed (so the dry ingredients do not blow everywhere) until the sugar and cocoa are absorbed by the butter. Increase mixer speed to medium and add vanilla extract, salt, and milk/cream and beat for 3 minutes. If your frosting needs a more stiff consistency, add a little more sugar. If your frosting needs to be thinned out, add additional milk 1 tablespoon at a time.


<3

Friday, November 11, 2011

Vegan Chocolate Cupcakes


Sometimes the simplest things are the best. Warm blankets, fuzzy sweaters, and chocolate cake of course. My best friend and I were in the same math class last year. One day it was our friend's birthday, and we decided to make cupcakes for the class to celebrate. After having them once, the class became obsessed, and we became the official cupcake bakers. My friend's mom gave us a great recipe that happens to be vegan, but it also happens to be the best chocolate cake recipe I've ever used. The cake is moist and delicious. We always made these with a simple buttercream, leaving it off for our friend who can't have dairy.
Towards the end of the year, we were bringing in cupcakes nearly every week. If it wasn't a friend's birthday, we would find an excuse - some weird holiday, or a celebrity's birthday. It was always the same recipe - the only difference was that we would dye the icing a different color every week. We kept it simple. We once tried bringing in vanilla cupcakes (for my birthday), but they just weren't as good and we decided to stick to these.
I switched schools this fall when we started high school, but my best friend stayed at my old school. I still see her every weekend, but I miss those afternoons baking cupcakes for math class. A few weeks ago, she said she had volunteered to bring in cupcakes for a class, so we decided to make them together. Our old recipe, nice and simple. Yum.

Dairy-Free Chocolate Cake (from The Joy of Cooking)
Whisk together in a large bowl until well blended:
1 1/2 cups all-purpose flour
1 cup plus 2 tablespoons sugar
1⁄3 cup plus 1 tablespoon unsweetened cocoa powder
1 teaspoon baking soda
1⁄2 teaspoon salt
Add:
1 cup cold water
1⁄4 cup vegetable oil
1 tablespoon distilled white vinegar
2 teaspoons vanilla
Whisk until smooth. Scrape the batter into the pan and spread evenly.
Bake about 30 minutes, until a cake tester inserted in the center comes out clean. Let cool in the pan on a rack for 10 minutes. Slide a thin knife around the cake to detach it from the pan. Invert the cake and peel off the paper liner, if using. Let cool right side up on the rack.
*One recipe makes about 12 cupcakes - we always double it. Bake the cupcakes for about 15 minutes - check on them until a skewer inserted in the middle comes out clean.

Quick Buttercream Frosting (from Baking Bites)
1 cup butter, room temerature
2 tsp vanilla extract
4 cups confectioners’ sugar (approx. 1 lb.)
2-4 tablespoons milk

Cream butter with an electric mixer until soft. Add vanilla and gradually add in sugar until most has been incorporated. Mixture will look a bit sandy. Add in milk as necessary (start with 2 tbsp), along with any remaining sugar, until frosting reaches an easy to work with consistency.
*This frosting is so good, we eat it by the spoonful. Our teacher loved it so much, she asked us to bring in whatever was leftover for her. So every week, she got her own little tub of frosting. She says she used it as a dip for pretzels. Yum.

Tuesday, July 6, 2010

I've Been a Bad Blogger...

I'm so, so sorry. I've been completely neglecting this blog. But now I'm back... although I'm away right now and wasn't able to make this week's TWD. And I won't be able to make next week's... whoops. But for now, I'll post the last 3 (!!!!) weeks' recipes. Here we go.


Three weeks ago, Susan of Food.Baby picked the Raisin Swirl Bread. I had been looking forward to this recipe since I got the book, and was so excited it was finally picked. It was simple to make, and I had no problems with it. Obviously my swirl is not perfect, because my bread was longer than the loaf pan and I had to tuck the ends under. The taste? It was really good. Next time I think I would add more sugar to the swirl and maybe a bit more to the dough as well, because it was a tiny bit bland. But there definitely will be a next time! You can find the recipe here.


Two weeks ago, Amy of Amy Ruth Bakes chose the Dressy Chocolate Loaf Cake. I had a few issues with this one. First, my cake sank. I don't know why, but it did. So there is a dent in my cake. Whoops. Also, the sour cream that I got had separated. It was still perfectly good, but it made the frosting a bit lumpy. All in all, the cake won't be winning any prizes for looks, but it was really yummy. I found the icing a bit too dark for my taste, but everyone else loved it. I probably won't make this one again, but you can find the recipe here if you want to try it for yourself.


Finally, last week Wendy of Pink Stripes chose the Rum-Drenched Vanilla Cakes. These were super simple to put together (No mixer needed!), but did take a long time to bake. I halved the recipe and baked it in only one loaf pan. It overflowed, but this could be because I was using a slightly smaller size than recommended (I'm really not sure, and I was too lazy to pull out the tape measure). After the cake came out of the oven, I brushed it with rum syrup (just water, sugar, and rum). I don't love the taste of rum, so I thought I wouldn't like this cake. The rum taste wasn't very strong, though - the cake tasted more like vanilla (due to the vanilla bean in the batter). Everyone loved this cake, and I'll definitely make it again. You can find the recipe here.

Since next week and this week's TWD recipes won't be made anytime really soon (or at least I don't think... maybe I can try to get the tart done here in Brazil...), they will be added to my list of rewinds and I'll post them here as soon as they are made. See you soon, and Enjoy!

P.S. About this month's Daring Bakers challenge... yeah, that wasn't gonna happen around here. No time! But no worries, this month's will be up on the 27th (I'm super excited about it!)