Wednesday, August 15, 2012

KitKat Ice Cream Torte

Remember how I was telling you about Brazilians and how much they love trifles? Well, this is a frozen trifle. A frifle? I decided to call it a torte.
In this party-perfect dessert, brigadeiro, the gooey chocolate made of sweetened condensed milk and cocoa powder that is often rolled into little truffles, is layered with KitKats and vanilla ice cream. The ice cream is filled with chocolate shavings- we bought it that way, but it's easy to do yourself if you can't find it to buy. The three layers go perfectly together: the crunchy, cookie-like KitKats, the gooey, chocolatey brigadeiro, and the creamy, cool ice cream.
According to my aunt, who taught me how to make this, it is easily adaptable. Don't want all the chocolate flavor in the brigadeiro? Just leave out the cocoa powder and make it just with the sweetened condensed milk and butter. If you don't want vanilla ice cream with chocolate shavings, substitute a different add-in or change the ice cream altogether. However you make it, I promise it will be delicious. Enjoy! <3

KitKat Ice Cream Torte

Enough KitKats to cover a 9x9" pan, cut into fourths
1 14-oz can sweetened condensed milk
1 tablespoon butter
1/4 cup sweetened cocoa powder or hot chocolate mix
1 pint vanilla ice cream
1/2 cup chocolate shavings

Cover the bottom of a 9x9" pan with the chopped KitKats.
In a large microwave-safe bowl, combine the sweetened condensed milk, butter, and cocoa. Microwave for 2 minutes, stir, 2 minutes, stir. Continue microwaving in 1-minute increments, stirring inbetween, until the mixture reaches the consistency of a caramel sauce: too thin to scoop, but too thick to drizzle easily. Pour over KitKats and put pan in the fridge until cool.
Soften the ice cream by microwaving for 15 seconds or leaving out at room temperature for a while. Stir in the chocolate shavings and spread the ice cream over the chocolate layer. Freeze until serving, at least an hour.

Sunday, August 12, 2012

Pineapple Coconut Trifle

Here in Brazil, there are a few desserts they are really crazy about. One is trifles- they like to later just about any sort of sweet things in a dish, and somehow it always works out. Another dessert they love is brigadeiro- a chewy chocolate truffle made simply of sweetened condensed milk and cocoa powder that is cooked, cooled and rolled into balls coated with chocolate sprinkles. These brigadeiro have many variations- I recently tried a delicious salted caramel one- among them brig a white brigadeiro. It is made by omitting the cocoa powder and simply cooking down sweetened condensed milk. I like to make this easier by doing it in the microwave!
This dessert, which I got my aunt to teach me how to make, combines a trifle with brigadeiro. Instead of rolling the white brigadeiro into balls, it is made a bit thinner and layered with pineapple and coconut shavings. It is the perfect combination of classic tropical flavors. The chewy coconut, juicy pineapple and creamy brigadeiro pair together very well. The one above was made with just one layer of each, but it is even better with two. Double layers of all the delicious flavors make it a classic Brazilian dessert that can, and should, be made everywhere. Enjoy!

Pineapple Coconut Trifle

1/2 of a pineapple, cut into very small pieces (you can also buy crushed pineapple and drain it)
2 14-oz. cans sweetened condensed milk
2 tablespoons butter
1 cup shredded coconut (we used fresh, but you can used dried if you can't find fresh)

In a large microwave-safe bowl, combine the sweetened condensed milk with the butter.
Microwave for 2 minutes, stir, another 2 minutes, stir. Microwave in 1-minute increments, stirring inbetween, until the mixture reaches the point of a caramel sauce- not thick enough to scoop but not thin enough to drizzle easily.
Layer half of the chopped pineapple in a glass dish- a 2-quart one will do. Cover with half of the milk/butter mixture and then half of the coconut. Repeat the three layers.

Saturday, August 11, 2012

Virgin Sparkling Lime Mojitos


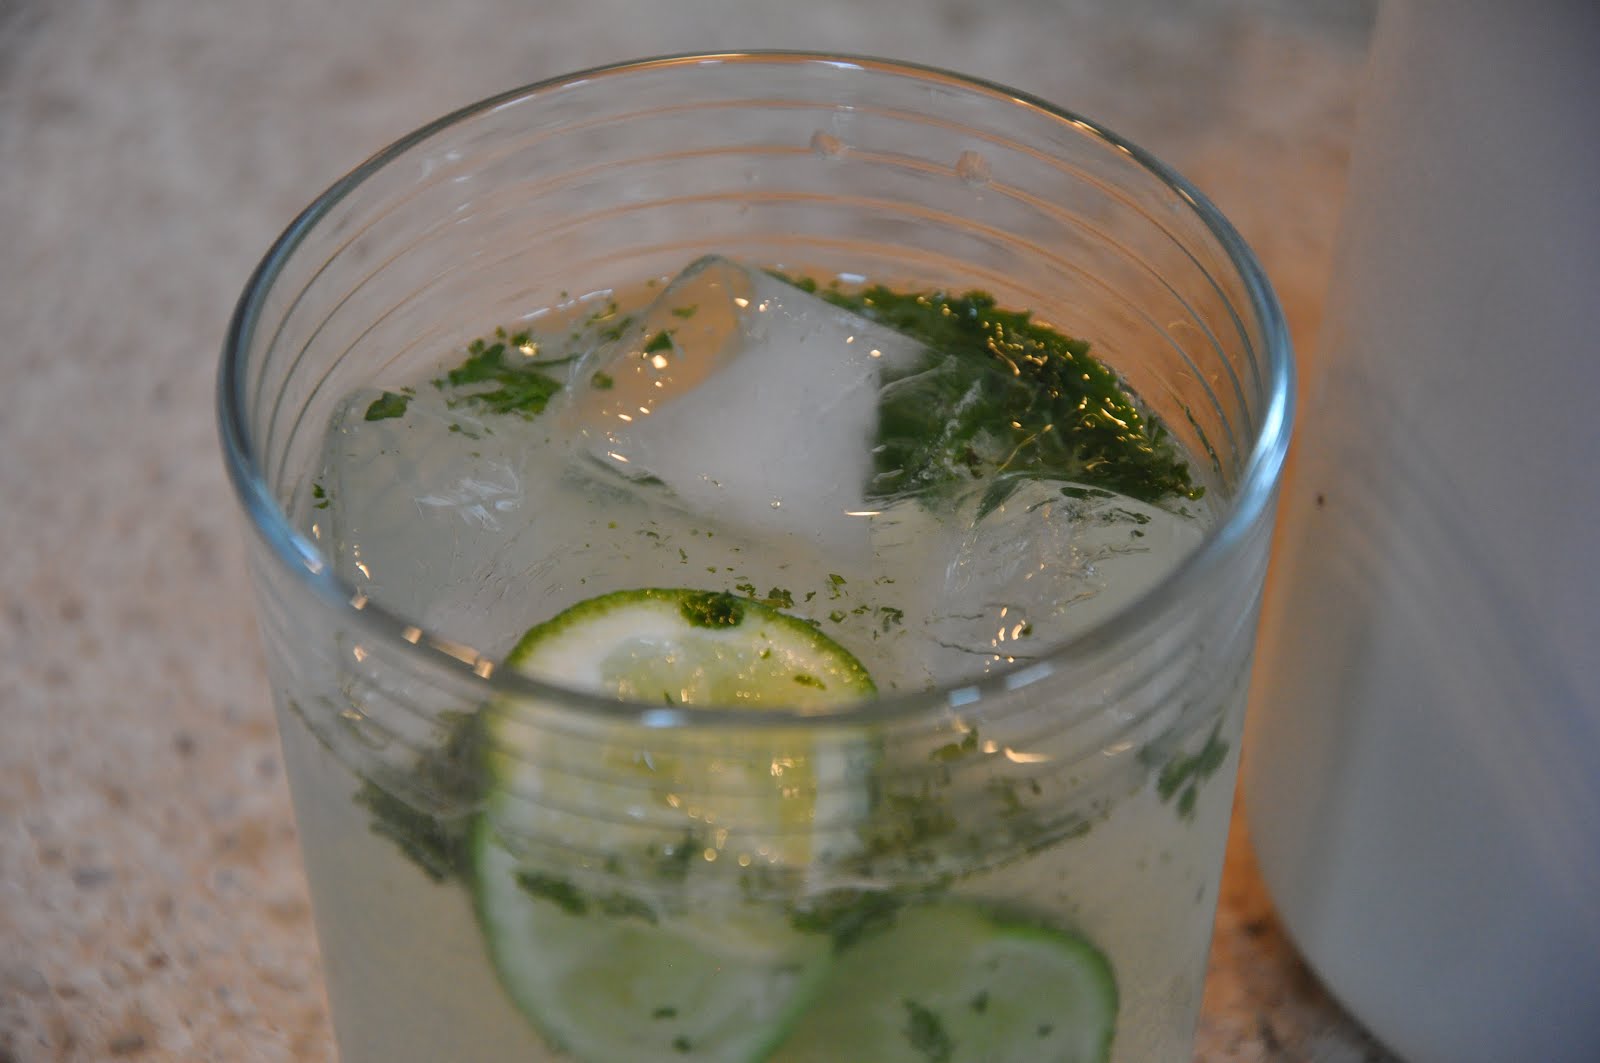
Some summer nights just beg for a cool, sweet beverage. As a teenager, it can be hard to find something tasty besides soda to drink. So when we were having friends over for dinner the other night, I asked my mom to make something I could drink. She suggested these non-alcoholic mojitos, and I'm so glad she did!
Mojitos are generally made with lime, sugar, mint, water, and rum. To make these non-alcoholic, we took out the rum, but we wanted them to be more than a mint limeade. So instead of water, we used sparkling water, which made them bubbly and that much more refreshing. If you want to make an alcoholic version of this, you can keep the same idea but use regular water (the bubbles and rum just don't really go together) and add rum to your liking. The measurements below are approximate- my mom thought up the "recipe" but added more sugar and line as we went on- so put in more or take away ingredients to make your ideal mojito ;)
On a summer night, or any night for that matter, this is a lovely little drink. As refreshing as lemonade but with a slightly more sophisticated (or "grown up") and delicious twist. Enjoy! <3

Virgin Sparkling Lime Mojitos

1 lime
2 tablespoons sugar
3 tablespoons fresh mint leaves
1 cup sparkling water
1/2 cup ice

Squeeze the juice of the lime into a small bowl (don't discard the lime after squeezing). Pour in the sugar and mint leaves.
Mash with a mortar and pestle (or sturdy spoon) for several minutes, until the sugar is nearly dissolved and the mint is crushed.
Mix with the sparkling water and pour into a glass filled with the ice. (If desired, add one jigger of rum.) Cut up the squeezed lime and drop into the glass. Taste and add more sugar or lime as desired.
-makes one mojito- multiply as needed

Tuesday, August 7, 2012

TWD: Mixed Berry Galette

Although people keep talking about the beginning of fall, I am a firm believer that we are still in the warm happiness that is summer. I am leaving for the airport in an hour to go to Brazil to see family, and I am beyond exited that I get to spend an entire month there. I've spent the last couple of weeks trying to get some recipes baked up, so expect less posting than usual but still a few treats while I'm away.
This galette is the perfect summer dessert. The crumbly, sweet crust (I made mine gluten-free with gluten-free all-purpose flour and xanthan gum), the fresh berries bursting with juice, and a little drizzle of sugar and honey. That's it- no complicated custard or pastry cream, no cooking of any fruit, no overnight rests or days of preparation. Great for when you just want something that will get you in and out of the kitchen quickly, but still impress.
I served this at room temperature with some vanilla ice cream, sitting in our friends' backyard. It was just the thing for a warm summer evening, and was light and fresh. My crust crumbled as I was putting the galette together, which is why mine isn't as pretty as many of them, but once it was dark out, nobody noticed ;)
Thanks to Lisa of Tomato Thymes in the Kitchen and Andrea of The Kitchen Lioness for hosting this week's Tuesdays with Dorie. The recipe can be found on their blogs or in Baking with Julia.
Enjoy! <3

Monday, August 6, 2012

Lemon Cranberry Irish Soda Bread with Honey Butter

I am a firm believer that Irish Soda Bread is a year-round food. Lots of people only make it around St. Patrick's Day, but it is one of my dad's favorite treats, so it gets baked during all four seasons in my house. The bread TWD made a while ago is a traditional one, and is simple to put together; however, it isn't very sweet at all. My family prefers the American-ized version, which is sweet and more cake-like. I have a go-to recipe, which is great, but I was sick of the same raisins and plain flavor. I found this recipe, which has lemon and cranberry, and decided to give it a try.
I liked it a lot. This is even more cake-like than the other (really not like a bread), and quite sweet, but is perfect for a snack or light breakfast. The tart cranberries and lemon go together so well and the flavor combination is one of my favorites. It is served with a sweet honey butter that is so easy to whip up, and is the perfect spread for this bread/cake- although if you want to skip it, the bread tastes great on its own. The best part of this recipe? It was approved by my dad, who is quite the soda bread connoisseur. Enjoy! <3
Lemon Cranberry Irish Soda Bread with Honey Butter
(ever-so-slightly adapted from Eat and Relish)

2 cups all-purpose flour
4 tablespoons sugar, + extra for sprinkling
1 1/2 teaspoons baking powder
3/4 teaspoon baking soda
1 teaspoon salt
3 1/2 tablespoons butter, chilled, cut into cubes
1 cup buttermilk
2/3 cup dried cranberries
1/2 cup hot water
juice and zest of one lemon
2 teaspoons milk or buttermilk

Preheat oven to 375 F. Place the dried cranberries, hot water, and juice from the lemon into a small bowl, and let the berries soften. Cut a piece of parchment to fit into a 8″ round cake pan, and place inside. Lightly butter the parchment.
Whisk the flour, 4 tablespoons sugar, baking powder, salt, and baking soda in alarge bowl to blend. Add the butter, and using your fingertips rub the butter into the dry ingredients until a coarse meal forms. It will be very dry.
Make a well in the center of the flour mixture and add the buttermilk and the lemon zest. Gradually the stir dry ingredients into the milk with a spatula to blend until they are just combined (do not overmix – mix only until the ingredients just come together, otherwise your bread will be tough). Once combined, drain the cranberries and discard the liquid. Squeeze them to remove any excess moisture, and add them to the dough. Carefully and gently fold them in.
Transfer dough to the prepared pan and smooth out as much as possible with your hands (you may want to flour them). Flatten slightly (dough will not come to the edges of pan), and brush the top with the milk. Sprinkle the bread with the remaining sugar.
Bake the bread until it is light golden brown and a tester inserted into center comes out clean, just about 40 minutes — start checking it around 30 minutes to avoid overcooking. Cool the bread in pan 10 minutes, then gently transfer to a cooling rack. Serve warm or at room temperature with honey butter (recipe below).

Honey Butter

4 tablespoons (1/2 stick) butter, softened
1 1/2 tablespoons honey

Beat butter briefly until it is creamy. Beat in the honey. Refrigerate so that it is no longer liquidy (it can get liquidy as you are beating it), but let it soften slightly before serving.

Saturday, August 4, 2012

Soft and Puffy Snickerdoodles

Earlier this week, I was in Texas for three days. The meals we had in the small city where my grandparents live were nothing special - mostly revolving around IHOP and Chinese takeout - but these cookies were there for us at the end of every meal. They are the perfect anytime snack. Sweet enough to be a satisfying dessert, yet no so sweet that you feel guilty having one before lunchtime!
I made these the night before we left, and they were whipped up in less than an hour altogether. These cookies are so easy to mix up, and a great cookie for late at night when you want your dessert fix and don't have a whole lot of time. As we discovered, they also keep well for several days.
I believe these were supposed to come out thin and a bit crispy, but mine came out thick and pretty soft. That's okay- I loved them anyway! The cinnamon sugar on the outside created a crisp little shell around the pillowy interior; one delicious cookie.
Enjoy! <3
Soft and Puffy Snickerdoodles
(from Cannella Vita)

1/2 cup butter softened
1/2 cup shortening
1 1/2 cups white sugar
2 eggs
2 teaspoons vanilla extract
2 3/4 cups all-purpose flour
2 teaspoons cream of tartar
1 teaspoon baking powder
1/4 teaspoon salt
2 tablespoons white sugar
2 teaspoons ground cinnamon

Preheat oven to 400 degrees F.
Cream together butter, shortening, 1 1/2 cups sugar, the eggs and the vanilla. Blend in the flour, cream of tartar, baking soda and salt.
Shape dough by rounded spoonfuls into balls. Mix the 2 tablespoons sugar and the cinnamon. Roll balls of dough in mixture. Place 2 inches apart on ungreased baking sheets.
Bake 8 to 10 minutes, or until set but not too hard. Remove immediately from baking sheets.

Thursday, August 2, 2012

TWD: Blueberry Nectarine Pie

Sorry for the 2-day delay on this TWD post; I went away for a few days and completely forgot to post this! Well, the delay is definitely worth it for this pie.
I had a couple of issues with this pie. The first was that I made the crust gluten-free (by using gluten-free all-purpose flour and a little xanthan gum) for my mom, but it just didn't hold together like it should have. I had to piece together the bottom crust, so I decided to not try and roll out the top crust - I cut out little butterflies instead! I think it ended up looking cute.
The other problem I had was with the fruit filling. Instead of flour I used cornstarch, but I must not have put in quite enough, because the filling was pretty runny. Once we kept in the fridge overnight it was fine, but when we ate it warm it was more like a cobbler. Hey, nobody ever complained about a tasty cobbler, did they?
This is one great summery fruit pie. The blueberries and nectarines go together really well, and the slightly tart filling pairs perfectly with the sweet crust. The recipe can be found on the hosts' blogs: Liz of That Skinny Chick Can Bake and Hilary of Manchego's Kitchen, or in the book. Enjoy! <3