Friday, April 30, 2010

TWD Rewind: French Yogurt Cake with Marmalade Glaze


Do you ever make a recipe with really high expectations, but it ends up just not working out for you? It's not that it's BAD, it's just not great, and you know you'll never make it again. That's what happened with this cake(s). The batter is simple to put together. it uses yogurt and lemon zest, but since I didn't have any lemons, I used some lemon yogurt. It also uses some almond meal, which you can definitely taste in the end result (in a good way). This recipe makes one 9x5" loaf cake, but I made it into twelve pretty big cupcakes. After they cooled, it was time for the glaze. It is a simple glaze made of marmalade heated with a little bit of water. I used orange marmalade instead of lemon, because that was what I had. It took FOREVER to strain, though, so I ended up not using that much of it.
All in all, these cakes were just okay. I didn't love them, but they were tasty. I won't be making them again, but I can cross them off my TWD Rewinds list! If you want to try them for yourself, you can buy the book or find the recipe here. Enjoy!

Thursday, April 29, 2010

TWD Rewind: Quintuple Chocolate Brownies


Last weekend, I had some spare time and wanted to do another Tuesdays with Dorie rewind. I decided on these Quintuple Chocolate Brownies. They have five types of chocolate:


White chocolate, unsweetened chocolate, unsweetened cocoa powder, milk chocolate, and semisweet chocolate (yes, we are one of those crazy families that buys the 72 oz. packages of chocolate chips at Costco).
The batter is fairly easy, but a bit time-consuming. Into the oven it goes! Once the brownies were cool (okay, mostly. we were hungry.), you melt white chocolate with cream and spread it on top of the brownies. Dorie says to take the brownies out of the pan before you put on the glaze. I did that, but the glaze wasn't very thick and dripped. Although I put the brownies (with the glaze on) in the fridge for 20 minutes, it still dripped (as you can see below). But they were delicious nonetheless.


These are very rich brownies, but also very delicious. They are decadent, but trust me, you won't want to eat one after the other (unless you want to be up all night with a stomach ache). I recommend these! If you want the recipe, you can find it here or in the book (which you REALLY should have by now). Enjoy!

Tuesday, April 27, 2010

Daring Bakers: Traditional British Pudding


The April 2010 Daring Bakers’ challenge was hosted by Esther of The Lilac Kitchen. She challenged everyone to make a traditional British pudding using, if possible, a very traditional British ingredient: suet.

Okay, so here's the deal. I'm vegetarian. That means I don't come near suet (although even before I was vegetarian, I had issues with the idea of using parts of an animal besides the meat). So I decided that I wanted to use shortening or butter instead. The recipe in the DB forum didn't look so interesting to me, but Esther posted a link to another recipe that looked really yummy. It was for a rhubarb steamed pudding (part of the challenge was to steam or boil the pudding). This challenge ended up being two firsts for me - the first time I made a steamed British pudding (and the first time I even heard of one!), and the first time I baked/cooked with rhubarb.


This pudding starts off with cooked rhubarb (cooked in sugar and ginger). Then it gets put in the pudding bowl (I decided to use four small ones instead - I should have used five, because they overflowed).


The rhubarb gets topped with a cake batter made of butter, sugar, vanilla, eggs, and self-rising flour. Then you steam the puddings. I used the slow cooker, but the water wouldn't simmer, so it took longer than it was supposed to.


You take them out when they spring back when touched. Mine were barely springing back, but it was late and I was getting impatient, so I took them out.
They tasted fine. The contrast of the sour rhubarb and sweet cake was good, but the cake itself tasted a bit too much like butter and eggs and wasn't cooked enough (although the cooking part was my fault). All in all, it was a fun experience, but I won't be making this recipe again. However, I might try other steamed pudding recipes. If you want to try it for yourself, the recipe I used is below. Enjoy!


Rhubarb Steamed Pudding

350g fresh rhubarb , cut into 4cm lengths
200g caster sugar
1 tsp ground ginger
125g unsalted butter
few drops natural vanilla extract
2 medium eggs , beaten
175g self-raising flour


Cook the rhubarb with 75g/2¾oz of the sugar and the ginger over a gentle heat for 2-3 mins until just starting to soften. Remove from heat.
Grease a 900ml pudding basin. Put butter and remaining sugar in a bowl and cream together. Stir in vanilla extract, then beat in eggs, a little at a time. Sift in flour and carefully fold into the mixture.
Spoon rhubarb into the bottom of the basin, then spoon the sponge mixture on top and level off surface.
Butter a piece of greaseproof paper slightly bigger than the top of the pudding basin. Make a pleat in the centre and secure over the top of basin. Repeat with a piece of foil, then secure the whole thing with string. Place in a pan half filled with simmering water. Cover and cook for 1½ hrs, checking regularly that the pan does not boil dry. Remove cover, invert the pudding onto a plate, then carefully lift off the pudding basin. Serve with crème fraîche or single cream.

TWD: Chocablock Cookies

I have four words. Chocolate. Nuts. Raisins. Coconut. Enough said? Maybe not. I'll explain. This week's Tuesdays with Dorie recipe was chosen by Mary of Popsicles and Sandy Feet. She chose the Chocablock Cookies.
These cookies are made brown not because of chocolate, but because of molasses in the dough. But, of course, you can't have a brown cookie with no chocolate in it! So, there are chocolate chips. You also need a bit of crunch in your cookie, so there are nuts. I used a mixture of pecans and walnuts (I didn't bother toasting them). You need some texture in dough beside nuts and chocolate, right? That's where the coconut and oats come in. Finally, you can't have all that and not have some healthy stuff. And there's the dried fruit. I like raisins as my dried fruit in baked goods, so that's what I added. These cookies truly had more add-ins than they had dough!
I, sadly, did not get a chance to taste these cookies, but they were taken to a party and I heard everybody loved them. So I can't honestly recommend these to you, but my taste-testers can. The one thing I heard wasn't so great was that they are very rich, so they should be small. Dorie recommends using a two-tablespoon scoop. I used a one-tablespoon scoop and heard they were too rich, so if you make these you might want to use a heaping teaspoon.
If you want the recipe, you can buy the book, or you can find it here. Enjoy!


Friday, April 23, 2010

TWD Rewind: Chocolate Cream Tart


Easter lunch. I'm making dessert. Better be good, right? Well, why not trust Dorie? Again. Oooh, there's a big list of rewinds to still do! Okay, I'll make the Creamiest Lime Cream Meringue Pie and the Chocolate Cream Tart. Chocolate, citrus, meringue, whipped cream... something for everyone, right? Right. Okay, why not spread it out over a few days? Day one: The crust.
This was a really quick and easy crust. It's very similar to the usual tart dough, only it has cocoa powder. Whir some ingredients together in the food processor, pat the dough into the pan, and stick it in the freezer. Half an hour later, into the oven it goes. Another half hour later, onto a cooling rack. All done!
Day two: The pastry cream.
Again, the usual deal. Sugar, egg yolks, cornstarch... temper with the milk... put in the rest of the milk... stir in melted chocolate (I used bittersweet).... stir in some butter. Stick it in the fridge.
Day 3: The whipped cream.
ONCE AGAIN, no big deal. Whip some cream. Add some sugar and vanilla. Great.
Now, time for assembly. Spread the pastry cream in the tart shell. Spread the whipped cream on top. Finally, some chocolate shavings (to this day, I cannot manage to make curls).
Easter morning we put the tart on a plate and got in the car to go to a friend's house. That was probably the most stressful car ride of my life. The plate was on my lap, and I stupidly didn't put anything under the tart to keep it from sliding, so the crust cracked in a few places. But it got there looking fine.
Time for dessert. At this point, I was nervous. I had tasted along the way, but didn't know how it would come together. Luckily, it was great! The crust was great, and so was the whipped cream. My only complaint was the pastry cream - I would have liked it to be a bit sweeter, so next time I'll use semi-sweet instead of bittersweet chocolate. But the people who love dark chocolate said it was great.
Basically what I'm saying is that if you ever need an impressive yet simple dessert, try out this tart. You can find the recipe here or in the book. Enjoy!

Thursday, April 22, 2010

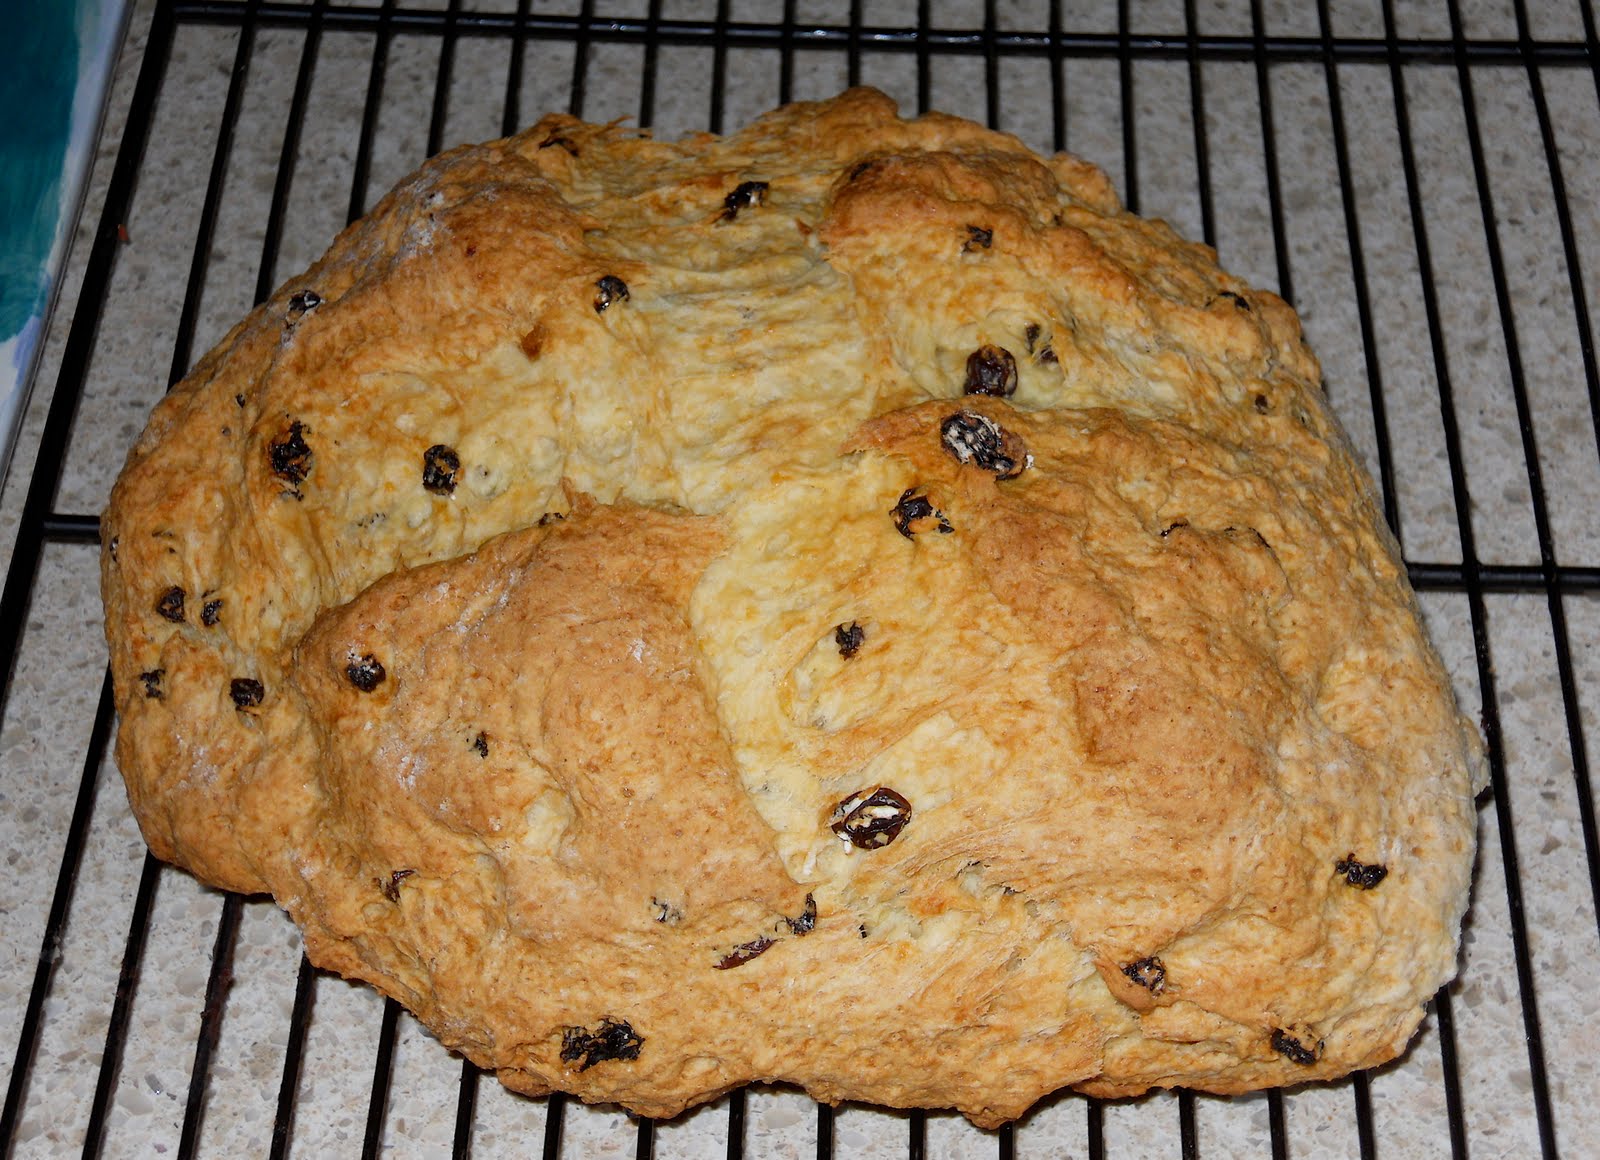
Post #101!!!! The Best Irish Soda Bread


This is post #101! Just for that, let's put in 101 exclamation points: !!!!!!!!!!!!!!!!!!!!!!!!!!!!!!!!!!!!!!!!!!!!!!!!!!!!!!!!!!!!!!!!!!!!!!!!!!!!!!!!!!!!!!!!!!!!!!!!!!!!! Yay.
Now, last week I asked you what you wanted me to put up as my 100th post. But, I didn't have time and that ended up being yesterday's TWD. So it's my 101th post. Deal with it.
Everyone who voted decided on me posting my best recipe for Irish Soda Bread. So that's what's happening here today.
If the words "Irish Soda Bread" makes you think of thinly sliced bread that tastes like fennel, you're right. That is a type of Irish Soda Bread. But not my type. This type has a hard crust, but is almost like a cake on the inside. It is crumbly but moist, and quite sweet (but definitely not overly so). It's perfect as breakfast, a snack, or as dessert (once it gets stale, it's great toasted with butter). Every time there is a special occasion, it is requested. So basically what I'm saying is that you HAVE to make this bread. Now. Pleeeeeeeeeease? You won't regret it. So here's the recipe (please note that this is an extreme risk for me, because once the lovers of this bread see how easy it is to make, it will never be requested again).

Irish Soda Bread (from The Spatulatta Cookbook)
(makes 2 loaves of soda bread)

5 cups all-purpose flour
1 teaspoon salt
1 teaspoon baking soda
5 (yes, I said 5) teaspoons baking powder
1/2 cup (1 stick) unsalted butter, softened
2 large eggs, beaten slightly
1 1/4 cups black raisins
3/4 cup sugar
1 1/2 to 2 cups regular or low-fat cultured buttermilk

1. Preheat oven to 375 F.
2. Stir together the flour, salt, soda, and baking powder in the bowl.
3. Unwrap the butter and set aside the wrapper, which you'll use to grease the cookie sheet. Stir the butter into the flour mixture until it is crumbly.
4. Add the eggs, raisins, and sugar. Stir well, then use your clean hands and fists to scoop the dry ingredients from the bottom of the bowl and gently push them into the dough.
5. With another person, add the buttermilk, a little at a time, until the dough is sticky. One person stirs while the other slowly pours the buttermilk.
6. Sprinkle flour on the counter or flat surface (and your hands and wrists - just trust me), remove the dough and shape into rounds.
7. Knead the dough ten times. Fold and press, then turn the dough. Repeat ten times. Kneading gives the bread its good texture.
8. Cut the dough in half and shape it into 2 rounds.
9. Rub the cookie sheet all over with the buttered side of the wrapper.
10. When your loaves are on the sheet, use a floured butter knife to cut into, but not all the way through, the tops of the bread, in an "X" shape. This is called scoring.
11. Bake the bread for 45 to 60 minutes until the bread is a nice nutty brown.

Enjoy!!!

Wednesday, April 21, 2010

TWD: Sweet Cream Biscuits


Ok, so it's Wednesday. But I'm getting better, right? Right. This week's Tuesdays with Dorie was chosen by Melissa of Love at First Bite. She chose the Sweet Cream Biscuits. These were so quick to make! We got up late on Saturday and they were ready within a half hour. The dough doesn't actually have any butter in it - all the fat comes from the cream. But they are still incredibly flaky!
So to make these, you mix together some dry ingredients and cream, pat the mixture into a disk, and cut out 2-inch rounds. I used my 2-inch cutter, but thought they came out smaller than I would have liked. But that didn't matter, because they tasted great. I had never made biscuits before (except for TWD's sweet potato ones, but those were sort of a failure...), and I like these much better than the ones from the can you whack on the counter to open! If you want to try them for yourself, you can buy the book or find the recipe here. eNjOy!