Saturday, November 24, 2012

Classic Apple Pie

 Apple pie. It's such a classic American dessert, and yet there are so many different versions of it. Syrupy, crumbly, sweet, tart, flaky, cinnamon-y, cheesy. How can there possibly be one greatest apple pie?
 It's not possible. I have made many apple pies throughout the years, and most have been very good - but many are filled with twists and turns that make them far from "homestyle." Sometimes you just need a classic apple pie, which is where this recipe comes in.
This is simple. It's thick and sweet and perfect after a big Thanksgiving meal. I forgot to put the cinnamon into the recipe, but instead sprinkled cinnnamon sugar over the warm pie. I was surprised that I didn't miss the cinnamon in the filling, but if you think it's necessary, feel free to throw in two teaspoons or so.
 This was enjoyed by everybody who had some from our buffet of holiday pies (more recipes coming soon!) and will definitely be made again whenever I want a taste of a classic fall dessert.
 Thank you to Nicole of Baking Bites for her wonderful pie giveaway, in which I won a great cookbook and the beautiful ceramic dish used for this pie.
  Enjoy!
Classic Apple Pie
(slightly adapted from Cannella Vita)

1 recipe pastry for a 9 inch double crust pie (my new favorite is Smitten Kitchen's)
1/2 cup unsalted butter 
3 tablespoons all-purpose flour 
1/2 cup plus 2 tablespoons white sugar, divided 
1/2 cup brown sugar 
1/4 cup water 
8 medium apples, peeled, cored, and chopped  
2 teaspoons cinnamon 


Preheat oven to 425 F. Melt butter in a sauce pan. Stir in flour to form a paste. Add 1/2 cup white sugar, brown sugar and water; bring to a boil. Reduce temperature, and simmer 5 minutes. If you want to put some cinnamon into the filling, now is the time to do so.

Meanwhile, place the bottom crust in your pan. Fill with apples, mounded slightly. Gently pour the sugar and butter liquid over the crust. Pour slowly so that it does not spill out of the pan. Cover with a lattice work crust (or just top with second crust and cut in steam holes). Seal together crust edges.

Bake 15 minutes. Reduce the temperature to 350 degrees F and continue baking for 35 to 45 minutes, or until browned to your liking. Stir together the remaining 2 tablespoons white sugar and the cinnamon, and sprinkle over the pie. Let the pie sit for a few hours to thicken, or enjoy fresh from the oven and slightly runny ;)


Thursday, November 22, 2012

Greek Yogurt Cinnamon Buns

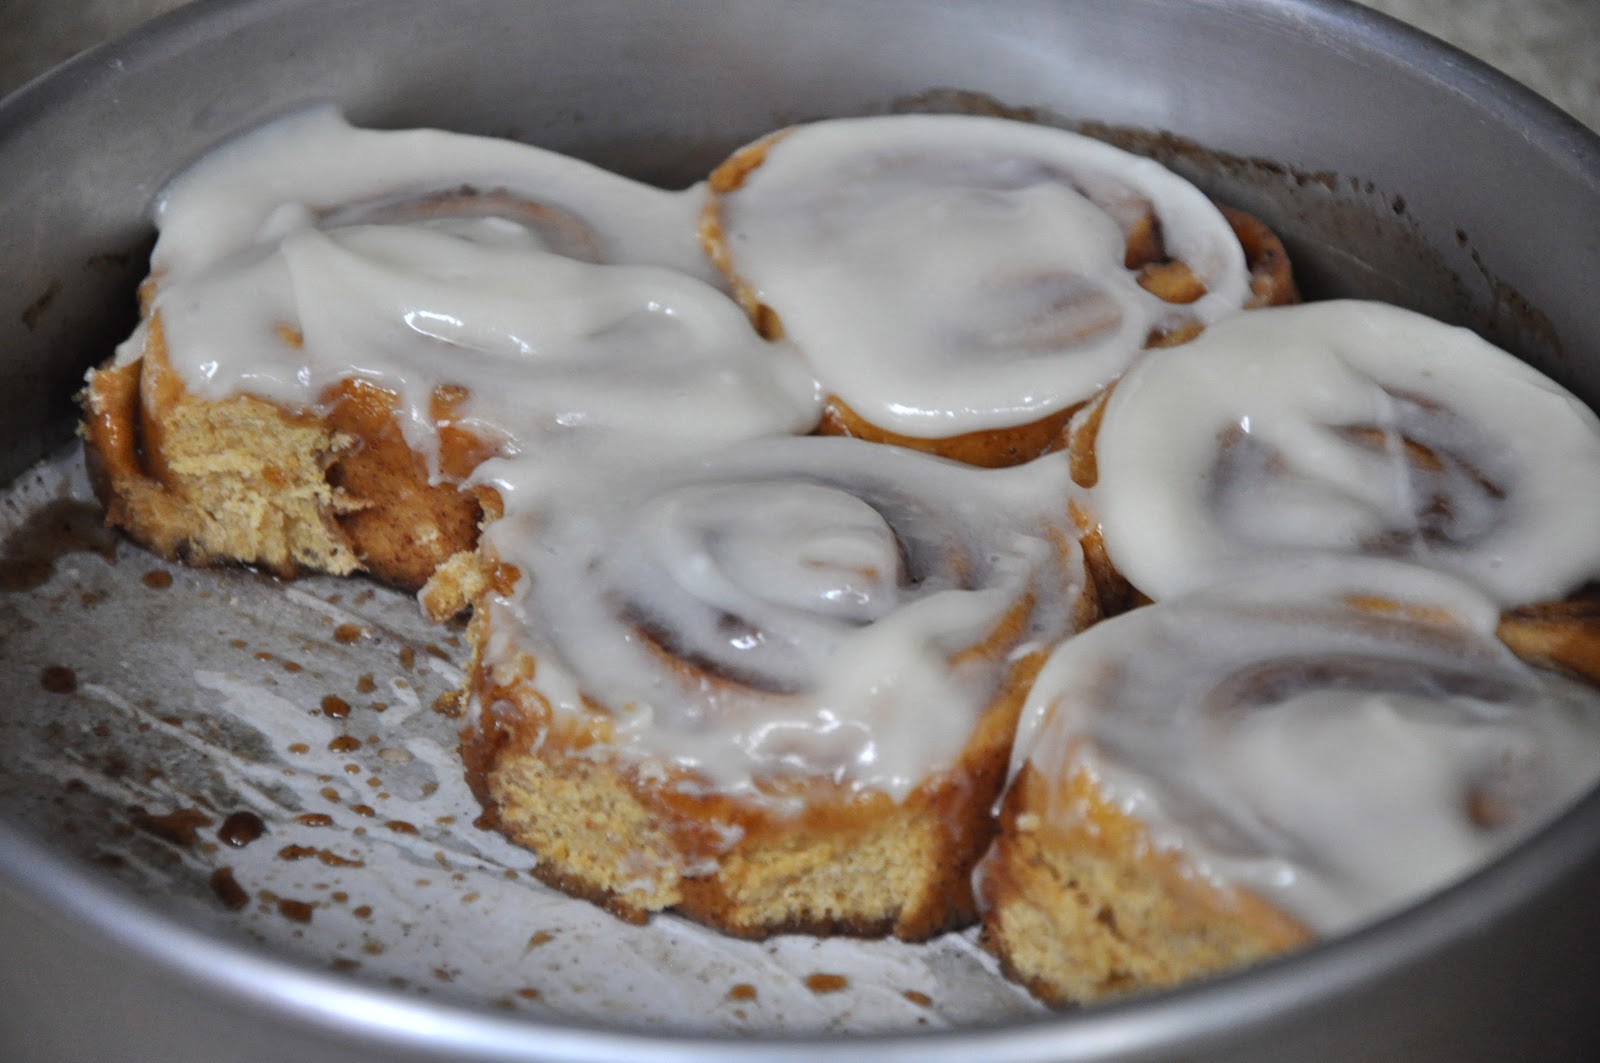
 Happy Thanksgiving! I hope you're all enjoying a day filled with fun with your favorite people. In the midst of all the crazy, buttery pies all over the internet, I figured I should bring you this easy recipe for a treat that will feed a big family for breakfast. Greek yogurt cinnamon buns.
  That's right, you heard it. Greek yogurt. Cinnamon buns. In the same phrase. What is happening to the world??
 When you hear anything with the words "Greek yogurt," you might automatically think of "healthy." The truth is, while these are a bit better for you than the average cinnamon bun - they have whole wheat flour, too - they are far from healthy.
 I originally set out to make a big batch of indulgent pumpkin cinnamon buns, but it ended up not really working out when I realized that I only had part of the pumpkin for the recipe, and decided to throw in some Greek yogurt instead. It ended up working out kind of like the classic chocolate mayonnaise cake, where you don't taste the secret ingredient, but it makes everything more moist and delicious.
  If you want a recipe for an easy, rich breakfast for a crowd, these are perfect. And if you want to tell yourself that they are healthy as well, go for it. I won't mind.
  Enjoy!
Greek Yogurt Cinnamon Buns
(adapted from Smitten Kitchen)

Dough
6 tablespoons unsalted butter, to be divided
1/2 cup whole milk, warmed (but not over 116 degrees)
2 1/4 teaspoons active dry yeast (from 1 .25-ounce or 7 gram envelope yeast)
1 1/2 cups white whole-wheat flour
2 cups all-purpose flour, plus extra for rolling out
1/4 cup (packed) brown sugar
1/4 cup granulated sugar
1 teaspoon table salt
1/2 teaspoon ground cinnamon
1/4 teaspoon freshly grated nutmeg
1/8 teaspoon ground cardamom
1/4 teaspoon ground ginger
2/3 cups plain Greek yogurt
1 egg
Oil for coating rising bowl

Filling
3/4 cup (packed) brown sugar
1/4 cup granulated sugar
1/8 teaspoon table salt
2 teaspoons ground cinnamon

Glaze
4 ounces cream cheese, softened
2 tablespoons milk
2 cups powdered sugar, sifted
Few drops vanilla extract

Make your dough: Melt your butter, and if you’re melting it in a little saucepan, you might as well brown it for extra flavor. Once the butter has melted, keep cooking it over medium heat for a few additional minutes. It will become hissy and sizzle a lot, then take on a nutty flavor as golden bits form at the bottom of the pot. Remove from heat and set aside to cool slightly.
Combine your warmed milk and yeast in a small bowl and set aside. After five to seven minutes, it should be a bit foamy. If it’s not, you might have some bad yeast and should start again with a newer packet.
In the bottom of the bowl of an electric mixer combine flours, sugars, salt and spices. Add just 1/4 cup (or two-thirds of; leave the rest for assembly) of your melted/browned butter and stir to combine. Add yeast-milk mixture, Greek yogurt and egg and mix to combine. Switch mixer to a dough hook and run it for 5 minutes on low.
Scrape mixture into a large oiled bowl and cover with plastic wrap. Set aside for 1 hour in a warm place; it should just about double.
While it is rising, line the bottom of two 9-inch round cake pans (8-inch round should work too, as does an 8-inch square) with parchment paper and butter the sides of the pan and the paper.

Assemble buns: Scoop dough onto a very well floured surface and flour the top of it well. With a rolling pin, roll the dough to an approximately 16×11-inch rectangle. Brush reserved melted/browned butter over dough. Stir together remaining filling ingredients and sprinkle mixture evenly over dough. Starting on a longer side, roll the dough into a tight spiral. This may be messy and leak out butter and sugar at the ends of the dough; that's okay.
Here’s how to cut cinnamon rolls without squishing their pretty spirals: With a sharp serrated knife, using absolutely no pressure whatsoever (only the weight of the blade should land on the dough) gently saw your log with a back-forth motion into approximately 16 1-inch sections. When a soft dough like this is rolled, it tends to grow longer, which means that you’ll have the option to either make more buns (say, 18 instead of 16) or just cut them a little larger (in generous inches).
Divide buns between two prepared pans. You can sprinkle any sugar that fell off onto the counter over them. Cover each pan with plastic wrap and let rise for another 45 minutes.
If you’re doing this ahead of time, you can now put them in the fridge overnight. In the morning, leave them out for an hour to warm up and finish rising.
15 minutes before you’re ready to bake them, heat the oven to 350°F. Meanwhile, you can make the glaze. Beat your cream cheese until it is light and fluffy. Add powdered sugar and vanilla. Drizzle in milk until you get the consistency you’re looking for, either thick enough to ice or thin enough to drizzle.

Finish your buns: Remove the plastic and bake buns for 25 minutes, until puffed and golden and delicious-smelling. Transfer pans to wire cooling racks and drizzle/spread with cream cheese glaze (or leave plain if you're like my dad and don't like icing, in which case, we need to have a little conversation about life values and such).

- makes about 16 cinnamon buns

Saturday, November 3, 2012

Double Chocolate Greek Yogurt Muffins

As much as it may seem like it from reading this blog, I don't actually spend all day eating custard pies and cupcakes topped with small mountains of icing. Usually, my family and I have a bit of whatever it was I made, and my dad takes the rest of it to share with his co-workers. I have been baking a bit more than usual this week, since I had the whole week off from school (thank you, Hurricane Sandy! No, actually, I hope everyone is okay - I was lucky to not have been affected at all at home). Yesterday, I was flipping through recipes calling for cups of sugar and multiple sticks of butter when I realized that my dad wasn't going to work today, so whatever I baked, it would be in our house for the next couple of days. Enter these muffins.
 These are fairly healthy (as muffins go) - they have some sugar and a bit of oil, but their chocolatey taste comes from unsweetened cocoa powder (with a few chocolate chips thrown in - I used semisweet, but feel free to use your favorite kind), and I made them with half white whole wheat flour, which adds some heartiness without changing the texture. As a vegetarian, I'm always trying to get some extra protein in, and Greek yogurt is filled with it; these muffins are made moist and ever-so-slightly tangy from the rich, creamy yogurt.
  This is the perfect breakfast muffin, in my opinion - it is moist, pairs perfectly with a creamy cup of coffee, and tastes almost as indulgent as your favorite bakery's double chocolate muffin, but is healthy enough to be acceptable for a weekday morning.
  Enjoy!
 Double Chocolate Greek Yogurt Muffins
(adapted from Knead to Cook)

1/2 cup all-purpose flour
1/2 cup white whole wheat flour
1/2 cup unsweetened cocoa powder
2 tsp baking powder
1/4 tsp salt
3/4 cup sugar
1 cup non-fat plain Greek yogurt
3 large eggs
1 teaspoon vanilla extract
1/2 cup canola oil
1/2 cup semisweet chocolate chips

Preheat oven to 350 F.  Grease a 12-cup muffin tin, or line with paper liners.
In a large mixing bowl, sift together the flours, cocoa powder, baking powder, salt and sugar. 
In a separate bowl, whisk together the yogurt, eggs, vanilla and oil.  Stir the yogurt mixture into the dry ingredients, mixing just until combined.  Fold in the chocolate chips.
Divide the batter evenly among the muffin cups.  Bake for 18-20 minutes, or until a toothpick inserted in the center of a muffin comes out clean. Make sure that the toothpick isn't coming out dirty due to hitting a chocolate chip - you don't want to over-bake your muffins!

Tuesday, October 30, 2012

Streusel-Topped Pear & Plum Pie

 I'm happy to report that my family and I are all okay and safe from Hurricane Sandy- our power is still on and now we're just waiting for news on the subways (no school tomorrow?) and hoping everyone is okay!
On Sunday, when we heard that we would probably be stuck indoors for a few days, I knew some pie was needed. We had just been shopping for hurricane supplies, which included lots of fruit and butter for baking (and an obscene amount of ice cream, but that's completely unrelated), so we had plenty of pie ingredients. I wanted something that could be easily made gluten-free, was delicious, and incorporated somewhat fall-like flavors (other than pumpkin, please!). This pie was the perfect choice.
 It starts with a crisp pie crust - I used a leftover gluten-free galette crust from this galette, but feel free to use your favorite. Then comes a thick layer of chopped pears and plums, mixed with lots of delicious magic! Finally, the best part (in my opinion) gets crumbled on: the streusel topping! I love the "crumb" on crumb cake, and this is basically a layer of just that - I even used gluten-free all-purpose flour for my mom, and it was wonderful. This pie is perfect warm with a big scoop of ice cream, or at room temperature if the idea of taking the time to heat up pie and scoop ice cream is just too daunting (it's okay - I get it).
The three layers go perfectly together to create a delicious dessert that can be made in fall just as easily as in summer - if you can't find any of the fruits or don't like them, feel free to substitute your favorites. This would be delicious with apples for Thanksgiving as well, or with nectarines for the Fourth of July, or with any other fruit for any other day of the year...
   Enjoy!
Streusel-Topped Pear & Plum Pie
(from Oprah)

1 9" pie crust, chilled
1 1/3 cups plus 1/4 cup all-purpose flour, divided (I used gluten-free all-purpose flour and added about a teaspoon of xanthan gum)
1/2 cup (1 stick) butter, melted and cooled
2/3 cup plus 3 Tbsp. granulated sugar, divided
1/3 cup packed brown sugar
1/3 cup sliced almonds
1/2 tsp. kosher salt, divided
3 ripe but firm pears, peeled, cored and sliced
3 plums, pitted and sliced

Place a baking sheet on the bottom rack of the oven and preheat oven to 400 F. (Be sure to do this - I didn't, and had a smoke-filled kitchen as pie juice burned on the bottom of my oven!) Line a 9" pie pan with crust; set aside.
In a medium bowl, toss together 1 1/3 cups flour, butter, 3 Tbsp. granulated sugar, brown sugar, almonds, and 1/4 tsp. salt until mixture forms clumpy streusel bits; set aside.
In a large bowl, toss together pears, plums, remaining 2/3 cup granulated sugar, remaining 1/4 cup flour, and 1/4 tsp. salt until well coated.
Fill pie crust with fruit and scatter streusel evenly over the top.
Place pie on top rack of oven and bake 15 minutes, then reduce temperature to 375 F. Continue baking until juices are bubbly and thickened, 45 to 60 minutes more. Set aside to let cool. Serve warm or at room temperature.

Monday, October 29, 2012

Pumpkin Dutch Baby

Waiting for Hurricane Sandy means that school is canceled for today, and most likely tomorrow. Living in New York City, nobody is quite used to being stuck at home, possibly soon without any power. I slept in this morning, and then, after browsing some of my favorite food blogs, could think of nothing but pumpkin pancakes.
Pancakes seemed like a lot of work for a stormy morning of watching movies and procrastinating on homework (I mean, I probably have until Wednesday to do it!). I have been seeing these "Dutch Babies" on food blogs for years, and they seem to be a giant, oven-baked pancake. I found a pumpkin version and got to work!
This pancake is moist, dense, and tastes exactly like pumpkin pie- probably helped by the fact that I used lots of pumpkin pie spice. It isn't very sweet on its own, and is actually pretty healthy, which makes it perfect for being topped with about a gallon of maple syrup! The spicy, pumpkin-y flavor is perfect for a chilly fall morning. If you anywhere but the East Coast, save this recipe for this weekend - although it's quick enough to easily be made on a weekday morning, too - and if you are on the East Coast, make this while we still have plenty of power, stay safe, and enjoy the day off!
Soak up that maple syrup!
Pumpkin Dutch Baby
(from Baking Bites)

2 eggs
1/2 cup all-purpose flour
1/2 cup milk
1 tbsp sugar
1/4 tsp salt
1/2 tbsp unsalted butter, melted and cooled slightly
1/3 cup pumpkin puree (canned or fresh)
1/2 tsp ground cinnamon
pinch ground cloves
pinch freshly ground nutmeg
1/2 tsp vanilla extract

Preheat oven to 425 F.
Place ovenproof 6 or 8-inch frying pan (stainless steel or cast iron) in the oven to heat for about 5 minutes.
Whisk together all ingredients until smooth.
Remove pan from oven and spray with nonstick cooking spray or quickly brush with butter, then pour the batter into the hot pan and put it back in the oven.
Bake for 15-20 minutes, until the Dutch baby is golden brown.
Slide from the pan onto a large plate and serve immediately with lots of maple syrup.
     -Serves 1-2

Notes: For a Dutch baby in a 10-inch skillet, double the recipe and cook for 20-25 minutes. Feel free to substitute pumpkin pie spice for the spice combination called for above.

Sunday, October 28, 2012

Pumpkin Apple Streusel Cake


 Since I started baking six years ago, I have learned so much. I've learned that no, the bakers at Costco who pipe perfect buttercream flowers onto the big sheet cakes are not magical fairies, but yes, they have had hours of practice. I've learned that some supermarket staples are a hundred times better when made at home, like chocolate pudding, but that sometimes, like for a late night at home with friends, nothing beats the ease and classic taste of bake-n-break cookie dough. I've also learned that fall is simply the greatest season for sweet treats.
 The warm, spicy flavors of pumpkin, cranberries, apples, nuts, and cinnamon make me think of long afternoons sipping cider and morning walks in the crisp country air. Yesterday, I wanted a perfect fall recipe, but didn't even know where to start. I had a can of pumpkin and three big apples, so I figured a spicy cake was in the works.
 This recipe combines the best of all these fall flavors. A moist, spice-filled pumpkin cake, topped with a layer of apples sauteed in butter, sugar, and cinnamon (I used pumpkin pie spice for this step too, not just for the cake batter) which tastes exactly like apple pie filling and is oh-so-addicting, and finally a sweet, crunchy crumb topping. It is perfectly sweet and hearty, making it wonderful for an October Saturday night filled with  preparations for this so-called "Frankenstorm" (officially no school tomorrow!) - good luck to anybody on East coast, and enjoy what will hopefully be nothing more than a relaxing day off tomorrow.
   Enjoy!
 Pumpkin Apple Streusel Cake

Apples:
3 tablespoons unsalted butter
4 cups diced peeled cored Granny Smith apples (about 4 large)
3 tablespoons sugar
1 teaspoon ground cinnamon

Cake:
11/2 cups all purpose flour
1 cup (firmly packed) golden brown sugar
1/2 cup (1 stick) unsalted butter, cut into pieces, room temperature
1/2 teaspoon salt
3/4 cup canned pure pumpkin
1/3 cup sour cream
2 tablespoons sugar
2 teaspoons pumpkin pie spice
1 teaspoon baking soda
2 large eggs

Melt butter in large nonstick skillet over medium-high heat. Add apples; sauté until apples begin to brown, about 5 minutes. Add sugar and cinnamon and sauté until golden brown, about 3 minutes longer. Cool.

Preheat oven to 350°F. Butter a 9-inch springform pan. 
Combine flour, brown sugar, butter, and salt in large bowl. Using an electric mixer, beat until mixture resembles coarse meal. Set aside 2/3 cup of mixture for topping. 
Beat pumpkin, sour cream, 2 tablespoons sugar, spice, and baking soda into remaining flour mixture, beating just until smooth. Beat in eggs. 
Transfer batter to pan. Scatter apples evenly over top. Sprinkle reserved topping over apples.
Bake cake until topping is golden brown and tester inserted into center comes out clean, about 1 hour and 10 minutes. Cool cake in pan on rack for 20 minutes. Run a thin knife around the sides of the pan to loosen cake. Release pan sides from cake. Transfer cake to a platter. Serve warm or at room temperature.

Saturday, October 27, 2012

TWD: Bagels! (and Veggie Cream Cheese)

 I'm sorry. I'm sorry I've been gone for a week and a half. I'm sorry I haven't posted a new recipe in nearly three weeks. The kitchen being painted, our house's lack of heat due to a boiler switch, schoolwork, pottery classes, and various other shenanigans got in the way of baking these past couple of weeks. I actually made an okay gluten-free carrot cake last week, but it was kind of crumbly, and let's just say that the chocolate "glaze" resulted in a cracked, hard-as-rock layer of yuck. Overall, not a great culinary period of time...
 ...but. Last weekend, these bagels. Bagels have been on my to-bake list for years, and I never got around to making them. I was so excited when I saw that they had been chosen as last week's Tuesdays with Dorie! This week was actually a fifth Tuesday of the month, so we had a make-up week in case we wanted to go back and make something we missed. Perfect!
um, YUM!
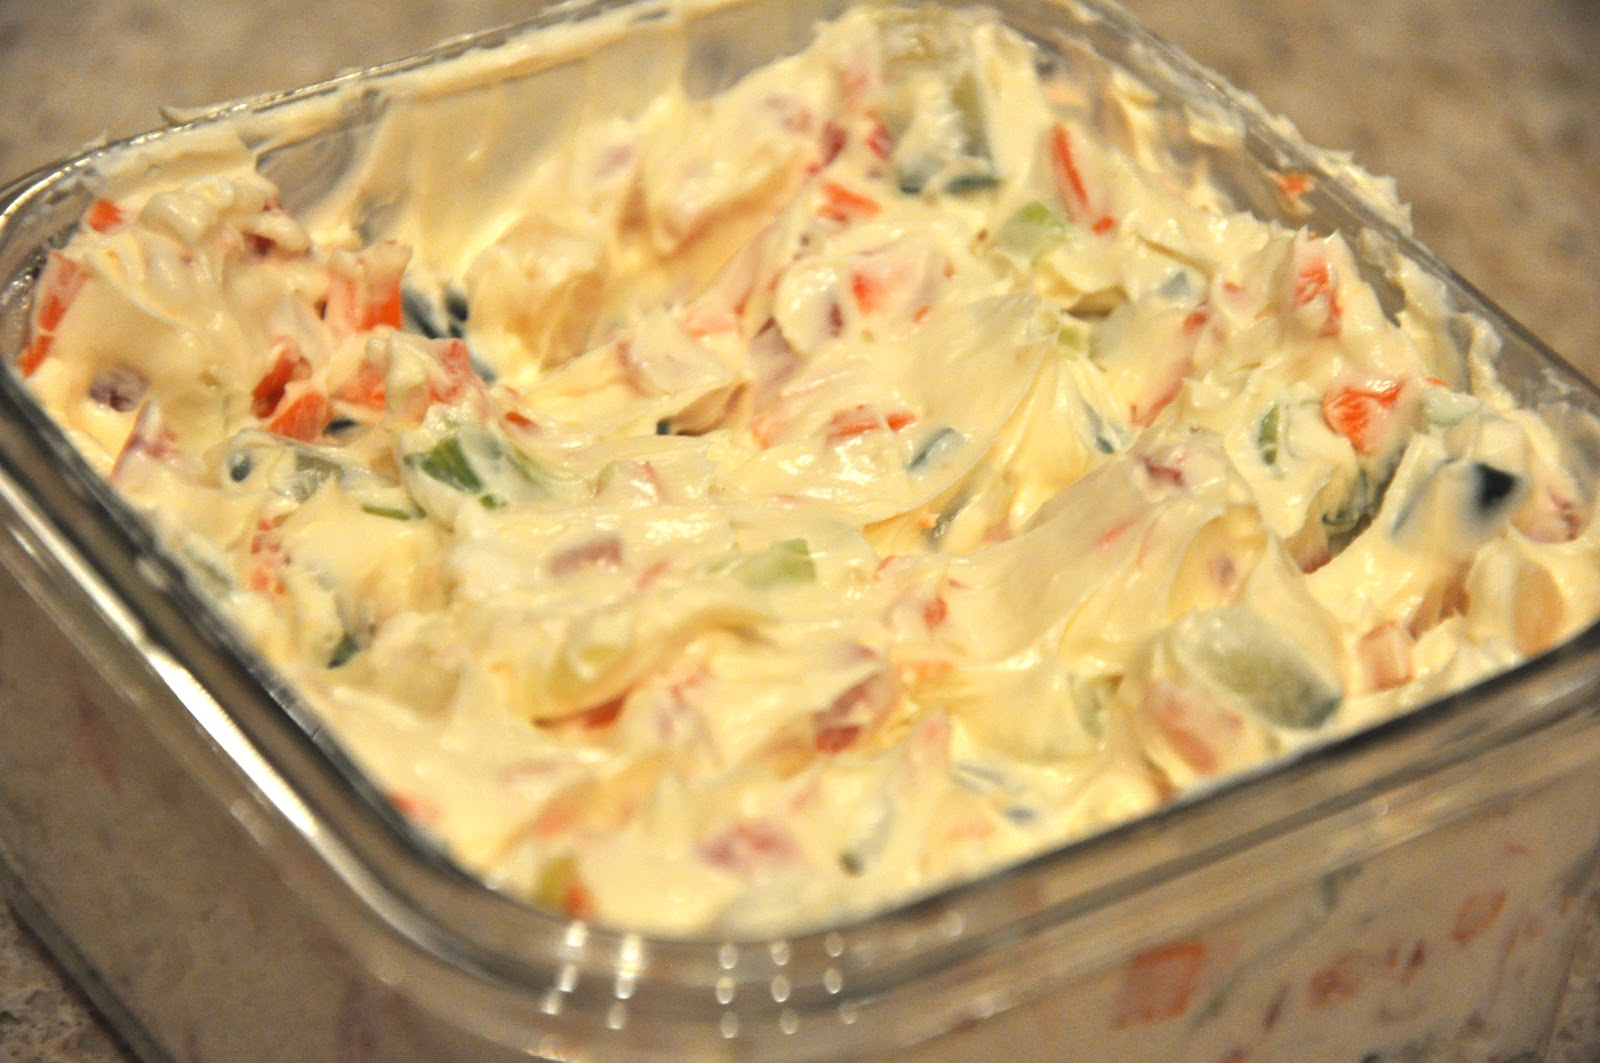
 The dough was kneaded, left to rise, deflated, left to rise, shaped into doughnut shapes, boiled, baked, and left to cool. I made the quick Vegetable Cream Cheese from the book, using red bell peppers instead of radishes. The cream cheese was light and refreshing, as opposed to the heavy, buttery spreads that can sometimes be piled onto deli bagels.
Listen, dears. (I feel that as I'm writing about a recipe made on Julia Child's show, calling you dears is appropriate. 'Kay?) The thing is, I live in New York City. My hometown basically is the bagel capital of the world (Montreal, I don't even want to talk about this with you). I was skeptical that these could live up to the chewy perfection two dollars can get you on my corner.
I was wrong to doubt this recipe. These bagels are tender, golden-brown bites of delicious. They are like a very, very good New York deli bagel (although not quite so huge, which is a good thing). I am so glad I got to try out making this usually-store-bought staple at home, and I know I will be making bagels again in the future; that said, I'm not promising to never buy one again.
If you live near a great bagel place, give this recipe a try and compare the two results. Let me know what you find? If you don't live near a great bagel place, you must give this recipe a try, if only to understand what all the fuss is about. ;) The recipe, as always, can be found in Baking with Julia or on the host's blog, Heather's Bytes. Thanks for hosting, Heather!
    Enjoy!