Monday, March 18, 2013

Classic Guacamole

   As you've probably noticed, I almost never post savory food on here. That's mostly because I don't make a whole lot of it - I like to help out when my parents are cooking, but I usually don't feel like the dishes are really mine. I've been doing a lot more cooking lately, and would love to start sharing that on here, too, so I decided to start with one of my favorite recipes, one that I have come back to over and over again.
   This is a classic guacamole - simple ingredients, not too fussy, with a great flavor. I love to use perfectly ripe avocados for this when I can find them, but this has enough flavor that imperfect ones can still make for a great dip. I also love this because it's easily adaptable - I like to put in less jalapeño than the recipe calls for, or throw in some chopped tomatoes. I usually leave out the canola oil in the recipe, just because I've never found a need for it, but some people like it. Any way you do it, it's delicious.
   Enjoy!

Classic Guacamole

1/4 cup chopped fresh cilantro
3 tablespoons finely diced red onion
Few tablespoons canola oil, optional
3 ripe Hass avocado, peeled, pitted and diced
Juice of 2 limes
1 or 2 jalapenos, finely diced
Salt and freshly ground black pepper
 
Mash the cilantro, onions, canola oil, if using, avocados, lime juice and jalapenos together in a bowl, using a fork; guacamole should be chunky. Season with salt and pepper.

Monday, March 11, 2013

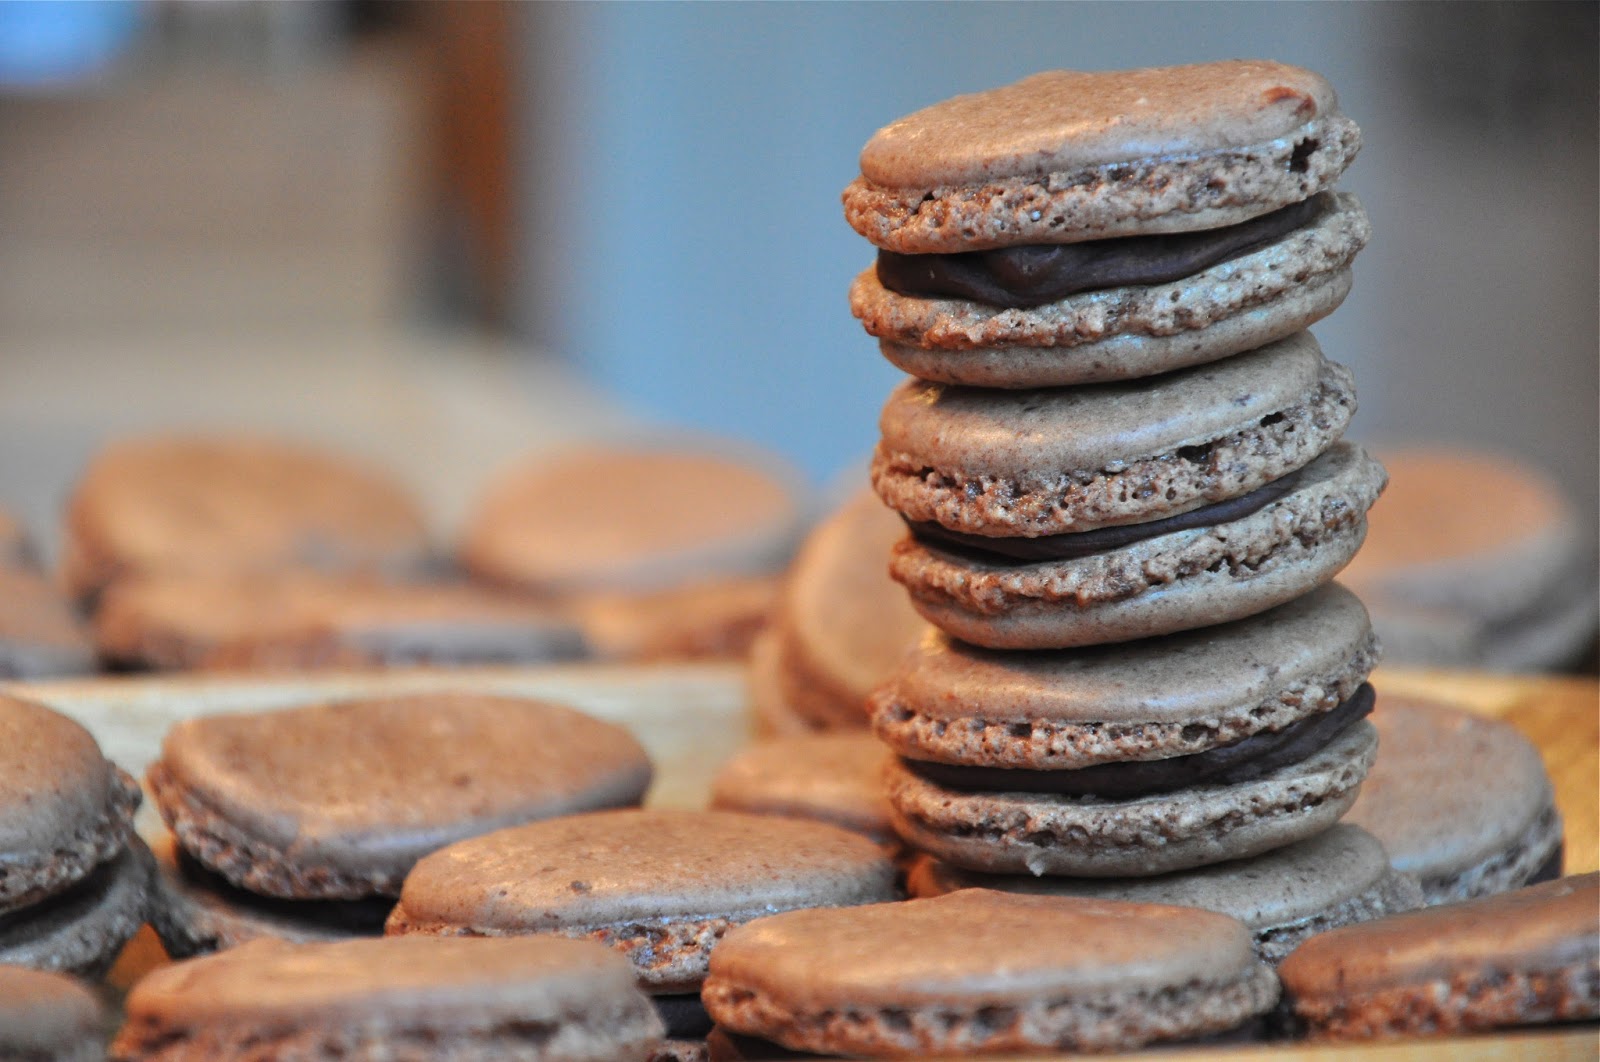
Ladurée Chocolate Macarons

    I've been wanting the Ladurée sweets cookbook for a long time. It's beautiful and, honestly, I'm pretty sure Ladurée's macarons are absolutely perfect. A few weeks ago, my mom surprised me with the book (thank you mom!), and I got to work on some macarons right away. I decided to start with chocolate, a classic. After my last macaron success, I was confident and jumped right in. Fast forward three or so hours, and you would find me sitting on my kitchen floor, staring into the oven with despair. The macarons spread and cracked and were just a fail - I was able to salvage enough to slap together a few sandwiches and leave them in the fridge overnight like the recipe says to, just to see what would happen.
     From the ingredients (and tasting the batter), I could tell that these were going to be good. Tasting one as soon as it was spread with filling, I thought it was tasty. But the next morning, eating one straight out of the fridge for the healthiest of breakfasts, I realized that these were really, really good. They were almost Ladurée.
    So this weekend, I started again. I measured more carefully, sifted more thoroughly and piped more quickly. The first two trays were just like the last batch - the macarons crumbled and cracked. After reading several "trouble-shooting macarons" blog posts (seriously, what is with these little cookies?!) and trying out a few different things, I realized that while Ladurée calls for leaving the piped batter on the counter for 10 minutes, it actually needs more like an hour. After that, everything went smoothly, and after their rest in the fridge, these were even more delicious than last time (and perfectly smooth on top).
   These are absolutely my new favorite recipe, and I can't wait to adapt it to make all of my favorite macaron flavors. Enjoy!
Chocolate Macarons (Macarons Chocolat)

Chocolate Ganache
10 oz / 290 g chocolate (minimum 70% cacao solids)
1 cup + 2 tbsp / 270 ml heavy (double) cream
4 tbsp / 60 g butter

Macaron Shells
2 3/4 cups / 260 g ground almonds (almond flour)
2 cups + 1 tbsp / 250 g confectioners' (icing) sugar
2 3/4 tbsp (15 g) unsweetened cocoa powder
2 oz / 65 g chocolate (minimum 70% cacao solids)
6 egg whites + 1/2 egg white
1 cup + 1 tbsp / 210 g granulated sugar 

Equipment
Piping bag fitted with a 1/2-inch / 10-mm plain tip

Chocolate Ganache
1. Prepare the ganache. Using a knife, finely chop the chocolate on a cutting board and place in a large bowl. In a saucepan, bring the cream to a boil. Pour the hot cream in 3 parts over the chopped chocolate, mixing with a wooden spatula between each addition to homogenize the preparation.
Cut the butter into small pieces and stir into the ganache until very smooth. Transfer to a baking dish and cover with plastic wrap, so that the plastic is in contact with the ganache. Allow the ganache to cool at room temperature and then refrigerate for 1 hour until it has a thick, creamy consistency.
Macaron Shells
2. Combine the ground almonds, confectioners' sugar and cocoa powder in a food processor and pulse to obtain a fine powder. Sift or strain through a sieve to remove any lumps. Melt the chocolate in a heatproof bowl set over a pan of gently simmering water or in the microwave oven until it is lukewarm (approx. 95 F / 35 C).
3. In a clean, dry bowl, whisk the 6 egg whites to a foam. Once they are frothy, add a third of the granulated sugar and whip until sugar is dissolved; add another third of the granulated sugar and whip for another minute; finally add the remaining granulated sugar and whip for 1 more minute. Pour the melted chocolate over the whipped egg whites. Using a rubber spatula, roughly incorporate the chocolate, and then immediately and delicately fold the sifted mixture of ground almonds, confectioners' sugar and cocoa powder into the chocolate and egg white mixture. In a separate small bowl, beat the remaining 1/2 egg white until just frothy. Then add to the final mixture, folding gently to slightly loosen the batter.
4. Transfer mixture to the piping bag fitted with a plain tip. On a baking sheet lined with parchment paper, pipe small macaron rounds 1 1/4 - 1 1/2 inches / 3-4 cm in diameter. Lightly tap the sheet so the macarons spread fully.
Preheat the oven to 300 F / 150 C / gas mark 2.
Allow the macarons to sit uncovered for 10 minutes and then place in the oven. Bake for approximately 15 minutes until they form a slight crust.
5. Remove baking sheet from the oven, and with a small glass, carefully pour a tiny amount of water in between the sheet and the parchment paper (lift the paper ever so slightly corner by corner). The moisture and steam that result from the water on the hot baking sheet will allow the macarons to peel off more easily once they are cool. Do not pour too much water as this could cause the macarons to become soggy. Allow to cool completely. Remove half of the macaron shells and place them upside down on a plate.
6. When the ganache has a creamy consistency, pour into a clean piping bag fitted with a plain tip. Pipe a coin of ganache onto the macaron shells resting upside down. Top each with the remaining macaron shells. Keep macarons in an airtight container in the refrigerator for 12 hours before tasting.

My notes:
-My biggest issue with this recipe is the 10 minutes of resting time - I had to increase this to an hour.
-I found that the step of pouring water onto the baking sheet to create steam was unnecessary - the macarons came right off the paper without a problem.
-Be sure to keep these in the fridge overnight - it makes a huge difference.
-Don't worry if your macarons crack or don't form feet on the first try (or, like me, the second or third try) - they might not look great, but they will taste almost the same!

Tuesday, March 5, 2013

Bakery-Style Blueberry Muffins

     There are some foods that people seem to think can only be made perfectly in restaurants and cafés. Until this weekend, I thought that muffins were one of them. I mean, I've made some great muffins, but they've never been incredible. I woke up on Sunday wanting a muffin like those you get in the best bakeries: soft, tender, and with a big, crunchy top. That's exactly what I got with this recipe. The perfect tops come from the large amount of baking powder in the recipe, and from the baking method: these are baked at an unusually high temperature for 5 minutes before lowering the heat to a normal level for the rest of the baking time.
     These are, in my opinion, the perfect blueberry muffin to have for breakfast. They aren't like the muffins you get in cellophane packages at the grocery store; those are more like really sweet cake with some blueberries thrown in. These are less cakey, a little bit chewier; they are the perfect brunch food or afternoon snack. The soft, tasty interior make them delicious; the big, crunchy tops make them unforgettable. I didn't have coarse sugar for topping them, so I used pearl sugar; it ended up being a great idea, because it added an extra crunch. This is a great base for variations - you can expect more muffins in the near future!
     Enjoy!
Bakery-Style Blueberry Muffins
(slightly adapted from Sally's Baking Addiction) 

3 cups all-purpose flour
4 teaspoons baking powder
1 teaspoon salt
1 teaspoon ground cinnamon
2 eggs
1 cup sugar
1 cup milk
1/2 cup canola oil
1/2 teaspoon vanilla extract
1 and 1/4 cup fresh or frozen blueberries
pearl sugar for sprinkling (or you can use coarse sugar)

Preheat oven to 425 degrees F. Spray your muffin tin of choice with non-stick spray or line with muffin liners. Set aside.
In a large bowl, whisk together flour, baking powder, salt, and cinnamon until all dry ingredients are combined. Set aside.
In a medium bowl, whisk together eggs and sugar until combined. Mix in milk, oil, and vanilla. Mixture will be pale and yellow. Fold wet ingredients into dry ingredients and mix everything together by hand. Avoid overmixing. Gently mix until all the flour is off the bottom of the bowl and no big pockets of flour remain. The batter will be very thick and somewhat lumpy. Fold in the blueberries.
Pour batter into prepared muffin tins, filling all the way to the top. Top with a sprinkle course sugar, if preferred. Bake at 425 degrees F for 5 minutes. Reduce oven temperature to 375 degrees F and continue to bake for 25-26 minutes until tops are lightly golden and a skewer inserted in the center of a muffin comes out clean. Allow to cool for 10 minutes on a cooling rack.
Muffins taste best fresh the same day. Store muffins at room temperature in an airtight container for up to 5 days. Muffins freeze well for up to 3 months.

Monday, February 25, 2013

Gluten-Free Ladyfingers

    I like to think that when faced with a challenge, I never give up. I keep going until I reach my goal. While I enjoy telling myself that, I know that is most definitely not always true - just ask my friend who takes Zumba with me. For sure, those dance moves are not something that I insist on mastering. There are times, though, when something that I don't get right the first time makes me persistent enough to keep going until it's great - like when it comes to baking.
Fun with the extra batter...
    When I make a new recipe for the first time, I start measuring and mixing with visions of Pinterest-worthy cakes and cookies dancing in my head (only sometimes are they also singing showtunes, but that's unrelated); only once I pull those treats out of the oven can I tell if my hopes were anywhere near accurate.
   This weekend, my mom wanted to make a classic Brazilian layered dessert (recipe coming soon!) that includes ladyfinger cookies. Since it's hard to find gluten-free ladyfingers in the grocery store, and I wanted her to be able to eat the dessert, I set about making my own version. Now, I assume the name "ladyfingers" comes from the long, thin shape of the cookies you find in the store - let's just say that my first attempt, while yummy, looked like "fingers" that would have to come from a lady weighing around 5 tons. So I sat on my kitchen floor and cried for a while munched on thin, crispy cookies while perusing the internet for a new recipe.
   I decided to try a whole different idea and go for a recipe that wasn't naturally gluten-free. I substituted in gluten-free all-purpose flour and a little xanthan gum for the regular flour, carefully whipped eggs, folded batter, and piped "fingers," and slid that tray into the oven. And somehow, magically - maybe it was just a better baking day for me (although the macarons I attempted to make later that night would beg to differ) - it worked. Out came fluffy ladyfingers that are perfect in any sort of creamy dessert, or just for snacking on with a cup of tea.
  Enjoy!
                                                            Gluten-Free Ladyfingers
                                                     (adapted from King Arthur Flour)


                                                           3 large eggs, separated
                                                     9 tablespoons granulated sugar
                                                        1 teaspoon vanilla extract
                               1 tablespoon lemon juice (fresh is best, but bottled is okay)
                                                                 pinch of salt
                                              2/3 cup gluten-free all-purpose flour
                                                       1 teaspoon xanthan gum
                                                 confectioners' sugar, for dusting

Preheat oven to 350 degrees F.
Beat the egg yolks, 6 tablespoons granulated sugar, vanilla extract, lemon juice and salt until light in color, and most of the sugar has dissolved. Set aside. 
In another bowl, beat egg whites until soft peaks form. Continue beating while adding the remaining 3 tablespoons sugar, one tablespoon at a time, until whites are stiff. 
Fold half the flour and all of the xanthan gum into the egg yolk mixture. Gently fold the egg whites into the yolk mixture, then add the remaining flour, stirring gently to mix. 
Transfer the batter to a pastry bag fitted with a half-inch plain round tip. Pipe batter about 1-inch wide and 4 inches long onto parchment-lined or lightly greased baking sheets. Space ladyfingers about 1-inch apart. Sprinkle the tops lightly with confectioners' sugar. 
Bake for 15 minutes, or until a light gold color; don't let ladyfingers brown. Immediately remove from baking sheet and cool completely on a wire rack. 
   -Makes about 24 ladyfingers.
Note: I seriously recommend doubling this recipe if you're planning on using the ladyfingers as part of a dessert - at least 20 will be consumed by excited family members hanging out in the kitchen as the cookies come out of the oven.


Wednesday, February 20, 2013

Chocolate Cupcakes with Nutella Buttercream


    Valentine's day can be a total downer for girls without boyfriends. This year, my friend and I decided to have a girls' night in to celebrate the fun parts of the holiday for single girls like us - takeout, romantic comedies, and most importantly, chocolate!
   We took a basic yet delicious chocolate cupcake recipe (with amazingly tasty, slightly chewy edges!) and wanted something to make it incredible. We found a recipe for buttercream. With an entire jar of Nutella added in. This frosting takes everything great about the chocolatey spread and multiplies it by a thousand, making it light enough to eat by the spoonful! Although, who am I kidding, we ate some plain Nutella by the spoonful too...
   Enjoy!
Basic Chocolate Cupcakes

2 cups sugar 
1-3/4 cups all-purpose flour 
3/4 cup unsweetened cocoa powder
1-1/2 teaspoons baking powder 
1-1/2 teaspoons baking soda 
1 teaspoon salt 
2  eggs 
1 cup milk 
1/2 cup vegetable oil 
1 cup boiling water  
2 teaspoons vanilla extract

Heat oven to 350 degrees F. Line 30 cupcake cups with paper liners, or grease.
Stir together sugar, flour, cocoa, baking powder, baking soda and salt in large bowl. Add eggs, milk, oil and vanilla; beat on medium speed of mixer 2 minutes. Stir in boiling water (batter will be thin). Divide batter amongst prepared pans.
Bake 22 to 25 minutes or until wooden pick inserted in center of a cupcake comes out clean. Cool 10 minutes; remove from pans to wire racks. Cool completely.

Nutella Buttercream 
(slightly adapted from Cannella Vita)
1 stick unsalted butter, softened
1/2 cup vegetable shortening
1 13-ounce jar Nutella
pinch of fine grain sea salt
1 tablespoon vanilla extract
1.5 pounds confectioners’ sugar

6-8 tablespoons milk

In a large mixing bowl, cream butter and shortening until well combined, thick and fluffy, about 5 minutes. Slowly add in confectioner’s sugar, and continue mixing until well blended.
Add salt, vanilla, and 3 tablespoons of heavy cream or milk. Blend on low speed until moistened. Add an additional 3-5 tablespoons of heavy cream or milk until you reach the desired consistency. Beat at high speed until frosting is smooth and fluffy, about 3 minutes. 
Add the Nutella and beat for another 3 minutes.

Monday, February 18, 2013

Gingerbread Spice Dutch Baby

    Breakfast. It's recently become my favorite time of day to indulge in something special - taking time out of your weekend or day off to make a morning treat is always a great idea. Back in October, during Hurricane Sandy when I was trapped at home, I made a delicious Pumpkin Dutch Baby. Last weekend we had a big snowstorm here in New York City, and I decided to make another storm Dutch baby. And with my new favorite cookbook staring at me with a delicious-looking recipe, it was perfect timing.
   A Dutch baby is essentially a large, oven-baked pancake. This one is flavored with gingerbread spices, making it perfect for a freezing cold morning (alongside a big cup of tea, of course). The batter is poured into a skillet with some melted butter and then baked until it puffs up and the edges get all crispy and amazing. Pour on the maple syrup or dust it with powdered sugar, and your weekend treat just got ten times simpler (and yummier).
   Enjoy!
Gingerbread Spice Dutch Baby

2 large eggs
1 tablespoon packed dark brown sugar
1 teaspoon molasses (I ran out, so I used maple syrup)
1/3 cup all-purpose flour
1/4 teaspoon ground cinnamon
1/8 teaspoon ground ginger
1/8 teaspoon ground cloves
1/8 teaspoon ground nutmeg
1/8 teaspoon kosher salt
1/3 cup whole milk
2 tablespoons unsalted butter
Powdered sugar or maple syrup, for topping

Preheat the oven to 400°F. Place the eggs in a blender and blend until smooth and pale in color. Add the brown sugar, molasses, flour, cinnamon, ginger, cloves, nutmeg, salt, and milk and blend until smooth.
Melt the butter in a 9-inch ovenproof skillet over high heat, swirling it up the sides to evenly coat the pan. Pour the batter into the skillet and transfer to the oven. Bake for 15 to 20 minutes, until the pancake is puffed up. Remove from the oven and  dust with powdered sugar or drizzle with maple syrup.
  -serves 1-2

Saturday, February 9, 2013

Condensed Milk Vanilla Pound Cake

    As much as I love making layered cakes and complex pastries, sometimes I just need something simple. I spent most of last week itching to bake something - when I got home on Thursday afternoon, I decided that it had gone on for too long. When my mom had put dinner in the oven, I jumped into the kitchen and got to work.
       I had had my eye on this recipe for quite a while, and with a can of condensed milk in the pantry, it was time to try it. I was curious to see how this would work out; the batter is made in a food processor, which is unusual, and has a full 3/4 of a cup of sweetened condensed milk.
    It resulted in a really interesting cake. The texture was different from what I've tried in the past - it is slightly more dense, and has a unique flavor from the mixture of condensed milk and vanilla bean. It's delicious! This recipe is definitely a keeper - it is just as yummy as a great pound cake, but seems light enough in texture to justify having it for breakfast.
  Enjoy!
Condensed Milk Vanilla Poundcake
(slightly adapted from 17 and Baking)

1 cup (2 sticks) unsalted butter, at room temperature, plus more to grease the pan
1 1/3 cups all-purpose flour
3/4 teaspoon baking powder
1/3 cup sugar
1 vanilla bean, chopped
1/2 teaspoon salt
3/4 cup sweetened condensed milk
3 eggs

Preheat the oven to 325 degrees F. Butter an 8.5 x 4.5″ loaf pan and set aside.
Sift together the flour and baking powder and set aside.
In the bowl of a food processor, pulse the sugar and chopped vanilla bean until the bean is finely ground. Sift to remove the large bits of vanilla, then return the sugar to the processor.
Add the butter and salt and process until light and fluffy, about 2 minutes, scraping down the sides and bottom of the bottom occasionally. Add the condensed milk and pulse until well incorporated, about 15 times, scraping down the sides of the bowl once. Add the sifted dry ingredients and pulse until no traces of flour remain, about 10 times. Add the eggs and pulse just until combined, about 5 times. Scrape down the sides and bottom of the bowl and finish mixing by hand to fully incorporate the eggs.
Scrape the batter into the prepared loaf pan. Bake until deep golden brown and a tester inserted in the center comes out clean, about 60 minutes. Cool completely in the loaf pan on a rack, then turn out onto a plate. Serve in thick slices.