Wednesday, January 22, 2014

Pecan Sandies

 Snow days always remind me of being in elementary school. My friends and I would cross our fingers, do our snow dances, put on our pajamas inside out, and perform any other elaborate tricks we had heard about. The next morning, we usually found ourselves back in science class, but just the excitement was worth it.
  Snow days always meant sledding, which involved getting cold and wet in the park. Ultimately, one of our moms would usually end up making us hot chocolate and cookies. These are the perfect snow day cookie - they remind me of those Keebler pecan cookies, but more buttery and flavorful. The powdered sugar dusting the tops only adds to the most delicious little-kid throwback.
  Enjoy!
 Pecan Sandies

1 3/4 cups plus 1 1/2 teaspoons all-purpose flour (250 grams) 
3/4 cup coarsely chopped pecans (80 grams) 
4 ounces unsalted butter, at room temperature (170 grams) 
3/4 cup plus 1 3/4 teaspoons confectioners' sugar (90 grams) 
Additional confectioners' sugar for dusting

 Position the racks in the upper and lower thirds of the oven and preheat the oven to 325°F (convection) or 350°F (standard). Line two sheet pans with Silpats or parchment paper.
Toss the flour and pecans together in a medium bowl.
Place the butter in the bowl of a stand mixer fitted with the paddle attachment and mix on medium-low speed until smooth. Add the 90 grams/3/4 cup plus 1 3/4 teaspoons confectioners' sugar and mix for about 2 minutes, until fluffy. Scrape down the sides and bottom of the bowl. Add the flour mixture and mix on low speed for about 30 seconds, until just combined. Scrape the bottom of the bowl to incorporate any dry ingredients that have settled there.
Divide the dough into 30-gram / 1 1/2-tablespoon portions, roll into balls, and arrange on the sheet pans, leaving about 1 1/2 inches between them. Press the cookies into 2-inch disks.
Bake until pale golden brown, 15 to 18 minutes if using a convection oven, 22 to 25 minutes if using a standard oven, reversing the positions of the pans halfway through.
Set the pans on a cooling rack and cool for 5 to 10 minutes. Using a metal spatula, transfer the cookies to the rack to cool completely.
Dust with confectioners' sugar.

Monday, January 13, 2014

Chocolate Cupcakes with Salted Caramel Frosting (and homemade salted caramel sauce!)

 Figuring out what to bake for a big group can be tricky. Some people like something simple, light and fruity; other people require a serious dose of chocolate. A couple of weeks ago, I put together a little cupcake display for a party, and I think I got the balance down pretty well! The bottom tier was a light red velvet cupcake with tangy cream cheese frosting (recipe here). For the top two tiers, I went with something kind of over-the-top but wonderfully indulgent and delicious. Tender chocolatey cupcakes are topped with a light and fluffy salted caramel frosting - it's all drizzled with golden-brown salted caramel sauce and topped off with a sprinkling of coarse sea salt.
The salt isn't overwhelming, and it's the perfect balance to the caramel and chocolate. Definitely take the time to make the sauce at home - it's better than anything store-bought. These are a crowd-pleaser for sure, and I have a few friends in mind who will definitely be getting birthday boxes of these sometime soon!
Enjoy!
Chocolate Cupcakes with Salted Caramel Frosting

for the cupcakes:
1/2 cup plus 1 tablespoon cocoa powder
1/2 cup plus 1 tablespoon hot water
2 1/4 cups all-purpose flour
3/4 teaspoon baking soda
3/4 teaspoon baking powder
1/2 teaspoon salt
1 cup plus 1 tablespoon unsalted butter, at room temperature
1 2/3 cups granulated sugar
3 eggs
1 tablespoon vanilla extract
3/4 cup sour cream

for the salted caramel frosting:
1 cup unsalted butter, at room temperature
8 ounces cream cheese, at room temperature
1/2 cup salted caramel sauce (recipe below)
4 cups powdered sugar

to garnish:
leftover salted caramel sauce
fleur de sel (or other flaky sea salt)

Make the cupcakes:
Preheat oven to 350 F. Line 2 standard-size, 12-cup muffin pans with paper liners.
In a small bowl, whisk together the cocoa powder and hot water until smooth. In a separate medium bowl, whisk together the flour, baking soda, baking powder, and salt.
Combine the butter and sugar in a medium saucepan set over medium heat. Cook, stirring occasionally, until the mixture is smooth, and the butter is completely melted. Transfer the mixture to the bowl of an electric mixer and beat on medium-low speed until the mixture is cool, about 4-5 minutes.
Add the eggs one at a time, mixing well after each addition, and scraping down the sides of the bowl as needed. Add the vanilla and then the cocoa mixture, beating until smooth.
Reduce the mixer speed to low, and add the flour mixture in three additions, alternating with the sour cream, beginning and ending with the flour mixture. Mix each addition until just incorporated.
Divide the batter evenly between the prepared liners, filling each about 2/3 full. Bake until a toothpick inserted in the center comes out clean, 18-20 minutes, rotating the pans halfway through baking. Let cool in the pan for 10 minutes, then transfer to a wire rack to cool completely.
Make the frosting:
Beat together the butter and cream cheese on medium-high speed for 5 minutes. Pour in the salted caramel and beat until combined. Reduce the speed to medium-low and slowly add the powdered sugar, a little at a time, until it has all been incorporated. Increase the speed to medium-high and beat for an additional 2-3 minutes, until light and fluffy.
To finish, pipe frosting onto the top of each cupcake (or use an offset spatula to spread the frosting), drizzle with some additional salted caramel sauce, and sprinkle with a pinch of fleur de del.
-makes 20-24 cupcakes

Homemade Salted Caramel Sauce

2 cups granulated sugar
12 tablespoons unsalted butter, at room temperature, cut into pieces
1 cup heavy cream, at room temperature
1 tablespoon fleur de sel (or any other flaky sea salt)

Add the sugar in an even layer over the bottom of a heavy saucepan, with a capacity of at least 2 or 3 quarts. Heat the sugar over medium-high heat, whisking it as it begins to melt. You'll see that the sugar will begin to form clumps, but that's okay; just keep whisking, and as it continues to cook, they will melt back down.
Stop whisking once all of the sugar has melted, and swirl the pan occasionally while the sugar cooks.
Continue cooking until the sugar has reached a deep amber color. It should look almost reddish-brown, and have a slight toasted aroma. Be very careful not to burn it - this can happen in a matter of seconds!
Once the caramel is golden-brown, add the butter all at once. Be careful, as the caramel will bubble up when the butter is added. Whisk the butter into the caramel until it is completely melted.
Remove the pan from the heat and slowly pour the cream into the caramel. Again, be careful because the mixture will bubble up like crazy again.
Whisk until all of the cream has been incorporated and you have a smooth sauce. Add the fleur de sel and whisk to incorporate.
Set the sauce aside to cool for 10-15 minutes and then pour into a glass jar and let cool to room temperature. Sauce can be refrigerated for up to 2 weeks; warm up before using.
-makes about 2 cups of salt
Note: Brown Eyed Baker has a wonderful tutorial on making the sauce; my one note is that mine was done long before reaching 350 F. 

Thursday, January 2, 2014

Glazed Apple Cider Cookies

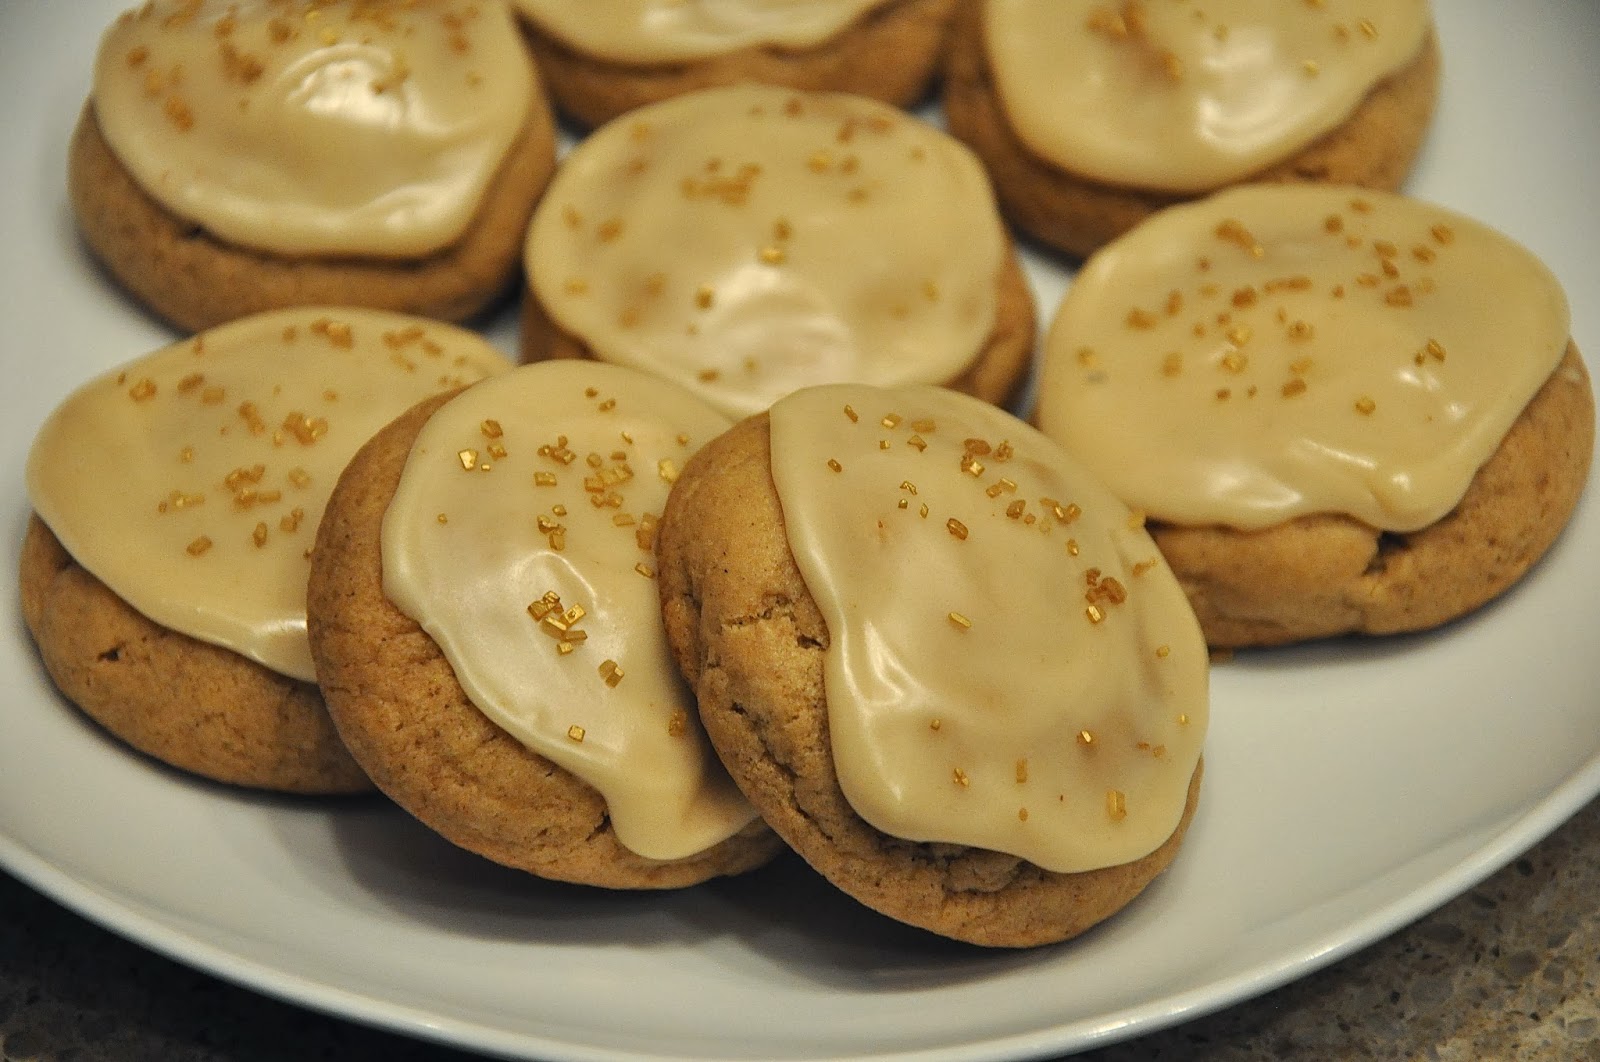
 Happy New Year! Sorry for the absence over the last month or so - I had a crazy few weeks, with lots of holiday preparations, schoolwork, and (although they may kill me for being so cheesy) music with some pretty great people. The week before holiday vacation, I suddenly realized that I hadn't been baking nearly enough holiday sweets, and I had about 20 people on my gift list needing some serious cookie love. Let's just say there were quite a few late nights of cookie baking and toffee making (that was totally not supposed to rhyme, but let's move on).
 I made quite an assortment of cookies, mixing it up with some old favorites (these are always super popular) and a bunch of new ones. I tried this recipe on a whim - it seemed like a sugar cookie with some reduced apple cider thrown in, so I figured why not?  They're also super simple to put together; a bunch of my teachers got cookie boxes with chocolate fudge cookies, gingerbread stars, and graham cracker toffee, and I threw these in at the last minute.
The result was shockingly delicious. The cider adds a burst of flavor and a tart edge, and the texture is perfectly tender. The glaze, which is simply reduced cider and confectioner's sugar, is a great addition and adds a totally bakery-style touch. So save this seasonal treat for next time, or take a minute to treat yourself in the new year.
Enjoy!
Glazed Apple Cider Cookies
(slightly adapted from Food Network Magazine)

1 1/2 cups apple cider
1 cinnamon stick
1 1/2 cups all-purpose flour
3/4 teaspoon ground cinnamon
1/2 teaspoon baking powder
1/4 teaspoon baking soda
1 stick unsalted butter, at room temperature
2/3 cup packed light brown sugar
1 large egg
2/3 cup confectioners' sugar
Coarse gold sugar, for decorating

Bring the apple cider and cinnamon stick to a simmer in a small pot over medium-high heat. Cook until reduced to 1/4 cup, about 12 minutes; set aside to cool. Remove the cinnamon stick.
Whisk the flour, ground cinnamon, baking powder and baking soda in a medium bowl. Beat the butter and brown sugar in a large bowl with a mixer on medium-high speed until light and fluffy, 3 to 5 minutes. Add the egg and half of the cider mixture and beat until combined. Reduce the mixer speed to low; add the flour mixture and beat until just incorporated. Cover with plastic wrap and refrigerate until firm, about 1 hour.
Position racks in the upper and lower thirds of the oven and preheat to 350 degrees F. Line 2 baking sheets with parchment paper. Form the dough into 3/4-inch balls and arrange 2 inches apart on the prepared baking sheets. Bake, switching the pans halfway through, until golden brown, 9 to 11 minutes. Let cool 5 minutes on the baking sheets, then transfer to racks to cool completely.
Make the glaze: Whisk the confectioners' sugar and the remaining cider mixture in a small bowl until smooth. Spread the glaze on the cookies and top with the coarse sugar. Let set until firm to the touch, about 30 minutes.

Tuesday, December 10, 2013

Norwegian Cinnamon Buns


 As you've probably noticed, I have a bit of a thing for cinnamon rolls. They can be everything from soft and fluffy to ooey-gooey with melted butter and sugar, and are easily adaptable to endless variations, from flavors to textures to frostings and more. And now I feel like I'm writing an infomercial, so let's move on...
These cinnamon buns in particular are totally different from any others I've made. The dough is rolled really thin, making for many, many flaky layers. The filling, instead of being just melted butter and a little cinnamon sugar, is creamed together, which lets the buttery flavor sink in to the dough while also keeping the rolls moist and gooey. 
 They are almost more of a "morning bun," Starbucks-style. They don't have any frosting, but they really don't ask for it at all - the sugar and egg wash caramelize and create a crisp, flavorful topping.
These won't be winning any beauty pageants, but I think the layers all swirling together makes for a charming little pastry that's perfect for Christmas breakfast.
Enjoy!
Norwegian Cinnamon Buns

for the dough:
600 g flour
100 g sugar
1/2 teaspoon salt
21 g (yep, 3 packets) of active dry yeast, or 45 g fresh yeast
100 g unsalted butter
400 ml milk
2 eggs

for the filling:
150 g unsalted butter, at room temperature
150 g sugar
2 teaspoons cinnamon
1 egg, lightly beaten, to glaze

Line a 9" square baking pan with parchment paper.
Combine the flour, sugar, salt and yeast in a large bowl. Melt the butter and whisk it into the milk and eggs, then stir into the flour mixture. Mix to combine and then knead the dough either by hand or using the dough hook of a stand mixer until it's smooth and springy. The dough will start out very soft; add extra flour, a little at a time, just until it's workable. Form into a ball, place in an oiled bowl, cover with plastic wrap and leave to rise for about 25 minutes.
Take 1/3 of the dough and roll or stretch it to fit pan; this will form the bottom of each bun after baking. Roll out the rest of the dough on a lightly floured surface, aiming for a rectangle of roughly 50 x 25 cm.
Mix the filling ingredients in a small bowl and then spread the rectangle with the buttery cinnamon mixture. Try to get even coverage on the whole of the dough. Roll it up from the longest side until you have large log; as you roll, stretch the dough out a bit, in order to get thin layers. Cut the roll into about 20 rounds. Sit the rounds in rows on top of the dough in the tin, swirly side up. Don't worry if they don't fit together snugly, as they will rise. Brush them with egg and then let rise again for about 15 minutes, or until puffy. Meanwhile, preheat oven to 230 C / 425 F.
Bake for 20-25 minutes, or until buns are risen and golden-brown in color. Don't worry if they aren't perfectly swirled or round - this will only add to the rustic charm! ;)
Use parchment to lift buns from pan, and leave to cool slightly on a cooling rack. Tear them apart and enjoy, preferably while still warm.

Saturday, November 23, 2013

Toffee-Topped Pumpkin Blondies

 I'm sorry if you're getting sick of all the pumpkin recipes on here. I promise it'll only last until next week (Thanksgiving, which in my opinion marks the official start of Christmas cookie season!). The last couple of months of the year are always insane, with tests, concerts, holiday parties, and of course, lots of delicious food. On Thursday, I took an hour out to just bake whatever I wanted to, and this was what I came up with.
These blondies are a combination of everything good. Pumpkin puree and pumpkin pie spice make them reminiscent of my favorite Starbucks drink, and the addition of chocolate makes anything better. The toffee bits sprinkled over the top give them a delicious crunchy layer that makes them irresistible. I snuck some into school for friends, and they were far gone by the end of the day.
Enjoy!
Toffee-Topped Pumpkin Blondies
(heavily adapted from The Domestic Rebel)

2/3 cup butter
2 cups brown sugar
2 tsp vanilla extract
1/2 cup unsweetened pumpkin puree
2 1/2 cups all-purpose flour
1 tsp baking powder
1/4 tsp baking soda
1/4 tsp salt
1 tsp pumpkin pie spice
1 cup semisweet chocolate chips
1 cup toffee baking bits

Preheat oven to 350 degrees F. Grease an 8×8″ baking pan; set aside.
In a medium saucepan, melt the butter and brown sugar together. Allow to cool for about 5 minutes. Stir in the vanilla and pumpkin puree. Add the flour, baking powder, baking soda, pumpkin pie spice and salt and stir until a dough has formed (it may seem thick for blondie dough; no worries). Stir in the chocolate chips. If the dough is still warm, they may start to melt - that's perfectly okay, a little chocolate swirl never hurt anybody!
Spread the mixture into your prepared pan. Sprinkle the top evenly with the toffee bits. Bake for about 30 minutes, or until a toothpick inserted near the center comes out mostly clean. Cool completely before cutting into squares. (Although they will smell incredible warm out of the oven, don't try to cut them until they're cooled - trust me!)

Thursday, November 14, 2013

Traditional Financiers


 Financiers are my new favorite thing. Ever. I bet you're dying to know why, so here's a list (partly because I like lists, but also partly because my SAT-practice-test-brain can't handle much more than that right now).
1. They are chewy with crisp edges, which is always lovely.
2. They have a wonderfully nutty flavor from the almonds and browned butter in them.
3. They are just about the most perfect snack to have with a cup of tea or coffee.
4. They are the namesake of one of my favorite bakeries. 
5. They gave me an excuse to use one of my new baking molds I bought in France this summer (because let's be honest here, what isn't better when it comes from France?).
6. They are insanely easy to make.
I baked the extra batter in tiny tart pans for an even more bite-sized treat
 I totally wasn't kidding about #6. The batter for these comes together in the time it takes to preheat the oven, and you can have a perfect snack, dessert, or breakfast (because I won't judge you) in under half an hour. When isn't that a good thing?
 These are also perfect for tons of different variations. Sick of making almond-flour-everything? Substitute ground pistachios (plus you'll get a lovely light green color). Want something fruity? Thrown in some berries. Something richer? Chocolate chips would be delicious. Anyway you make them, they're quick, easy, and will be gone in less time than it took to throw them together.
  Enjoy!
 Traditional Financiers 

1/2 cup + 1-1/2 T. (120 g) sugar
1/4 cup + 1 T. (40 g) unbleached all purpose flour
1/2 cup + 2 t. (60 g) almond meal
100 g egg whites (from about 3 large eggs)
1/2 cup (100 g) unsalted butter, browned (still hot)

Preheat oven to 425F degrees, and butter 12 financier molds, roughly 1-1/4" x 2-1/4". (My tin only makes 7 financiers - if yours is like this, either set aside batter and wait to use the tin again or bake in a mini muffin tin or mini tart pans.) Refrigerate buttered tin.
Sift together sugar, flour and almond meal into a medium bowl.
Create a well in the center of the dry ingredients and add in egg whites; whisk together by hand until ingredients have been combined.
While still hot, slowly pour browned butter into batter, simultaneously whisking the batter until combined.
Evenly distribute batter among molds or mini-muffin tin wells, leaving about 1/8" of space from the rim.
Lower oven temperature to 350F degrees, and bake on the center rake for about 20 minutes or until golden brown and a tester inserted in the center comes out clean. Cool unmolded financiers on a wire rack.

Monday, November 4, 2013

Nutella-Swirled Pumpkin Bread

When it comes to fall, pumpkin bread is one of those things that never gets old. As food bloggers, it's our job to come up with a million and one variations on classics, and in my opinion, Nutella makes just about everything exponentially better. When I saw a Nutella-infused pumpkin bread, I figured, why not?
This cake is tender and moist, and the pumpkin flavor isn't too strong. There's a huge amount of Nutella in here, but that's what makes it so delicious and gooey. It's a new fall classic, if that's possible. 
Whenever I bake anything that isn't super messy, I bring some of it into school to share with a friend or two. Last week, I had a few friends complain that they never got sugary goodie bags - needy people! ;) - so this was their reward for waiting so long. I think it was worth it.
Enjoy!

Nutella-Swirled Pumpkin Bread

1 3/4 cups all purpose flour
1 teaspoon baking soda
1/2 teaspoon salt
1/2 tablespoon cinnamon
1 1/2 teaspoons nutmeg
1 1/2 cups sugar
1/2 cup canola oil
1/3 cup water
1 cup unsweetened canned pumpkin
2 eggs
1 teaspoon vanilla extract
roughly 1/2 cup Nutella (or other chocolate hazelnut spread)

Preheat the oven to 350 degrees F. Spray 4 mini loaf pans with cooking spray. Set aside.
In a medium bowl, whisk together flour, baking soda, salt, cinnamon, and nutmeg. Set aside.
In a large bowl, whisk together sugar, oil, water, pumpkin, eggs, and extracts. Whisk until smooth and combined.
Slowly stir in the flour mixture. Mix until ingredients are combined.
Pour the batter into the mini loaf pans, making sure batter is evenly divided. Drop 2 heaping tablespoons of Nutella onto each loaf pan. Swirl the Nutella into the pumpkin batter with a knife. Place the loaf pans onto a baking sheet and place in the oven. Bake for 40-45 minutes or until a toothpick comes out clean.
Place the loaf pans on a wire rack. Cool for 15 minutes in the pan and then carefully remove the loaves. Cool completely before slicing.

*Note-You can make regular size loaves. This recipe should make 2 8×4 loaves. Adjust baking time to about 60 minutes.